How to Remodel a Kitchen

So, last week I renovated one of my rental properties. This included replacing an old kitchen from 1995 with a new one. Here’s an overview of the process.

1. Take a picture of and measure the old kitchen cabinets

I just drew the measurements in Photoshop. Note that the picture below is what the cabinets looked like in 2008. The remodel was done in 2021 and the cabinets were is much worse condition then.

2. Design and order new cabinets
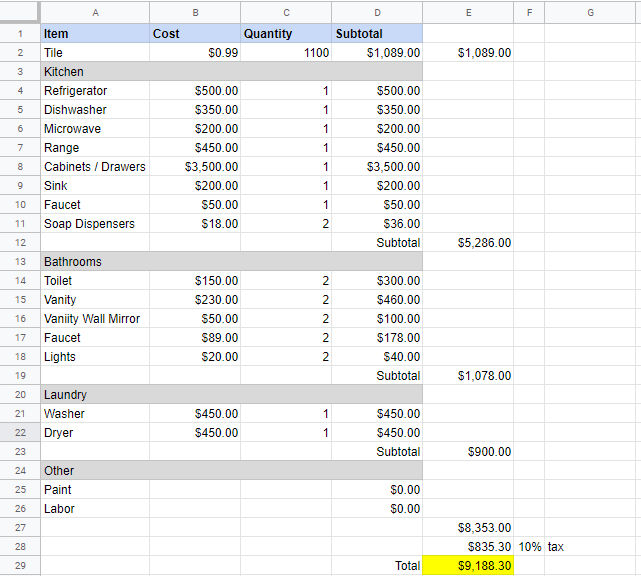
Cabinet Prices

Cabinet prices can vary widely. Home Depot, for example, is expensive. HD Supply has cheap cabinets but they look cheap. IKEA’s cabinets are mid-priced but you have assemble them. Chinese stores have cheap cabinets that look expensive. They also come pre-assembled. But, you have to inspect each cabinet before installing them because their quality control isn’t very good.

Cabinet or Drawers

There are base cabinets that sit on the floor and wall cabinets that are on the wall. Wall cabinets are always just cabinets with a swing out door. They are more expensive if the door has a glass window in it. Base cabinets can be regular cabinets or have drawers. If they are just cabinets, then you’d have a hard time reaching for items in the back of them. If they are drawers, then you can just slide out the drawers to access anything in them. Since drawers require more material and come with sliding mechanisms, they are more expensive then drawers.

Types of Cabinets

2D / 3D Design

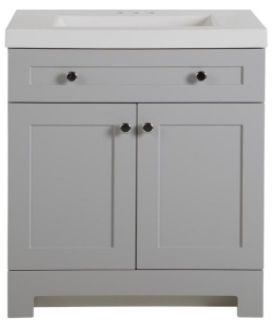
I ended up just buying the cabinets from a Chinese store (warehouse) called Uni Tile & Marble.

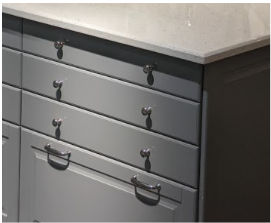
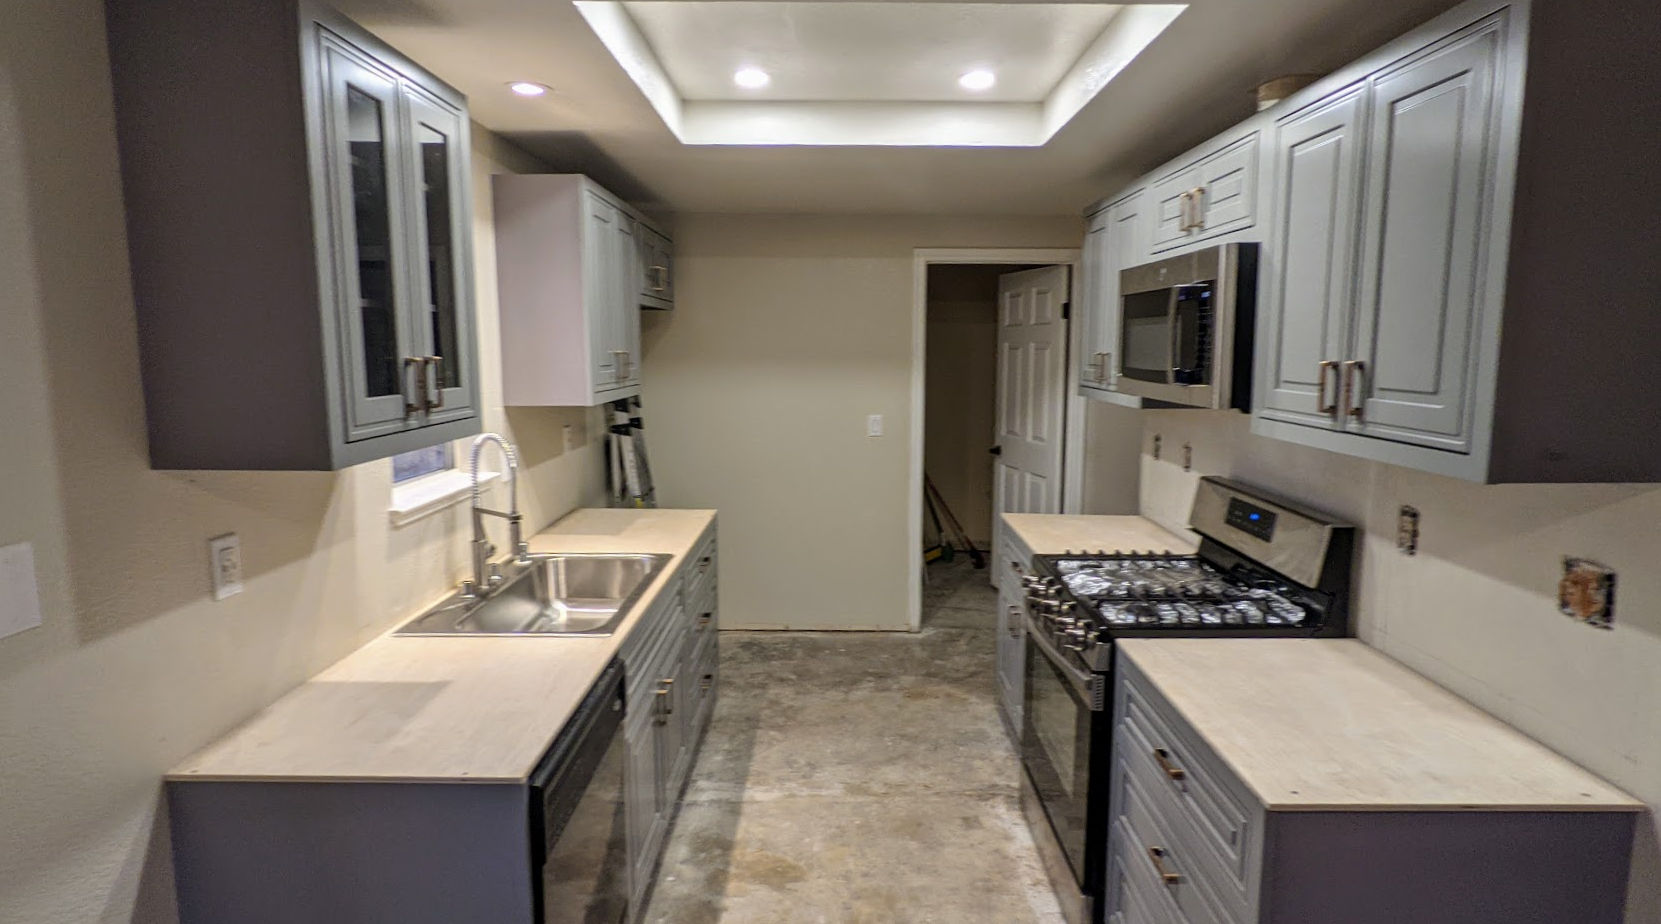
I ended up choosing solid gray color cabinets. This is because the house is a rental house and tenants somehow ruin the surface of the cabinets, I can later just easily repaint the cabinets. This is what the cabinets look like in the showroom.
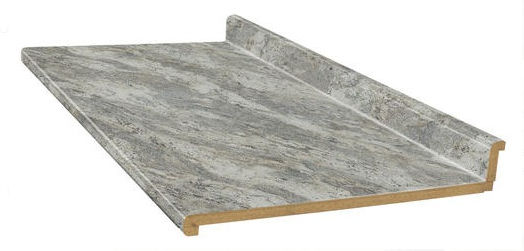
Countertops

For the countertop, the one on display was off white with a random gray design.

It contrasted well with the gray cabinets and looked exotic but it was also more expensive than other countertops on offer. I decided to go with a cheaper countertop ($300 per 8 foot slab) but my tenant offered to pay the difference for the more expensive countertop so I ended up getting the more expensive one.

Quarts countertops are super heavy and require special handling and are not easy to cut. I ended up paying the store to transport and install the countertops. If you’re looking for a cheaper DIY option, you can just buy cheap laminate countertops at the Home Depot and use a simple jigsaw to cut out the sink hole.
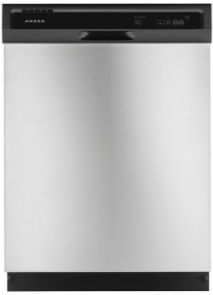
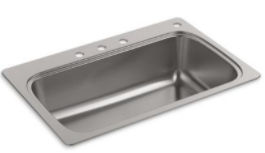
Sinks

For the sink, I prefer the large single basin type. Even though they’re available at Chinese stores, Chinese stores then to have outdated return policies with unreasonable restocking fees (25%) so for these types of items, I buy them at the Home Depot or Lowes.
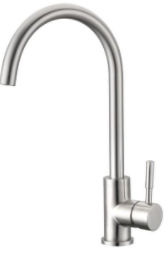
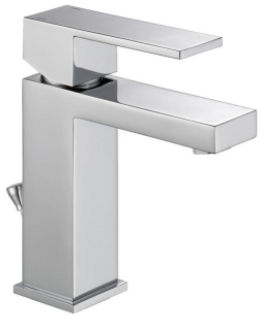
Faucet

For the faucet, I definitely prefer the type in the picture below. It makes it easier to spray and clean the entire sink or whatever else you are washing / cleaning.

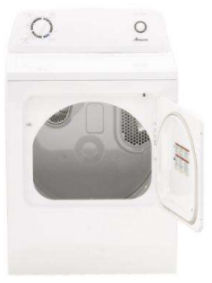
3. Pick Up New Cabinets

I could have had the cabinets delivered for a ridiculous $200 fee but since I need to dispose of the old cabinets, I decided to rent a 10′ U-Haul box truck to both pick up the new cabinets and transport the old cabinets to the dump.

A 10′ box truck was big enough to lay all cabinets on the truck bed.

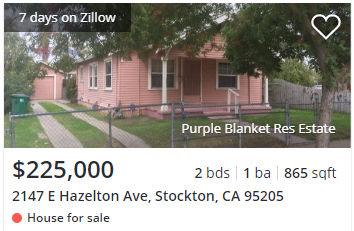
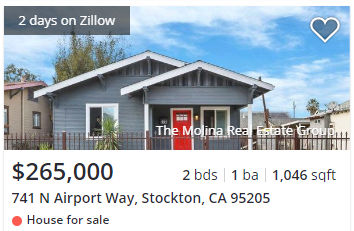
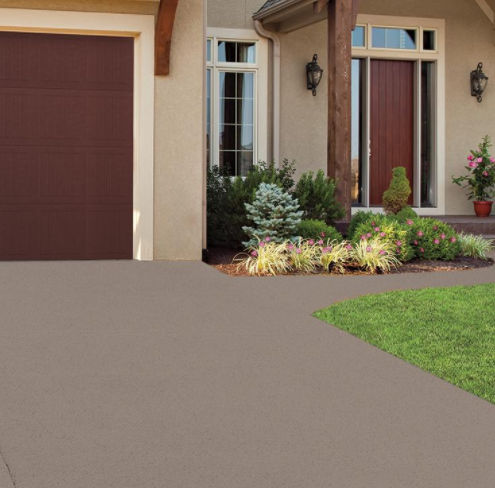
The house were the cabinets will be installed.

4. Demolish Old Cabinets

The old cabinets were original to the house from 1995. They were definitely low quality cabinets. They were just screwed into the wall. Some sections were large so I used a Milwaukee Monster sawzall to cut cabinets in half.

5. Dispose of Old Cabinets

Since we had the truck for 24 hours, we loaded the old cabinets and other construction debris in it

and took it to the dump where I paid $138 to dump it all.

6. Prepare Wall

After removing the kitchen cabinets, the walls needed to be patched up and painted.

First, we enlarged some of the holes in the wall by cutting with an oscillating tool. The holes were shaped like rectangles where vertical edges would be along the center of studs. This would allow us to screw drywall nails through them into the studs. Cutting drywall was easy using a small, cordless reciprocating saw.

We then patched crevices with spackling paste.

After waiting for the spackling paste to dry, I then used an orbital sander to smoothen the wall surface.

I then sprayed wall texture to try to match the texture of the existing wall. This didn’t work well as the material was often clogging up. Next time, just use an air compressor with an actual texture sprayer gun.

I then painted the ceiling Swiss Coffee.

And painted the walls Roman Plaster.

I then touched up the corners where the two colors met. Semigloss paint was used to make cleaning easier.

7. Mark Walls

After the paint dried, we marked where all the studs in the wall were using a stud finder and then marked level (horizontal) and plumb (vertical) points using a laser level.

Then, we connected the points and drew outlines for where the cabinets would go. Note that the distance between the countertop to the bottom of the wall cabinets should be 18 inches.

8. Install Cabinets

We then installed the wall cabinets first. To facilitate this, we screwed a 2×4 to the wall so we could sit the cabinets on it while we screw the cabinets into the wall. If a cabinet didn’t span 2 studs, we’d use drywall anchors.

If walls or floor are not level or flat, use shims.

9. Install Cabinet Handles

To facilitate installing the cabinet handles perfectly, we bought a plastic template / jig. It did not work for drawers, though, so for drawers, we made our own jig.

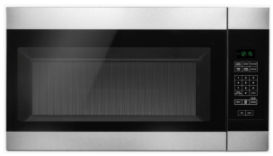
10. Install Microwave

Since the microwave goes above the range, we installed that next. This required cutting holes in the cabinet above it for bolts and the vent.

11. Install Plywood on Base Cabinets

We then cut plywood and screwed it to the base cabinets.

12. Install Sink

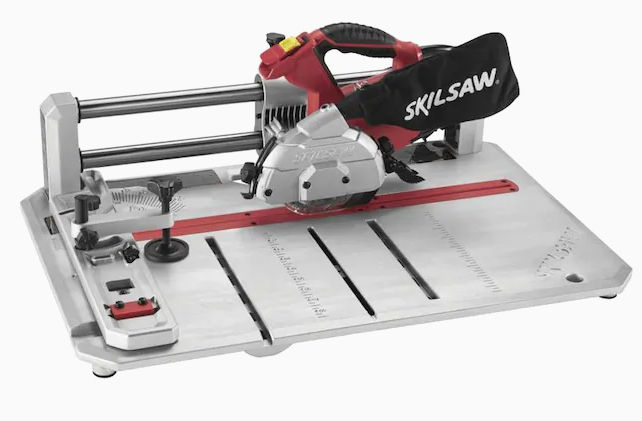
We then cut a hole in the plywood for the sink using a mini circular saw for the straight sides and a jig saw for the corners. Then we installed the faucet, soap dispenser, dishwasher air gap, and garbage disposer to the sink and then installed the sink. This was done before installing the countertop because the countertop would not be ready for another 2 weeks.

I just got a top mount sink that includes the faucet holes rather than an undermount sink. This simplified installation.

13. Install Crown Molding

We then installed the crown molding. This was very tricky for a couple of reasons.

  • depending on the shape of the top of your wall cabinets and the shape of your crown molding, there may not be enough surface area to shoot finish nails into or there may not be enough clearance to shoot nails from above
  • cutting miter angles can be tricky and holding the crown molding down on the miter saw the same way isn’t easy.

Cutting the crown molding

Fortunately for this project, we only needed 45 degree cuts. But, we messed up a few times at first and wasted some expensive molding. Here are some tips to cut crown molding easily and correctly each time.

Label the surface of the miter saw “TOP” to remind yourself that the top of the crown molding should be facing down and the bottom of the molding flat against the fence.

Find a way to secure 2 pieces of wood to the sides of the miter saw.

Place your crown molding against the fence and then screw a piece of plywood or wood board to the two pieces of wood on each side of the miter saw. This allow you to put the crown molding on the saw at the same angle every time ensuring perfect cuts.

Installing the crown molding

For our particular case, we decided to secure the crown molding to thin plywood using small screws. We then lifted it and let it sit on top of the wall cabinets – no further screwing or nailing necessary.

14. Install Baseboard and Trim Molding

We then cut the baseboard and trim molding to length and shot them into the cabinets using a finish nailer powered by an air compressor. The baseboard and molding were necessary to hide gaps between the cabinets and the floor and walls.

15. Install The Countertop

For the countertops, I decided to go with quartz instead of marble. Since it’s very heavy and tricky to cut and to smoothen the edges, I decided to just pay someone to install the countertops.

First, one of the 8 foot slabs was cut to go on each side of the range. I believe this was done using a diamond blade.

A thin strip of the excess material was cut to make a finished end. The strip was secured using a special epoxy glue.

The strip was then clamped down and the epoxy left to cure for a while.

The installer intentionally cut the slab and the thin strip to be longer than the final length so that after the strip was secured he could cut and trim the end where you see all the glue oozing out.

This resulted in a very clean joint. He then smoothened the end.

This is how the joint ended up looking (with some dust that would eventually be wiped off).

For the sink side, a hole was cut out.

To create rounded corners, the installer cut a bunch of lines at each corner.

And then using a flathead screwdriver, broke off the thin pieces.

And then used an angle grinder to grind away rough edges to create a smooth rounded corner.

They then glued the quartz countertop to the plywood.

And this is the end result.
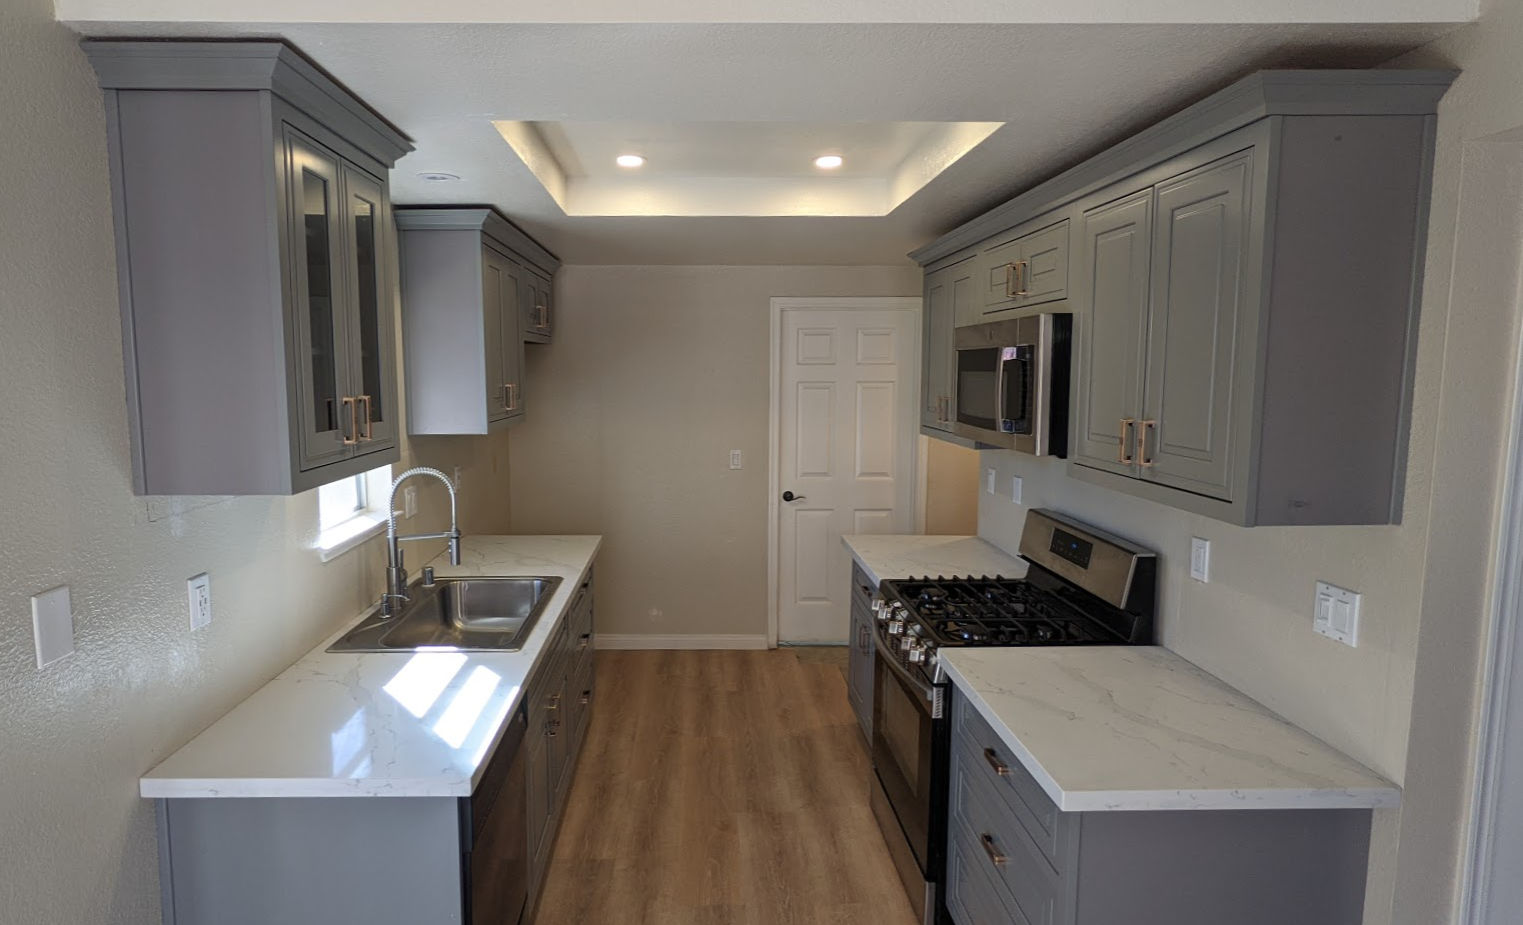
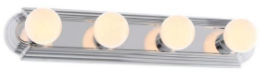
Note that we also

  • replaced the flourescent tube light box with flat LED lights
  • painted the walls BEHR Roman Plaster (semigloss)
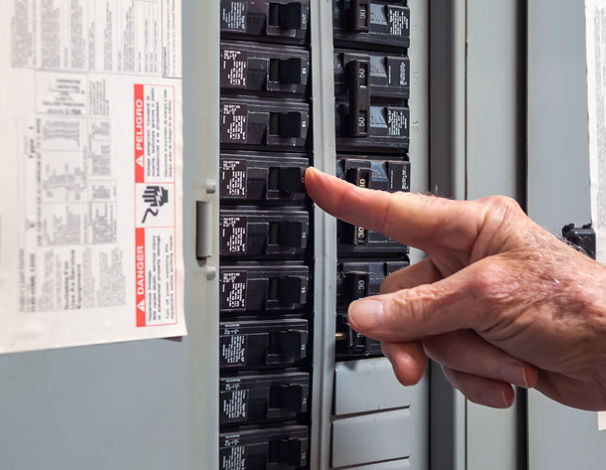
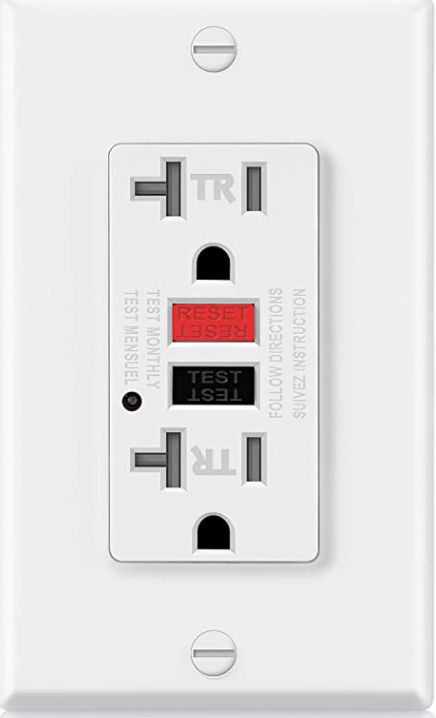
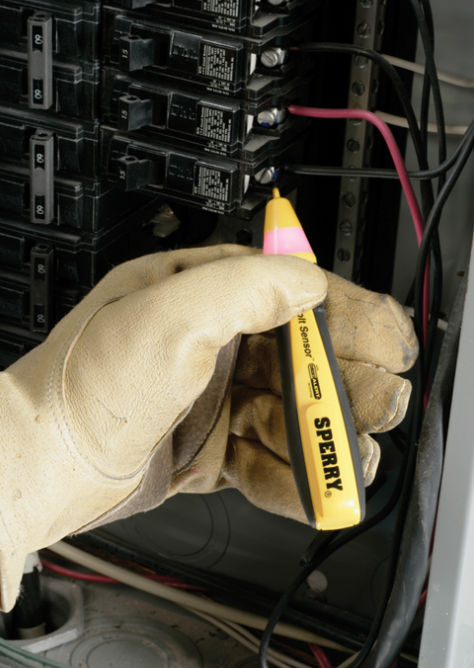
  • replaced the old style kitchen outlets and switches with new Decora ones including adding a dimmer for the very bright LED lights
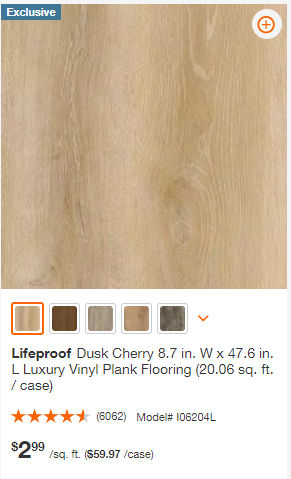
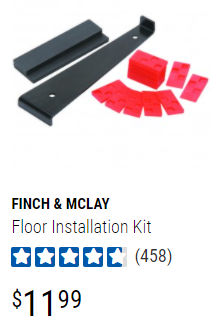
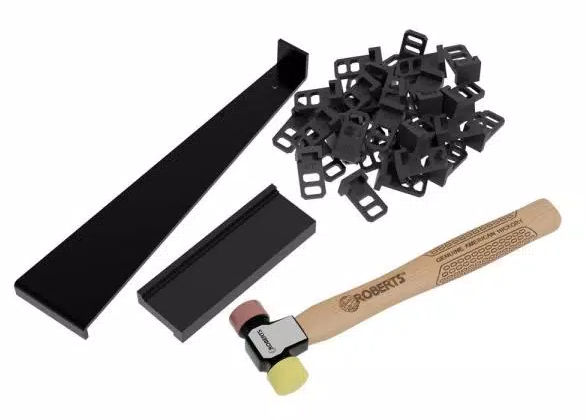
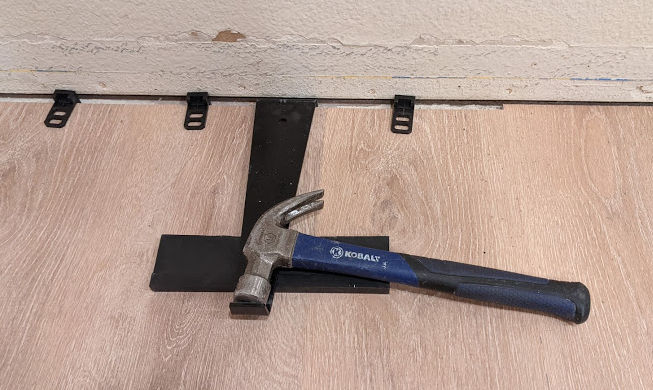
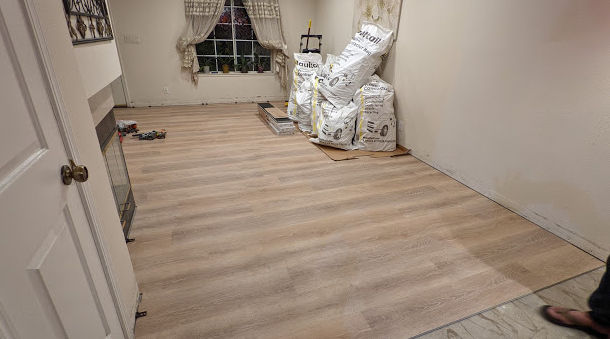
  • replaced the linoleum sheet / vinyl tile flooring with LifeProof Dusk Cherry luxury vinyl planks.
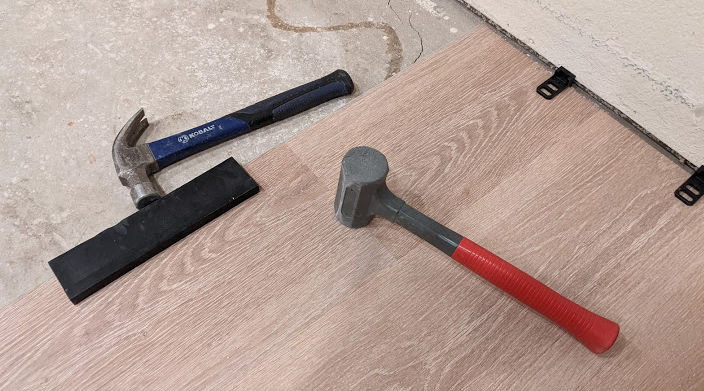
Tools

This project was big enough that I ended up bringing most of my tools to the worksite.

How to Fix Broken Electrical Outlets / Switches

If you have an electrical outlet or switch that isn’t working, here are some steps for debugging and fixing the issue. First of all, it’s important to understand the flow of electricity within a typical home.

Electrical Components and Electricity Flow

  1. Electricity comes through a cable from your local utility to your house
  2. That cable enters a circuit breaker panel on a wall
  3. The circuit breaker panel contains many circuit breakers.
  4. Each circuit breaker has electrical wiring to different parts of the house (kitchen, bedrooms, living room, bathroom, garage, etc). For example, below is a picture of electrical wiring from one circuit breaker in the panel going to 4 outlets. The wiring (or circuit) forms a loop. Electricity flows
    1. from the panel
    2. through the circuit breaker
    3. through the black (hot) wire
    4. through each outlet
    5. through the white (neutral / return) wire
    6. through each outlet
    7. and back to the circuit breaker panel

The bare copper or green wire (ground) goes from each outlet to the circuit breaker panel and then to a rod stuck in the ground.

  1. Each circuit delivers 120 V (volts) of electricity or 240 V depending on the use. Most circuits carry 120 V but electric ranges, electric water heaters and electric clothes dryers carry 240 V since they require more power to function.
  2. Each circuit breaker is rated for a specific number of amperes (amps). Usually 20 A for circuits that require more power, e.g. kitchens, and 15 A for circuits that don’t require much power, e.g. bedrooms.
  3. Circuits that require more power (e.g. 20 Amps vs 15 Amps) use thicker electrical wiring. The smaller the gauge number, the thicker the wire.
    1. 12 gauge Romex is rated for 20 Amps and is commonly yellow jacketed.
    • 14 gauge Romex is still used in some applications and is rated for 15 Amps and is grey jacketed.
    • 10 gauge Romex has an orange jacket and is used for water heaters or clothes driers.
  1. The power (P) available to any particular circuit is determined by the voltage (V) running through it and the amps (A) the circuit breaker and the wiring support. The formula for power is P = VxI. So, if a circuit has 120 V and is rated for 15 A, then it supports a maximum power of 120 x 15 = 1800 Watts.
  2. Each device (toaster, laptop, lamp, refrigerator, TV, etc) plugged into an outlet or is in a circuit draws power. The device will indicate how many amps it draws or power (in watts) is consumes to work. For example, below is a label on the back of a toaster oven. It requires 120V AC (alternating current, as opposed to DC, direct current) and it consumes up to 1200 W of power.

This toaster, which consumes up to 1200 W, can be used on a 15 A circuit because a 15 A circuit supports up to 1800 W of power. However, if two of these toasters were plugged in to the came 15 A circuit, then they’d both consume up to 1200 + 1200 = 2400 W which exceeds the power rating of the circuit. This would cause the circuit breaker associated with the circuit to trip and disconnect power to the circuit. Without the circuit breaker, the 15 A rated wiring would begin to melt due to the heat buildup and possibly catch on fire. If the circuit breaker turns off, you can toggle it back on.

In the picture above, the first outlet is a GFCI (ground fault circuit interrupter) outlet. It behaves like a circuit breaker. If the total power drawn through the outlet exceeds its rating, e.g. 15 A or 20 A, then the outlet would disconnect itself from the circuit thereby rendering the entire circuit without power because it is the first device in the circuit. If a GFCI outlet turns off, you can push a button on it to reset it.

Debugging Electrical Outlets / Switches

Now that we understand basic home electricity, we can make a list of things to check for debugging a non-working outlet or switch or entire circuit.

Outlet not working

Check all circuit breakers in the circuit breaker panel. If any are off, turn them on.

If the outlet is a GFCI outlet, it may have been turned off. Push the RESET button on it to turn it on.

Check neighboring outlets to see if they are working or not as they may be on the same circuit as the outlet that isn’t working. If the neighboring outlets are not working, see if any are GFCI outlets. If any are, then push the RESET button to turn them on. A GFCI outlet that is off will cause downstream devices (outlets, switches, etc) to also be off.

Using a voltage tester tool, test for the presence of voltage at each component (outlet, switch, circuit breaker). Some voltage testers will beep and/or show a red color when it detects voltage.

Try to determine which components (outlets, switches) are on a circuit and in what order.

Plug an outlet tester into the outlet to check whether the wires were installed correctly. For example, the outlet may have an open neutral meaning the white wire may be disconnected. Even if the black (hot) wire is connected, if the white (neutral) wire is disconnected, then the outlet, and all downstream outlets, won’t work. Using an outlet tester is the easiest way to test continuity in wires.

If an open neutral exists, open the outlet and verify the white wire is installed correctly. If the outlet tester still reports an open neutral, then the white wire may be loose or disconnected on the other end, e.g. at the circuit breaker. If the white wire is connected at the circuit breaker, then it could be disconnected somewhere in between both end points, which could happen if a rat chewed on the wire. In that case, new wiring needs to be added.

If the outlet tester reports an open ground (ground wire not connected), then the outlet will still work but it’s not safe to use.

Use the outlet tester on ALL outlets in a circuit. A disconnect in one outlet can cause all downstream outlets to not work.

In order for an outlet to work, electricity must flow from the black wire into the outlet and out from the white wire thereby creating a loop. The outlet tester is one way to check for continuity. Another is by using a multimeter. A multimeter can also be used to trace wires through walls to see to find each end point.

If an outlet sort of works, e.g. a light connected to it is dim or flickers, it could be because there are too many devices drawing too much power to it or the voltage in the circuit is too low, e.g. 85 V instead of 120 V. To determine the actual voltage on the line, you can use a multimeter.

Tips for Installing Luxury Vinyl Plank Flooring

So, I was going to replace the old bamboo flooring in the living room and vinyl tiles on top of linoleum sheet flooring in the dining and kitchen areas of my rental with tile but since I hate dealing with mortar and cutting tile, I asked some contractors to do it. Apparently they all want thousands of dollars so I decided to instead install luxury vinyl planks which are easy enough to do myself (or with a helper). I decided to go with this particular brand and color:

Lifeproof Dusk Cherry 8.7 in. W x 47.6 in. L Luxury Vinyl Plank Flooring

It’s exclusive to the Home Depot and it looks pretty nice. It costs $2.99 per square foot but it comes with the underlayment pre-attached which greatly simplifies installation.

These planks are waterproof and float on the subfloor. No glue or mortar is necessary. The planks click and lock into each other.

Following are some tips I came up with after following the instructions and realizing the instructions could be better.

Subfloor preparation

Removing linoleum sheet / vinyl tile and adhesive

Don’t try to do this by hand. Spend a little bit of money ($85) and rent a power floor scraper. You’ll save a ton of time and energy.

Notice how the top part of the blade sits underneath the black curved deflector. This was problematic because vinyl tiles that were getting stuck where those two parts meet making it difficult to move forward.

To fix this, I unscrewed the bolts and put the scraper blade above the deflector.

This tool is loud and heavy and can’t reach into tight spaces. For tight spaces, I bought a pneumatic floor scraper from Harbor Freight.

This tool requires a compressor that preferably has a large tank. I have a small 2.5 gallon compressor and this tool would work very well at high pressure for about 30 seconds before losing strength. I’d have to stop for another 20 seconds for the compressor tank to fill up before proceeding again with high pressure. To address this, you can buy or rent a large air compressor.

Removing tile flooring and mortar

If you have a lot of tile to remove, you can rent a demolition hammer with the following scraper / breaker attachments.

Installing click-lock vinyl plank flooring

Cutting planks

The instructions say to use a utility knife to score planks on both sides and snapping them into two pieces. Though that works without producing any vinyl dust, doing this a lot can get tiring very quickly and is error prone. Instead, just buy a flooring saw like the SKIL 4-3/8-in 7-Amp Sliding Corded Miter Saw.

It’s lightweight and can do rip and cross cuts.

For clean cuts, place the plank face side down and underlayment side up.

If you need to cut irregular shapes or cuts that are difficult with a flooring saw, just use an angle grinder if the cuts don’t need to be perfect since they’ll be hidden underneath baseboard. I temporarily took off the blade guard so I could see where I was cutting.

Spacers

You’re supposed to leave a 1/4 inch gap between the wall and the planks. At first I used the spacers that came with a flooring kit from Harbor Freight.

Though this kit is cheap, the spacers and the tapping block are no good. The red spacers keep falling out of place and the tapping block is made of rubber which helps protect the vinyl planks from damage but it makes it difficult to tap the planks together. Instead, by the following tapping block and spacers. Or, just buy the kit which comes with 2 other tools.

Pro Flooring Installation Kit for Vinyl, Laminate and Hardwood Flooring

The hammer doubles has a hard side for hitting the tapping black and a soft (mallet) side for hitting vinyl plank seams. Since I did not have this kit, I used a separate hammer and mallet.

Installation Steps

  1. First Row
    Starting at one end, place a spacer against the wall and lay planks down to lay the first row. Overlay the short end of the planks and tap them together using a mallet.
  2. Second and Even Number Rows
    Cut a plank in half or at least 8 inches from one end to stagger the placement of planks. Make sure that no plank pieces are less than 8 inches long, if possible.
  3. Install plank by wall
    Place a spacer by the wall, place a plank such that the long edge overlaps the long edge of the existing plank in the first row at a 45 degree angle.

Then, lay the plank down and tap down on the two long edges using a mallet.

  1. Install next planks
    The subsequent planks will have two edges that need to be snapped into place – a long edge and a short edge. Again, position the plank at an angle to get the long edge into the groove of the neighboring plank’s long edge. Then, slide the plank towards the short edge of the neighboring plank’s short edge. Lay the plank down and hit the short edge using a mallet.

Then, using a hammer, hit the tapping block so there’s no gap between the long edges of the plank.

Keep doing this until you get to the last plank in that row.

  1. Install last plank in row
    For the last plank in the row, you’ll likely need to cut the plank. Then, install the plank. If you notice any short edges of the planks in that row have a gap, you can close the gap by using the following method. Notice I put the tapping block underneath the metal pull bar which worked better than if you don’t use the tapping block.

Repeat above steps for each row till you’re done.

Measuring Water Usage in a Multifamily Building

If you own a multifamily investment property which you are renting out to 2 or more tenants, you’ll probably be disappointed to find out that there’s only one water meter (provided by the city) to the entire building located underground under the sidewalk. Following are some scenarios on how water pipes reach each unit and how to possibly measure each unit’s water usage.

Separate cold water pipes

Even though there’s only one water meter under the sidewalk, it’s possible that the downstream water pipe after the meter branches into multiple pipes, one for each unit, thereby creating multiple cold water networks If this is the case, then you’re in luck and you can install a water meter, e.g. Badger Model 25 or Neptune T-10 at each branching water pipe.

Shared cold water pipes, separate hot water pipes

If the cold water pipes from the city’s water meter go to all units in a shared manner, then it would be very difficult to measure water usage by unit. However, if each unit has its own hot water pipes that are not shared with other units, which would be the case if each unit has its own hot water heater, then you can measure hot water usage by installing a water meter at the cold water inlet to or the hot water outlet from the water heater.

Billing each unit for water

Usually there will be one water bill for a multifamily property. Since there are multiple tenants, you’d need to fairly split the bill among them based on each unit’s water usage.

Based on headcount

If both hot and cold water are shared among all units, then one common method is to bill each unit proportionally based on headcount (number of occupants). If one unit has twice as many people living in it as another, then that unit would pay twice as much for water. Of course, headcount can change over time so this would need to be updated whenever there is a change.

Based on hot water usage

If cold water is shared but hot water is separate, then you can split the water bill proportionally based on hot water usage. This would be more accurate that going based on headcount.

Water meters

Following are some popular water meters for residential use.

Badger Model 25

This meter has plastic threads and costs about $100.

Buy online – RC Worst

Buy online – QC Supply

Neptune T-10

This meter has metal threads and costs about $100.

Buy online

Smart Water Meters

The water meters above are manual read meters. To measure water usage remotely and see usage over time, you can buy a smart water meter. One of the best ones is Flume 2.

Flume 2 Smart Home Water Monitor

This smart water meter does not require plumbing as it is just attached or strapped around a compatible water meter. It costs $200.

Buy online

The Flume water monitor just straps onto an inline water meter. It reads the magnetic field generated by your water meter, which the company says can detect any water usage all the way down to one one-hundredth of a gallon — i.e. a slowly dripping faucet.

How to Buy a House Without an Agent

Many, if not most, people aren’t experienced with buying and selling a house. For that reason, they hire a real estate agent. However, once you’ve bought one or two houses, you’ll realize it’s not that hard. 50 years ago, when online MLS sites like Zillow didn’t exist, having an agent find a house for you was useful. However, nowadays, buyers can get notified instantly when a house matching their criteria comes on the market. This reduces the value of having an agent. Furthermore, in California, real estate agents get a 3% commission. Even though this is paid by the seller, in certain situations the buyer pays by having to offer a higher purchase price. By buying a house without an agent, the seller doesn’t have to pay 3% commission to a buyer’s agent which means you can offer a lower purchase price than other buyers who have an agent. For a $500,000 house, this can save you $15,000.

Below are steps to buy a house without an agent.

1. Get a pre-approval letter

Assuming you will be borrowing money to buy the house, as for most people, you need a pre-approval letter. This is for 2 reasons:

  • Find out how much of a house you can afford
  • Prove to the seller you can actually afford to buy their house

To get a pre-approval letter, you can submit an application to purchase a home on Zillow Home Loans. You can do the same at LoanDepot.com which is reportedly the second-largest non-bank provider of direct-to-consumer loans in the United States. Another option is to compare lenders based on interest rate offered. By filling out some information on Zillow’s Mortgage Rates page, you’ll be presented with multiple lenders and interest rates. You can then pick a lender, get in contact with them, and ask for a pre-approval letter at the rate they advertised. Here’s an example pre-approval letter.

A pre-approval letter is different from a prequalification letter. With a pre-approval, your financial situation is verified and your credit score is checked.

2. Search for a house

The easiest thing to do is search Zillow. You can also search Redfin, Trulia, and official MLS websites.

Appraisal

Note the automated estimates, e.g. Zestimate and Redfin estimate. They will give you a good idea of the value of the property. However, don’t assume they are correct. Sometimes, their algorithms use uncomparable properties to determine value leading to incorrect values, e.g. comparing a multifamily property or condo to a single-family property. You can see the properties each website uses to determine a particular value. If they don’t make sense, you can calculate the price per sq ft of similar properties recently sold and come up with a more accurate estimate. See an example. Based on the pictures, neighborhood and estimate, think of how much you’d pay for the property.

Tips

See my post on house-buying tips to learn more about certain things to watch out for.

3. Draft a purchase offer

Most offers in California are made using standard forms provided by the California Association of Realtors (CAR). You can see sample forms and buy the forms at exorbitant prices at https://store.car.org/collections/c-a-r-standard-forms.

RPA – California Residential Purchase Agreement and Joint Escrow Instructions – 4 Pack

This form is the main form used for making an offer. It includes

  • (AD) Disclosure Regarding Real Estate Agency Relationship
  • (BIA) Buyer’s Inspection Advisory
  • (PRBS) Possible Representation Of More Than One Buyer Or Seller
  • (WFA) Wire Fraud Advisory

Price

  • $170.98 (CAR Member Price)
  • $341.95 (CAR Non-Member Price)

Other useful forms

  • TDS – Real Estate Transfer Disclosure Statement
    The property disclosure statement is required by law in most residential sales transactions in California. It includes Seller’s mandatory disclosure of specified items and any known adverse material conditions, as well as sections for Seller’s and Buyer’s agents to comply with diligent visual inspection requirements.
  • BCO – Buyer Counteroffer
    Counteroffer form to be used when a buyer initiates a counter offer.
  • SCO – Seller Counteroffer
    Counteroffer form to be used when a seller initiates a counter offer.
  • WOO – Withdrawal of an Offer
    This form is used to revoke an offer or counter offer before the document has been accepted.

Important Terms of Purchase Offer

The standard California residential purchase offer form is written to protect buyers by default. Following are some key clauses.

  • Inspection Contingency
  • Appraisal Contingency
  • Loan Contingency

4. Submit the purchase offer

You will submit the purchase offer to the seller’s agent or, if it’s an FSBO (for sale by owner) listing, then to the seller directly.

Since you are submitting your purchase offer yourself without an agent, you should make it clear that your offer will not require the seller to pay a commission to a buyer’s agent. For a 3% rate, the seller could save $15000 on a $500,000 purchase offer. Below is an example cover letter for this purpose.

Note to Seller:

This offer is from a buyer with no agent. I (the buyer) am representing myself. As such, acceptance of this offer by you (the seller) would save you from having to pay a commission to a buyer’s agent. Since my offer is for $390K, assuming a commission rate of 3%, my offer would save you $390K x 3% = $11,700, and your total commission expense would only be $11,700 to your own agent (seller’s agent). Your net proceeds (excluding other expenses) would be $390K – $11700 = $378300 as shown below.

My OfferCommission to Seller’s AgentCommission to Buyer’s AgentSeller’s Net Proceeds
Purchase Price3%0%(excluding other expenses)
$390,000$11,7000$378,300

If there is another offer above $390K but below $403K and that offer includes a buyer’s agent, then you’d have to pay 6% commission (3% for each agent). In this case, my offer will net you higher proceeds as you can see from the table below.

Other OffersCommission to Seller’s AgentCommission to Buyer’s AgentSeller’s Net Proceeds
Purchase Price3%3%(excluding other expenses)
$391,000$11,730$11,730$367,540
$392,000$11,760$11,760$368,480
$393,000$11,790$11,790$369,420
$394,000$11,820$11,820$370,360
$395,000$11,850$11,850$371,300
$396,000$11,880$11,880$372,240
$397,000$11,910$11,910$373,180
$398,000$11,940$11,940$374,120
$399,000$11,970$11,970$375,060
$400,000$12,000$12,000$376,000
$401,000$12,030$12,030$376,940
$402,000$12,060$12,060$377,880
$403,000$12,090$12,090$378,820

To conclude, my offer of $390K will net you a higher profit than any other offer up to $402K.

5. Do a home inspection

Inspections aren’t usually required by your mortgage lender, but they can reveal hidden issues that the seller might not know about. A typical home inspection covers surface-level elements of the home, including its plumbing, structure, heating system, and more.

You can search for home inspectors on Zillow’s website or Google.

Expect to pay at least $400 for a home inspection from a reputable company on an average 2,000-square-foot home.

6. Negotiate

If the inspection reveals an issue with the home, there are a few ways you can negotiate with the seller.

  • Ask For Repairs
    You can ask the seller to repair any problems with the home before closing.
  • Ask For Reimbursement
    You can ask the seller to reimburse you for the cost of repairs. This guarantees that you’ll get work from a quality contractor because you choose the professional. However, you might have trouble getting a seller to agree to pay a bill if they don’t know how much it will be.
  • Ask For A Discount
    You can ask the seller for a reduction of the sale price if there are significant repairs that need to be made.
  • Cancel The Sale
    If you can’t reach a solution with the seller and the issues are a deal-breaker for you, you can always cancel the sale.

7. Finalize financing and close

When you reach an agreement with the seller, it’s time to close on the loan.

Appraisal

Your lender will likely require you to pay for an appraisal. You’ll pay up to $500 and the lender will choose the appraiser. They do this to protect themselves so that if you default on the loan, they can reduce their losses. The appraisal report will also protect you so that you are not overpaying for the property. If the property isn’t worth what you’re offering, you can negotiate to lower the purchase price. Or, you can put a larger down payment if you really want the house.

Your lender will first give you a loan estimate. As soon as the appraisal and underwriting are cleared, your lender will send you a closing disclosure. Your loan estimate and closing disclosure tell you about the terms of your loan, your closing costs, your interest rate, and more. Compare the loan estimate to the final closing disclosure to ensure everything is as expected. If everything looks good, contact your lender and schedule your closing. The examples below are for a refinance but they are similar for a purchase.

Things to look out for

  • The loan should have NO prepayment penalty
  • The loan should have NO balloon payment
  • The loan should have NO demand feature

Easily Renew Your Ugly Concrete Driveway or Garage Floor

Your concrete driveway or garage floor will get ugly over time. There are many reasons for this such as

  • oil or acid stains
  • natural discoloration
  • new, adjacent slabs of concrete that have a different shade of gray

Fortunately, you can easily cover up the non-uniformity of colors with any one of the following products:

  • Behr Granite Grip
  • Behr Concrete Dye
Image result for behr granite grip
Continue reading Easily Renew Your Ugly Concrete Driveway or Garage Floor

Average House Prices & Rent Costs at Top 100 US Metros

Zillow provides housing and rental market data on the Research page. Using this data, I created the table below that shows the top 100 most populated cities in America along with their typical house value and monthly rent cost. GRM stands for Gross Rent Multiplier. GRM = Property Purchase Price / Annual Rental Income. It gives you an idea of how many years it will take for your rental income to pay for the cost of the property. It’s often used to compare investment properties. For example, if you buy a triplex for $490,000 and your monthly rental income from the 3 units is $3400, then

GRM = $490,000 / ($3400 x 12 months) = 11.3 years.

Note:

  • Houses in Texas are cheap but property taxes are some of the highest in the country. But then again, Texas has no state income tax.
  • Houses in Florida are cheap but the weather is humid and there are often hurricanes.
  • Chicago is cheap but it gets very cold during the winter there.
  • The weather is California is GREAT but houses are expensive.
Size RankRegion Name11/30/2020
Home Value Index
11/1/2020
Rent Index
GRM
1New York, NY$510,076$2,52816.81
2Los Angeles-Long Beach-Anaheim, CA$759,102$2,57924.53
3Chicago, IL$261,177$1,66113.10
4Dallas-Fort Worth, TX$269,887$1,57014.33
5Philadelphia, PA$273,752$1,61014.17
6Houston, TX$230,373$1,49212.87
7Washington, DC$482,099$2,03919.70
8Miami-Fort Lauderdale, FL$365,372$1,93515.74
9Atlanta, GA$260,613$1,60713.51
10Boston, MA$546,943$2,27020.08
11San Francisco, CA$1,216,247$2,98533.95
12Detroit, MI$195,290$1,32212.31
13Riverside, CA$427,588$2,20616.15
14Phoenix, AZ$328,585$1,55817.58
15Seattle, WA$606,462$1,89126.73
16Minneapolis-St Paul, MN$319,056$1,54617.20
17San Diego, CA$703,181$2,35524.88
18St. Louis, MO$196,236$1,15414.17
19Tampa, FL$259,430$1,58113.67
20Baltimore, MD$319,277$1,66316.00
21Denver, CO$492,525$1,74323.55
22Pittsburgh, PA$175,716$1,18612.35
23Portland, OR$456,983$1,66522.87
24Charlotte, NC$259,533$1,53314.11
25Sacramento, CA$473,185$1,94820.24
26San Antonio, TX$219,618$1,33613.70
27Orlando, FL$279,324$1,59514.59
28Cincinnati, OH$208,939$1,30913.30
29Cleveland, OH$176,987$1,14012.94
30Kansas City, MO$223,135$1,20515.43
31Las Vegas, NV$325,522$1,48318.29
32Columbus, OH$239,551$1,33314.98
33Indianapolis, IN$201,667$1,27313.20
34San Jose, CA$1,339,174$2,95837.73
35Austin, TX$372,388$1,53920.16
36Virginia Beach, VA$262,781$1,39715.68
37Nashville, TN$301,610$1,59715.74
38Providence, RI$355,752$1,60918.43
39Milwaukee, WI$211,195$1,21314.51
40Jacksonville, FL$250,879$1,40014.93
41Memphis, TN$169,436$1,32010.70
42Oklahoma City, OK$168,756$1,10312.75
43Louisville-Jefferson County, KY$195,591$99516.38
44Hartford, CT$272,229$1,39116.31
45Richmond, VA$262,456$1,33016.44
46New Orleans, LA$222,617$1,40913.17
47Buffalo, NY$190,328$1,12314.12
48Raleigh, NC$302,874$1,52616.54
49Birmingham, AL$185,236$1,10413.98
50Salt Lake City, UT$432,450$1,41625.45
51Rochester, NY$170,742$1,16412.22
52Grand Rapids, MI$244,161$1,26616.07
53Tucson, AZ$252,181$1,25916.69
54Urban Honolulu, HI$852,315$2,10733.71
55Tulsa, OK$159,970$1,17811.32
56Fresno, CA$294,949$1,58515.51
57Worcester, MA$337,964$1,47119.15
58Stamford, CT$537,126$2,24619.93
59Albuquerque, NM$233,950$1,24315.68
60Albany, NY$217,450$1,34913.43
61Omaha, NE$213,772$1,22214.58
62New Haven, CT$275,606$1,45615.77
63Bakersfield, CA$253,212$1,37415.36
64Knoxville, TN$210,770$1,36212.90
65Greenville, SC$220,927$1,31114.04
66Ventura, CA$664,216$2,75720.08
67Allentown, PA$233,511$1,44613.46
68El Paso, TX$145,456$1,19210.17
69Baton Rouge, LA$198,195$1,18713.91
70Dayton, OH$151,480$1,05012.02
72Columbia, SC$173,302$1,19812.05
73Greensboro, NC$174,750$1,23811.76
74Akron, OH$166,219$90915.24
75North Port-Sarasota-Bradenton, FL$305,969$2,15911.81
76Little Rock, AR$167,357$92415.09
77Stockton, CA$418,915$2,12216.45
78Charleston, SC$289,926$1,55815.51
79Syracuse, NY$158,599$1,17311.27
80Colorado Springs, CO$360,902$1,56919.17
81Winston-Salem, NC$176,408$1,27711.51
82Wichita, KS$155,850$85015.28
83Springfield, MA$260,722$1,32916.35
84Fort Myers, FL$266,200$1,93011.49
85Boise City, ID$370,881$1,40222.04
86Toledo, OH$135,759$88112.84
87Madison, WI$312,394$1,34919.30
88Lakeland, FL$211,959$1,45612.13
89Ogden, UT$368,942$1,38122.26
90Daytona Beach, FL$231,262$1,46913.12
91Des Moines, IA$217,048$1,16015.59
92Jackson, MS$149,726$1,2709.82
93Youngstown, OH$108,312$74712.08
94Augusta, GA$167,244$1,17911.82
95Scranton, PA$130,549$93111.69
96Harrisburg, PA$203,742$1,15614.69
97Melbourne, FL$246,745$1,54513.31
98Chattanooga, TN$190,511$1,29912.22
99Spokane, WA$316,096$1,34319.61
100Provo, UT$401,223$1,36824.44
104Durham, NC$290,228$1,43116.90
119Port St. Lucie, FL$260,308$1,76112.32
159Fort Collins, CO$444,725$1,56823.64
162Boulder, CO$630,002$2,07825.26
177Greeley, CO$395,174$1,58920.72
229Gainesville, GA$250,664$1,40514.87

360° Virtual Tours and Wide Panoramic Images

To create a 360° virtual tour, you’ll need a few things:

360° camera

Insta360 One R Twin Edition

The Insta360 One R Twin Edition camera seems like a good choice because it can double as an action cam. It’s currently on sale for $410.

Pros:
  • Modular and therefore can add modules that offer different / better features
  • HDR (high dynamic range) for better image quality
  • More advanced desktop editing software
Cons:
  • Modular and therefore can be a hassle to have to switch modules, especially quickly in order to capture a moving target

GoPro Max

Pros:
  • Easy to use without having to assemble modular parts
Cons:
  • No HDR (high dynamic range)
  • Desktop editing software not as powerful as the Insta360 Studio

Insta360 One X2

Pros:
  • Small
  • HDR (high dynamic range) for better image quality

Ricoh Theta SC2

After testing the GoPro Max, Insta360 One X2, and the Ricoh Theta SC2, it clear that the Insta360 One X2 is the better camera.

Virtual Reality / 3D Panorama Software

Marzipano

Marzipano is free and open source. You can use the Marzipano tool to quickly upload 360 photos and then download a complete website with all code to host yourself. However, you can only zoom out so much as shown in the screenshot below.

Kuula

Kuula lets you upload 360 photos and embed a 360 viewer of your photos on your website. You can also zoom out much more than with Marzipano as shown in the screenshot below.

You can then take a screenshot of the zoomed out 360 photo which doesn’t show very warped and curved lines.

Metareal

Metareal is a great alternative to MatterPort. You can create floorplans as well and pay a nominal fee to have Metareal convert your 360 photos into virtual tours for you.

Photoshop

In Adobe Photoshop, you can import a 3D panorama photo

In the lower left corner, when you have the white grid enabled, you will see orbit, pan and dolly buttons to move the image around.

Under Properties, you can adjust the Vertical FOV (Field of View) to zoom in and out.

GoPro Player Desktop App

The GoPro Player desktop app will also open 360 photos and let you rotate and zoom in and out. But, unlike Photoshop and Kuula, you’ll get a fisheye view as shown below.

Google Photos Mobile App

The Google Photos mobile app has a Panorama feature but you have to move your camera horizontally or vertically to capture create the panorama. It’s not a full 360 degree panorama but it does support scrolling in Google Photos.

Insta360 Studio

The Insta360 Studio desktop app is definitely better than the GoPro Player desktop app. It’s got more features and is intuitive to use.

To Buy or To Rent? That is the Question.

It is January 2, 2021 and the previous year has surprised everyone. Analysts predicted home prices to fall due to the global Coronavirus pandemic but in the US, home prices surged despite millions of Americans losing their jobs.

House Price Index for California

The surge is likely due to

  • Very low inventory of houses for sale
  • Super low interest rates for 30 year fixed rate mortgage

If we look at historical interest rates, we find that they are historically low.

30-Year Fixed Rate Mortgage Average in the United States

At this time, the cost to rent an apartment in Hayward, California is

  • ~$1600 / month for a 1 bedroom apartment
  • ~$1800 / month for a 2 bedroom apartment

Now, let’s see how much it costs to buy a house with the following assumptions:

  • Buyer credit score is 680
  • Buyer has never purchased a home before

The top half of the table below shows 4 different loan scenarios.

  • Conventional loan requiring a 20% down payment and a purchase price of $300K
  • FHA (first time home buyer) loan requiring a 3.5% down payment and mortgage insurance for a purchase price of $200K, $250K, and $300K

At this time, Zillow indicates that one with a credit score between 680 and 699 can get a 30 fixed rate mortgage for 3%.

For a conventional loan of house costing $300K, if one has $60K for the 20% down payment, their monthly mortgage including principal, interest, taxes, and insurance (PITI) would be $1287. This is far below the the cost to rent a 1 bedroom apartment in Hayward, CA.

For the FHA loan, one would only need a 3.5% down payment but they’d have to pay mortgage insurance. The total monthly mortgage-related expenses (PITI) are

  • $1155 for a $200K purchase price
  • $1405 for a $250K purchase price
  • $1732 for a $300K purchase price

These costs are all lower or equal to the cost to rent in Hayward, CA. The problem, however, is house prices in Hayward are very high. The closest large city with house prices between $200 and $300K is in Stockton, CA, e.g.

Now, just because the monthly mortgage expenses are lower than the cost to rent, that doesn’t mean one would qualify for a loan. Lenders require

  • mortgage expenses (PITI) to be no more than 28% of one’s gross monthly income before taxes
  • total debt (including mortgage expenses) to be no more than 43% of one’s gross monthly income before taxes

The bottom half of the table below shows different income scenarios as follows:

  • Having a gross annual income of $46K and buying a single family home
  • Having a gross annual income of $46K, buying a duplex and renting one unit out for $1200 per month
  • Having a gross annual income of $60K and buying a single family home
  • Having a gross annual income of $60K, buying a duplex and renting one unit out for $1200 per month
  • Having a gross annual income of $75K and buying a single family home

In these scenarios, we find that:

If you have a gross annual income of $46K and

  • you buy a single family home, then your maximum mortgage expenses can be $1073.33. In this case, you can buy a house for $200K (yellow cells)
  • you buy a duplex and rent out one unit for $1200 per month, then your maximum mortgage expenses can be $1409.33. In this case, you can buy a duplex for $250K (green cells)

If you have a gross annual income of $60K and

  • you buy a single family home, then your maximum mortgage expenses can be $1400. In this case, you can buy a house for $250K (green cells)
  • you buy a duplex and rent out one unit for $1200 per month, then your maximum mortgage expenses can be $1736. In this case, you can buy a duplex for $300K (blue cells)

If you have a gross annual income of $75K and

  • you buy a single family home, then your maximum mortgage expenses can be $1750. In this case, you can buy a house for $300K (blue cells)

But Stockton is too far from Hayward!

Assuming you currently live and work in or around Hayward, then it’s true that Stockton is a bit far. According to Google Maps, it’s about a 1 hour drive in no traffic between the two. However, according to this article, many people who work in the Bay Area can no longer afford local housing and have moved to Stockton and commute.

What if I save money and buy a house later?

If you make $46K a year and rent an apartment for $1800 per month, you probably won’t have much left over to save. And, even if you could save $100 per month, house value appreciation could outpace your savings. When you buy a house, some of your monthly payments go towards paying down the principal on your home loan. That, in effect, is a form of savings (pink cells in table) but in the form of equity in the house rather than cash in the bank. After a few years, your wealth could grow in 2 ways:

  • Appreciation of house value
  • Equity in paying down the principal on your home loan

You could then potentially sell the house and use the proceeds to put 20% down on another house thereby reducing your monthly mortgage payments even further.

What if the house value drops?

According to this article, recessions typically occur around every 10 years but they don’t necessarily cause house prices to flatten or drop. Housing busts typically occur every 18 years. The last housing crisis was in 2008 so the next one may occur in 2026 (5 years from now).

House Value Trends

Using data from Zillow Research Data, we can create a custom graph showing house value trends like the one below.

Similarly, we can chart the rent cost over time. Below is an example using US and Stockton, CA rents.

Cost to Remodel a House

Assuming you have 3 bedroom, 2 bathroom 1100 square foot investment property, following is a breakdown of costs to remodel it relatively cheaply and quickly using neutral colors.

Floor Plan

Using Live Home 3D, this is an example of a 3 bed, 2 bath, 2 car garage house. The kitchen is U-shaped. The bedrooms are almost all the same size. Two of the three bedrooms have walk-in closets. The laundry is central to the house. There is a small patio next to the kitchen and living room.

Colors

Here are the neutral colors we’ll be choosing.

  • Floor – beige or light gray
  • Wall – beige (Roman Plaster PPU7-10U) Behr / Home Depot
  • Ceiling – same as wall color for simplicity or Swiss Coffee
  • Baseboard – pure white
  • Kitchen cabinets – light gray
  • Kitchen appliances – stainless steel
  • Kitchen countertop – white
  • Bathroom vanity – light gray
  • Bathroom sink – white
  • Doors – pure white

Wall

Replace all outlets and switches with Dekora ones

(Roman Plaster PPU7-10U)
Behr / Home Depot

Ceiling

Spray walls and ceiling same color for simplicity. Or, spray ceiling Swiss Coffee.

Floor

Choose large 12”x24” tiles for fewer grout lines and quicker completion.

Kitchen

  • Get cabinets from IKEA. They deliver.
  • Average 10×10 kitchen

IKEA 10×10 kitchen

~ $3500

Light gray cabinets with off white countertop

Go with a solid color so in case it gets damaged, it can easily be painted gray.

Bathroom

Glacier Bay Everdean 30.5 in. W x 19 in. D x 34 in. H Vanity in Pearl Gray with Cultured Marble Vanity Top in White with White Sink

$230

Go with a solid color so in case it gets damaged, it can easily be painted gray.

Buy at Marshalls, Ross, TJ Maxx for less

Laundry

Landscaping

3/4″ Ginger rock

By at a rockery and have delivered

Italian Cypress Trees

$40 / tree at Costco (only available in Spring)

$100 / tree at a nursery

Garage Floor and Driveway

Whole House Renovation Plan

  1. Turn on water, gas and electricity
  2. Use laser measure to measure each room
  3. Use Live Home 3D to draw floor plan
  4. Print multiple copies of floor plan and staple to wall
  5. Demolition – Day 1 – 2
    1. Wear coveralls / protective clothing
    2. Lay down large tarp in driveway to make debris cleanup easier
    3. Demolish kitchen using Bosch jackhammer, monster sawzall and pry bar
    1. Remove both bathroom toilets and and vanities
    1. Remove all flooring.
    2. Rent floor surface prep tool to smoothen floor. Include the garage floor.
    3. Remove all outlets and switch covers
    4. Remove all interior door knobs, if necessary
    5. Put all debris in driveway
    6. Vacuum all dust using cyclone filter to minimize filter clogs and simplify disposal
  6. Drywall – Day 3
    1. Add drywall where necessary
    2. Patch holes in walls where necessary
    3. Texture walls where necessary
  7. Paint – Day 4
    1. If reusing baseboard, label each baseboard with a number and label corresponding wall in the floorplan with the same number
    2. Remove baseboard and put on floor and cover with plastic
    3. For each area that needs to be covered, e.g. outlets, ceiling lights, registers, vents, etc, cut painter’s plastic to size
    4. Spray glue around the area that needs to be cover and stick plastic to it
    5. Wear coveralls / protective clothing
    6. Use air sprayer to spray paint on walls and ceilings.
    7. If necessary, spray paint doors white
  8. Floor and Wall Fixtures – Day 5 – Day 9
    1. Pay someone to install tile flooring on all floors
    2. While floor tiles are being installed, do following
      1. Replace outlets, switches and plates with Dekora ones
      2. Install bathroom lights
      3. Install bathroom towel hangers
      4. Replace all door knobs, if necessary
      5. Paint baseboard
  9. Kitchen – Day 10 – Day 13
    1. Pay someone to install IKEA kitchen
    2. Install kitchen appliances
    3. Pay someone to install quartz countertop
  10. Bathrooms – Day 13
    1. Install toilets
    2. Install vanity
    3. Install vanity faucet
  11. Landscaping – Day 14 – 18
    1. Remove trees
    2. Rent mini skid steer to remove 3 inches of dirt
    3. Rent excavator to dig holes for Cypress trees
    4. Plants Cypress trees
    5. Lay down weed fabric
    6. Lay down cement board
    7. Pour and level Ginger rocks
  12. Debris removal – Day 19
    1. Rent dumpster
    2. Transfer all debris from driveway to dumpster for haulaway
  13. Fence, garage floor, driveway, and exterior cement walkways – Day 20 – Day 21
    1. Pressure wash the garage floor, driveway and fence
    2. Spray tan Granite Grip using air compressor
    3. Paint fence

Cost Breakdown

Using a spreadsheet, create a cost breakdown like below.

Based on this, we can estimate that including labor and other items, the total cost for a whole house renovation would be around $20K.