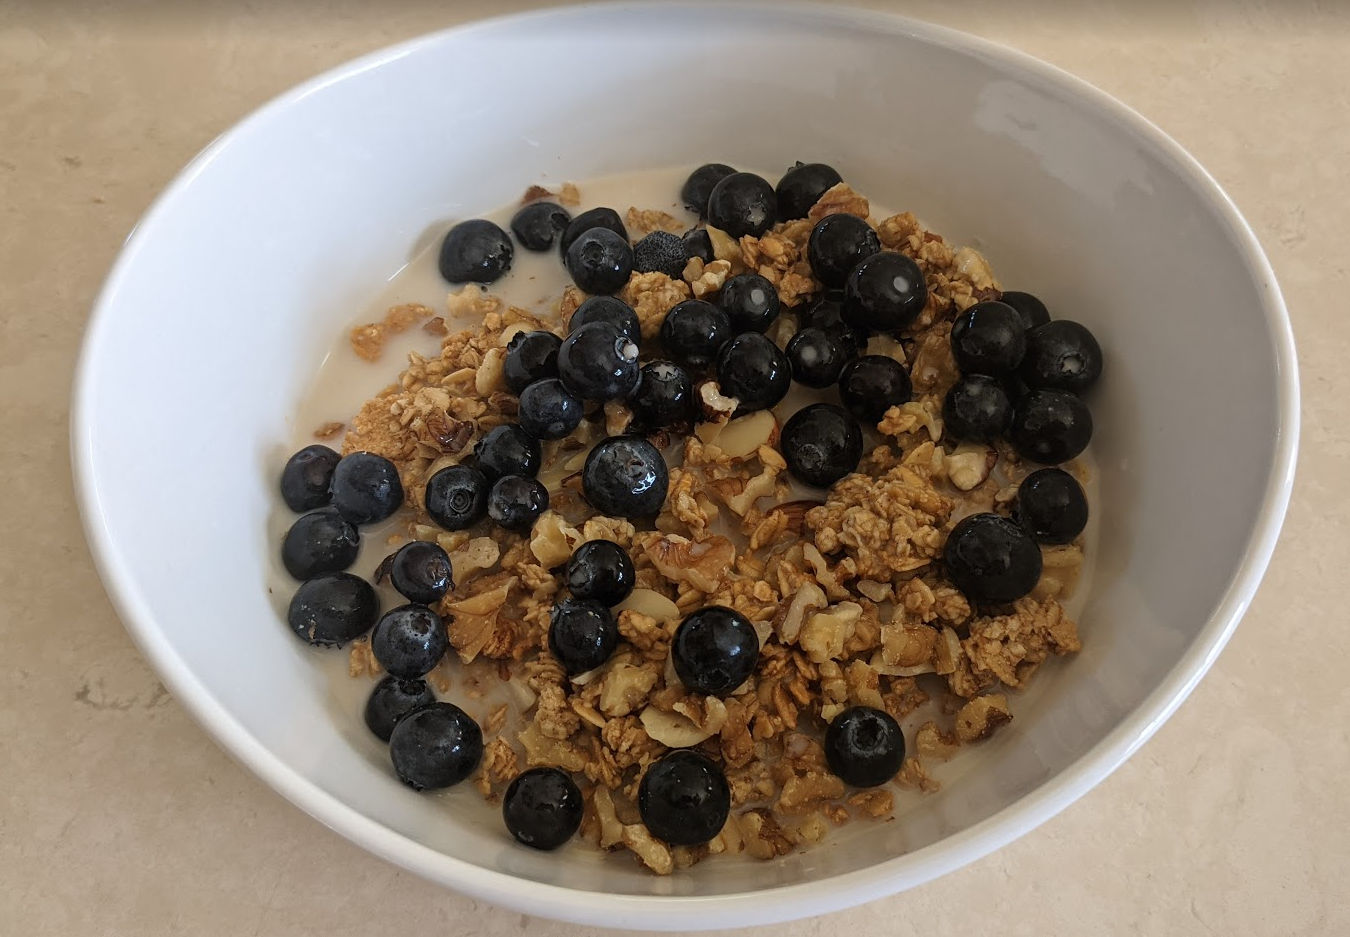
If you’re trying to lose weight and/or want to eat something simple and yummy that will keep you from feeling hungry for a long time, then the recipe below is one of my favorites.
Ingredients
Banana Nut Crunch Cereal (2 cups) – available at Target
Kirkland Ancient Grains Granola (1 cup) – available at Costco
Blueberries (1/2 cup)
Chopped walnuts (1/4 cup) (if you want more walnuts than what’s included in Banana Nut Crunch)
Unsweetened Almond Milk (2 cups)
Instructions
Combine everything, wait 5 minutes for ingredients to soften from the milk, eat.
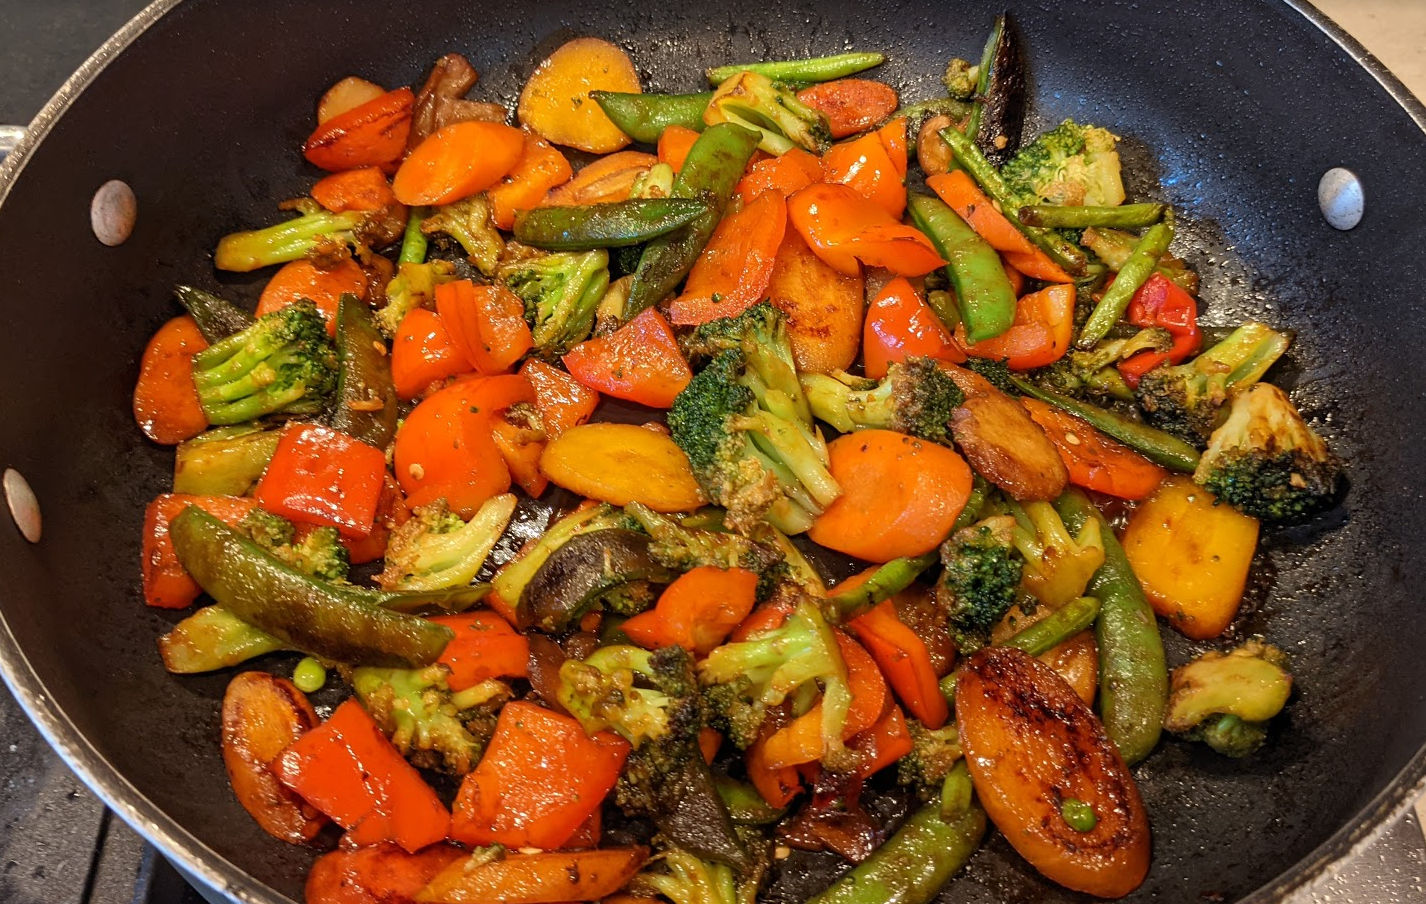
There are many stir fry vegetables recipes online but they seem more complicated than they need to be (unless I’m just not picky enough about how stir fry vegetables is supposed to taste). The main thing the be concerned with is sodium / salt. You typically add soy sauce to the vegetables but unless you get low sodium soy sauce, the sauce will be already salty so you don’t need to add salt to the vegetables.
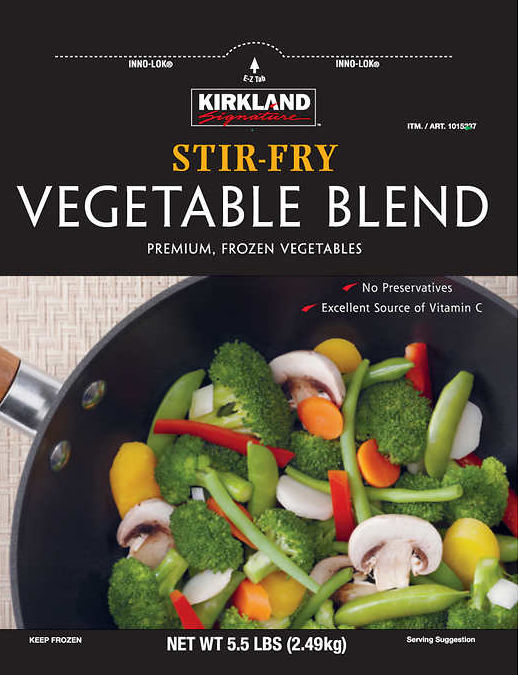
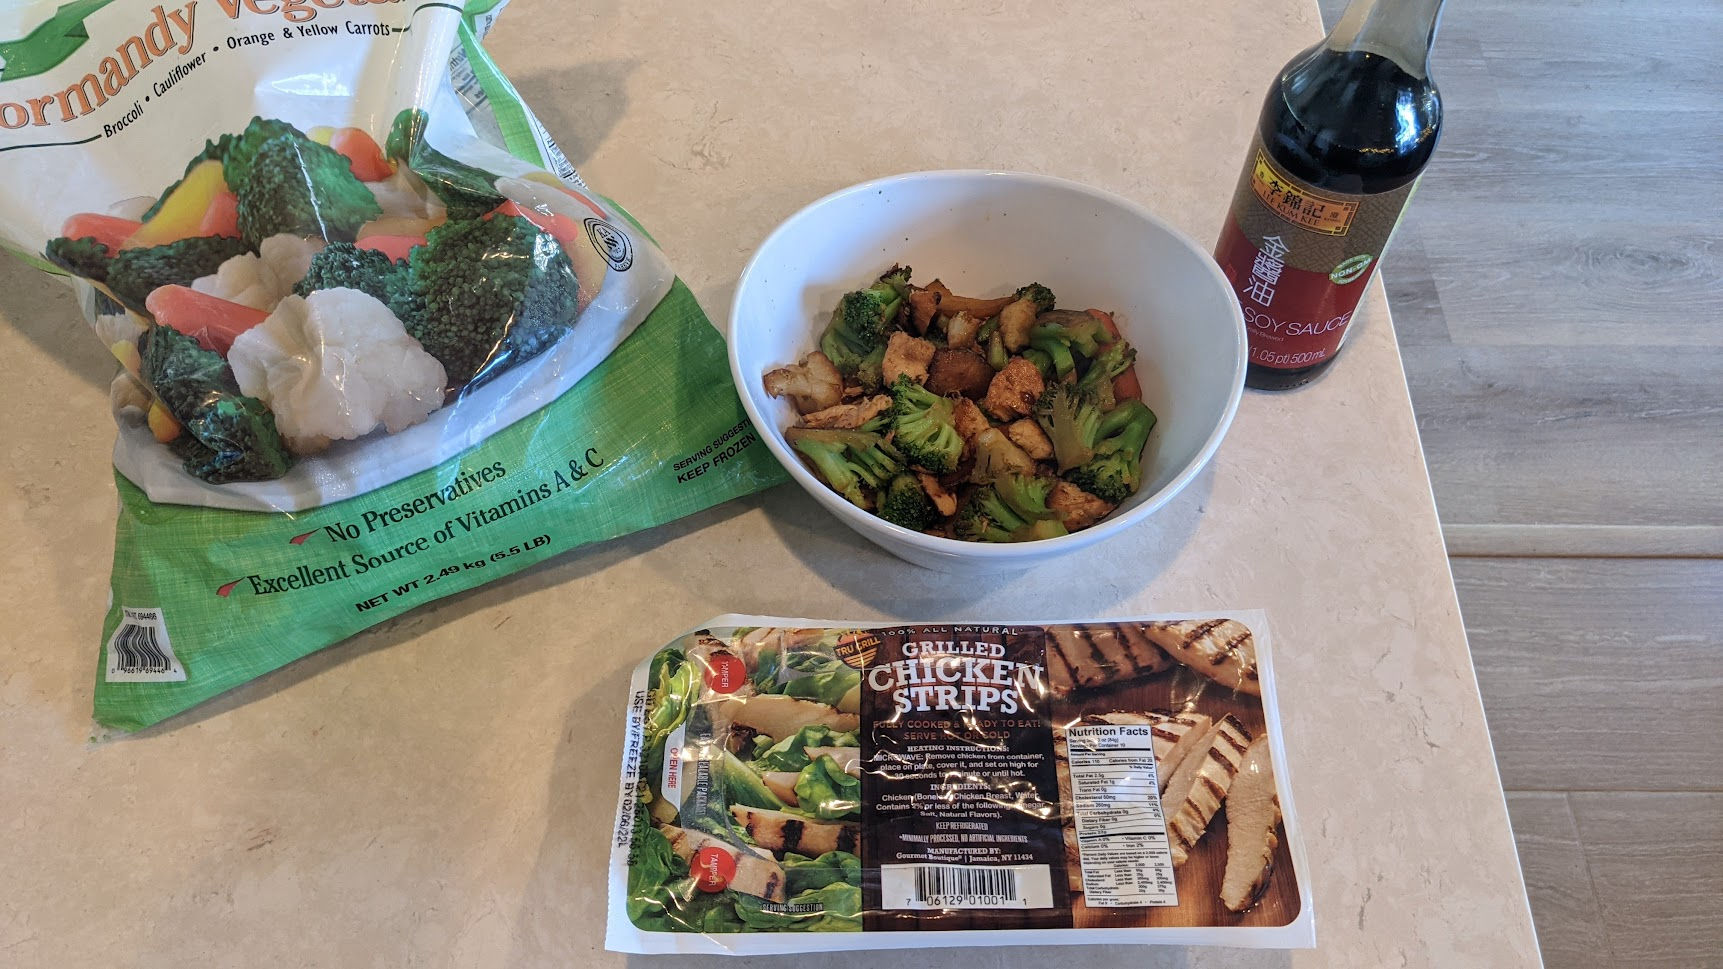
For the ingredients, all you need is a stir fry vegetable blend (I get mine from Costco) and soy sauce.
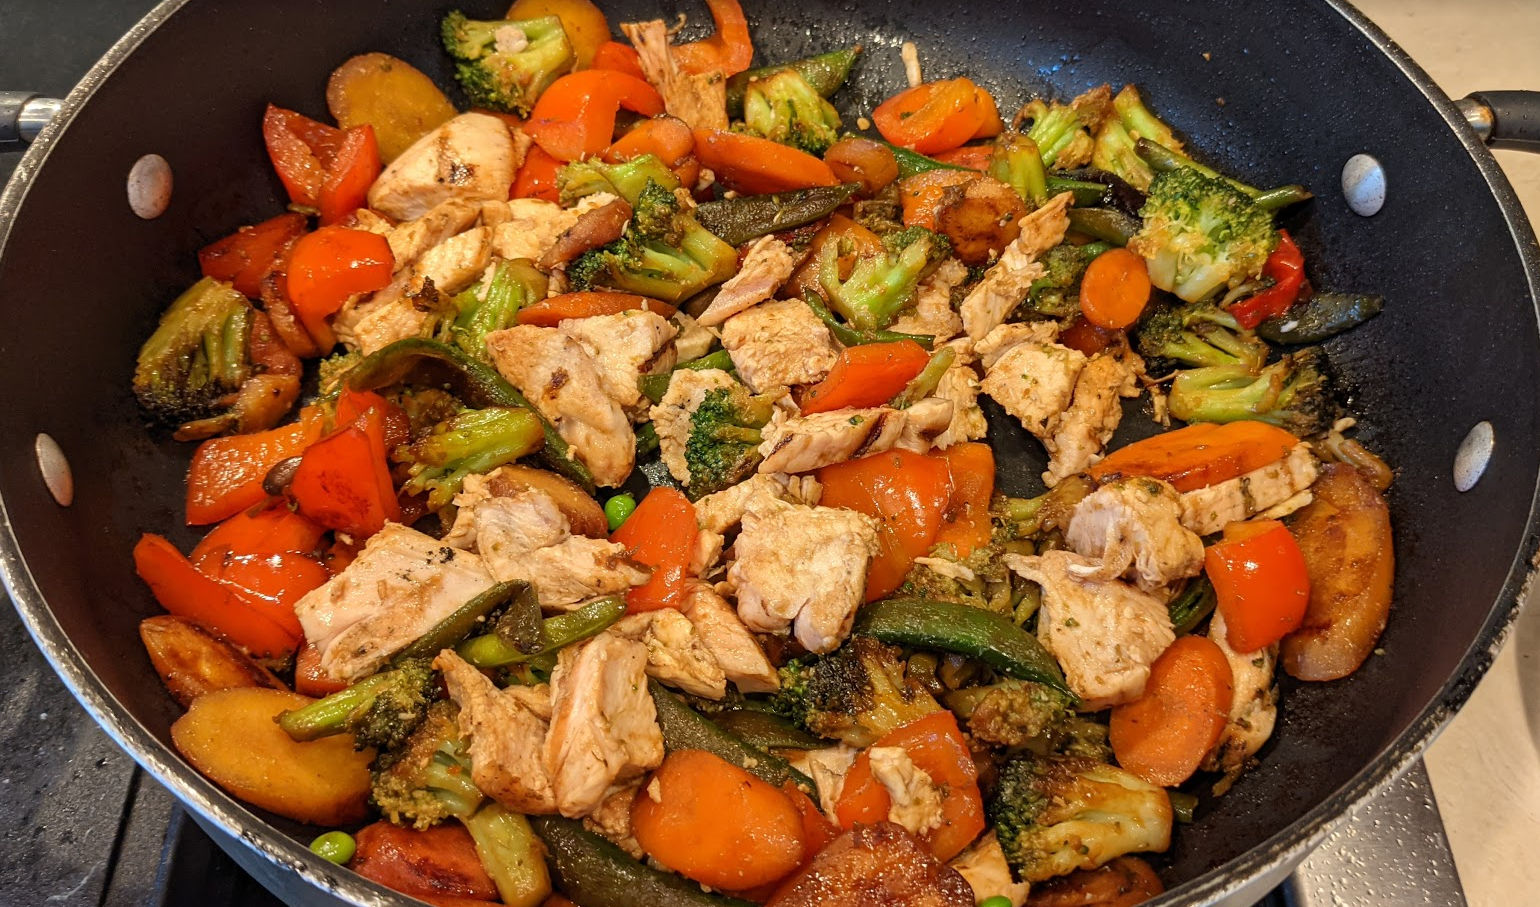
I sometimes add chicken to if I want to add protein.
To make the dish look colorful, I like to add one red bell pepper chopped into bite-size pieces.
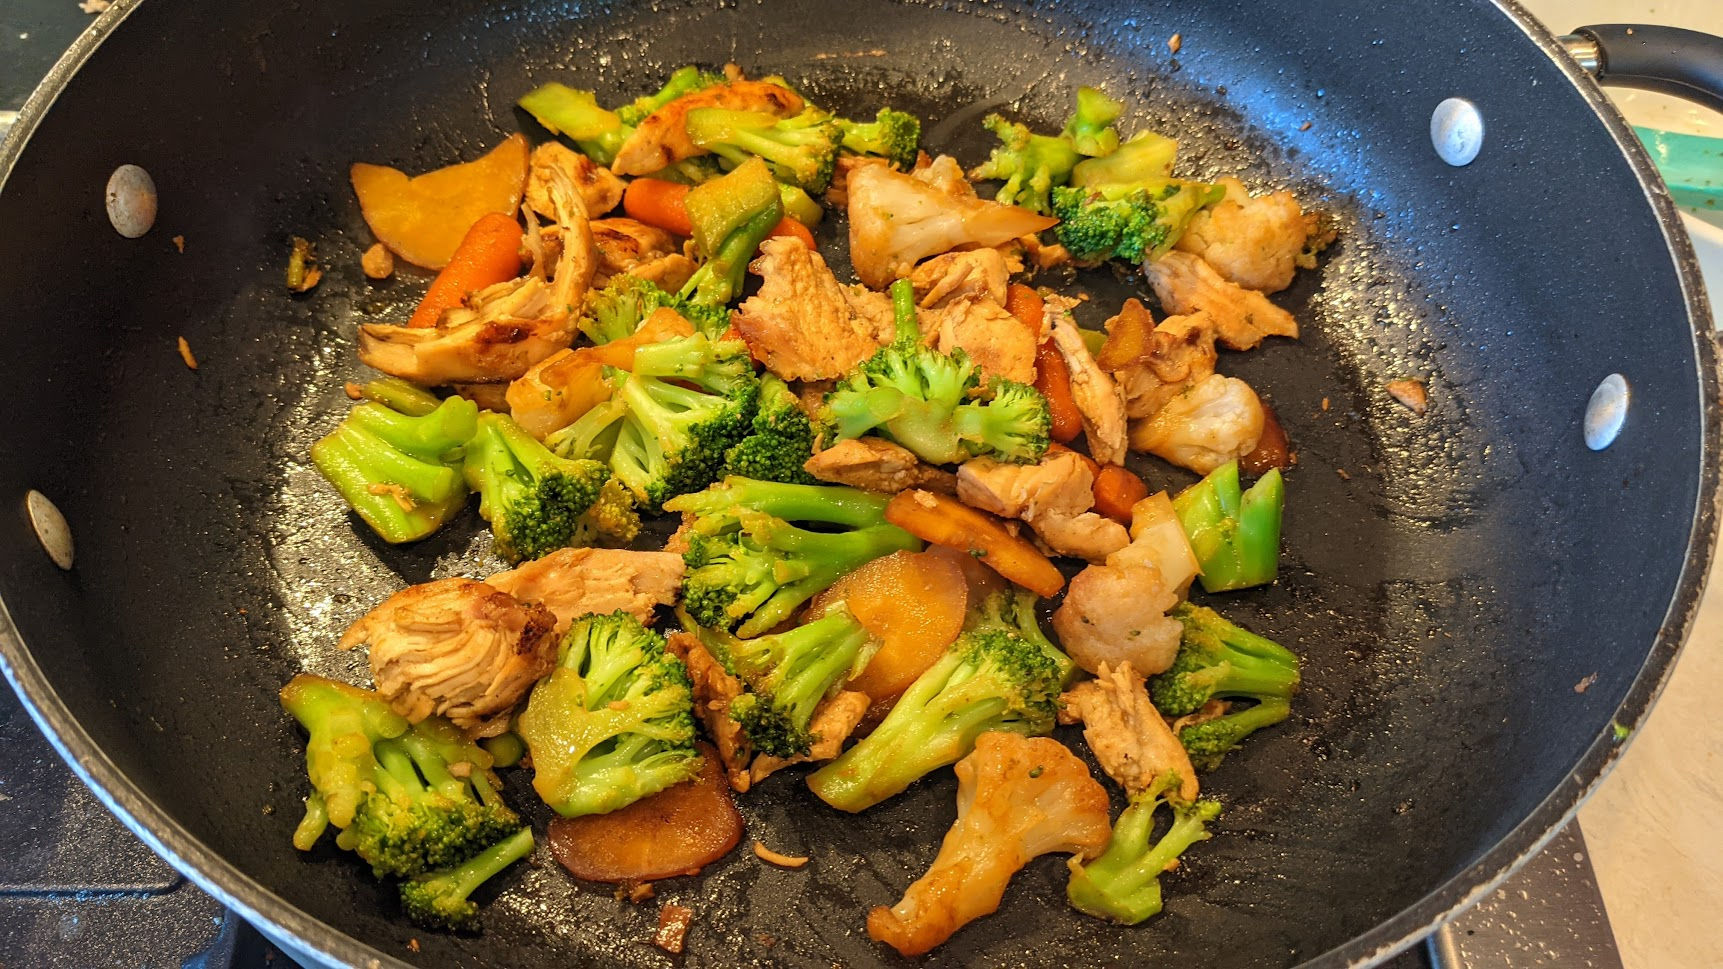
You don’t need to defrost the vegetables. Just get a wok, put in some olive oil, wait a bit for the wok to heat up, throw on some frozen veggies, and toss periodically.
Once the veggies are soft, pour on some soy sauce and toss periodically again. the picture below shows it with chicken. If you want a darker look, add dark soy sauce. Dark soy sauce is less salty than regular soy sauce. After a while, give it a taste to see if it needs more soy sauce or not. If not, you’re done.
The soy sauce is only 15 calories / tbsp.
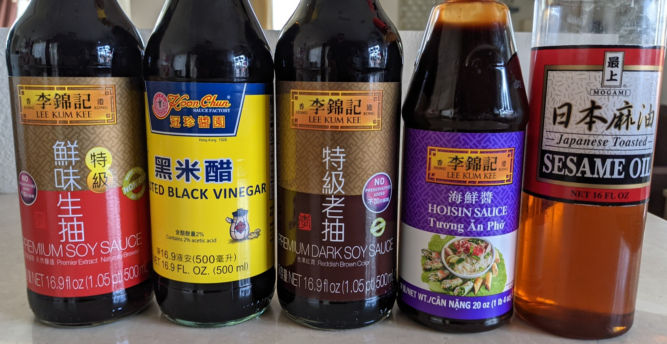
UPDATE: I tried some other recipes that call for a mix of various sauces and I think it did taste better BUT it come with a lot more calories to the all the sugar in Hoisin sauce. If you don’t care about calories, then try this recipe for the sauce instead:
1 tbsp Hoisin sauce (90 calories)
1 tsp dark soy sauce
2 tbsp soy sauce
1 tsp black vinegar splash of toasted sesame oil
If you do care about calories, omit the Hoisin sauce.
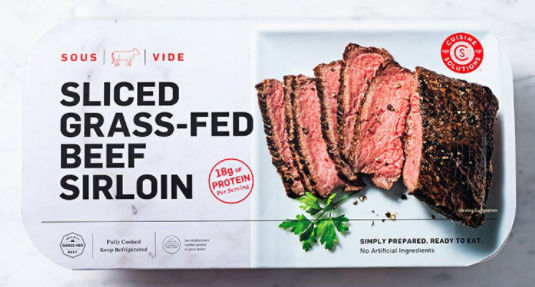
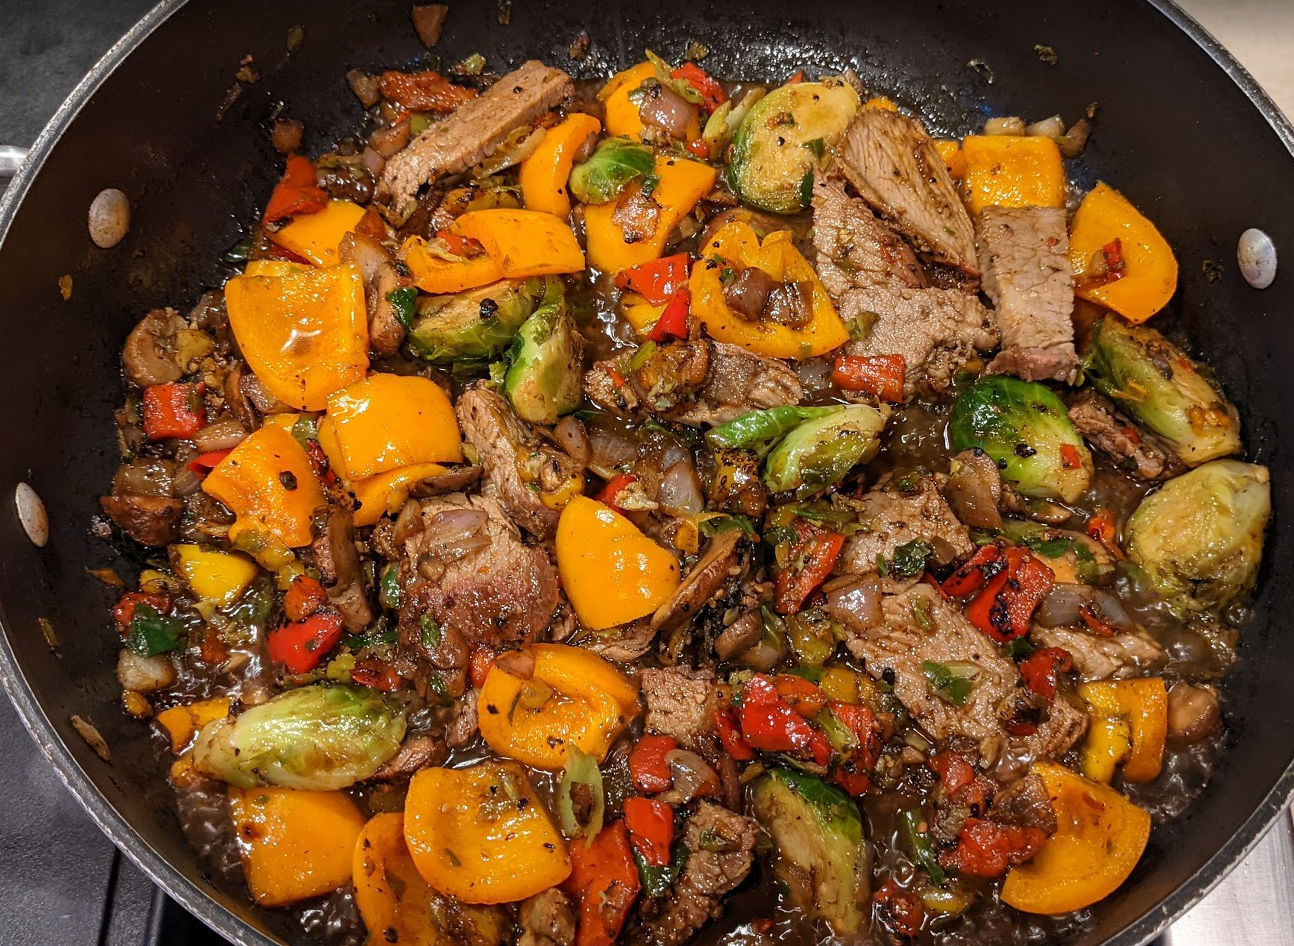
Beef Instead of Chicken
If you prefer beef, you can add precooked, pre-sliced beef sirloin (available at Costco).
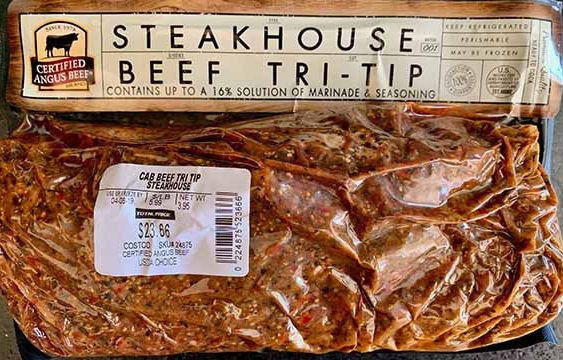
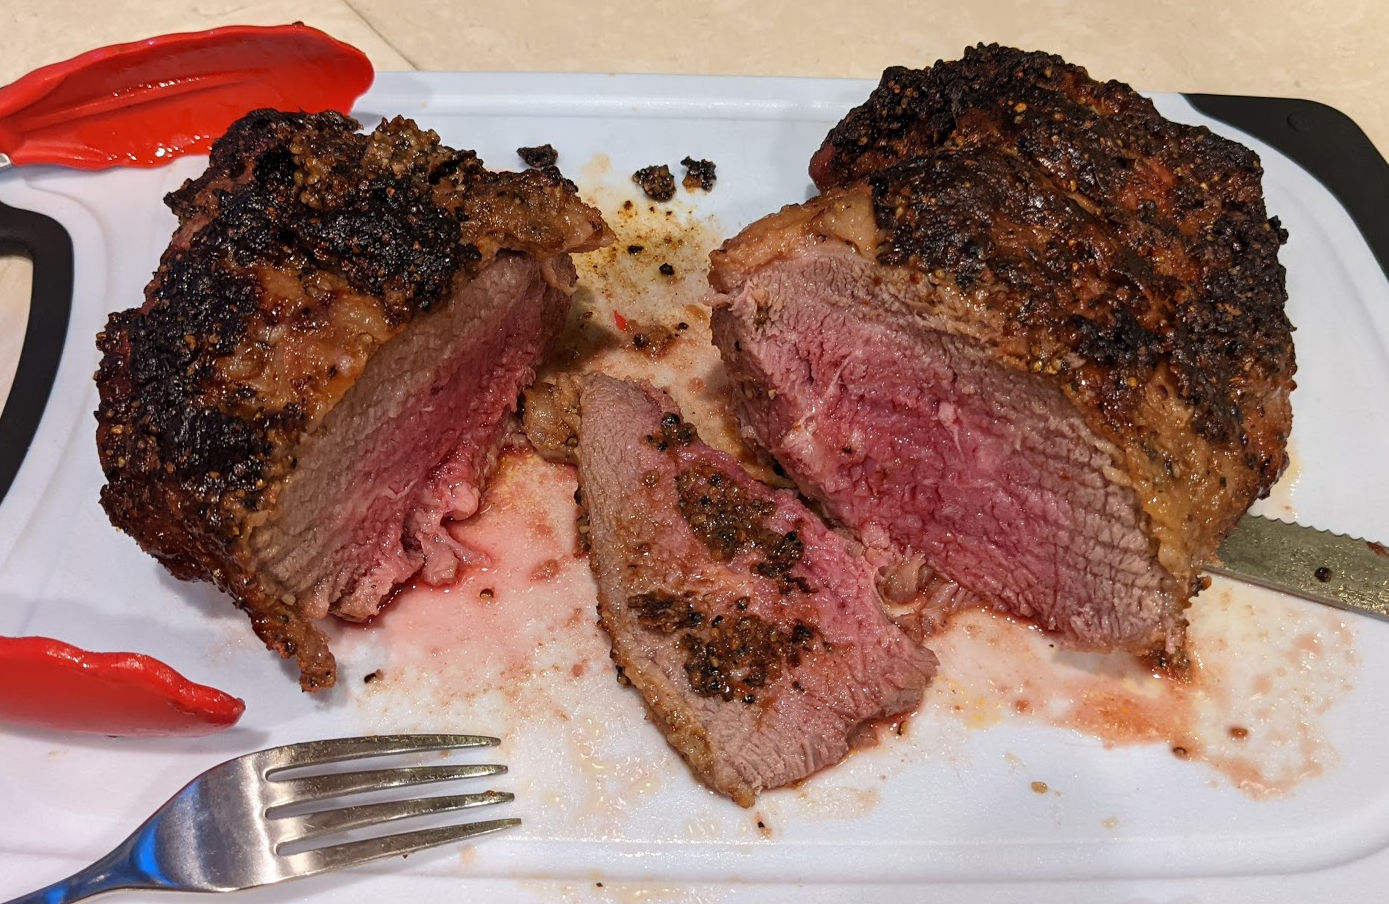
Or, to get more for your money, you can buy pre-marinated tri-top (available at Costco).
I tried this out and it came out great. Just preheat an over to 375 (convection bake), stick in a thermometer and set the target temperature to 135. When it’s done, your oven will (should) beep. Take it out and leave for 10 minutes.
Then just add to your veggies.
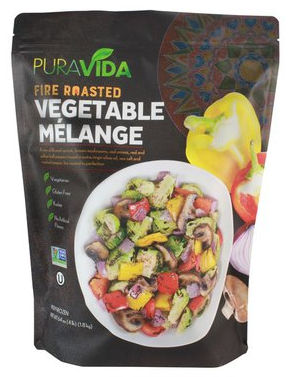
Fire-Roasted Vegetables
Costco also sells frozen fire-roasted vegetables as well.
This was good but the vegetables were smaller and I didn’t care for some of the vegetables. Nevertheless, it was still very good. In the pic below, I added yellow bell pepper.
KETO UPDATE
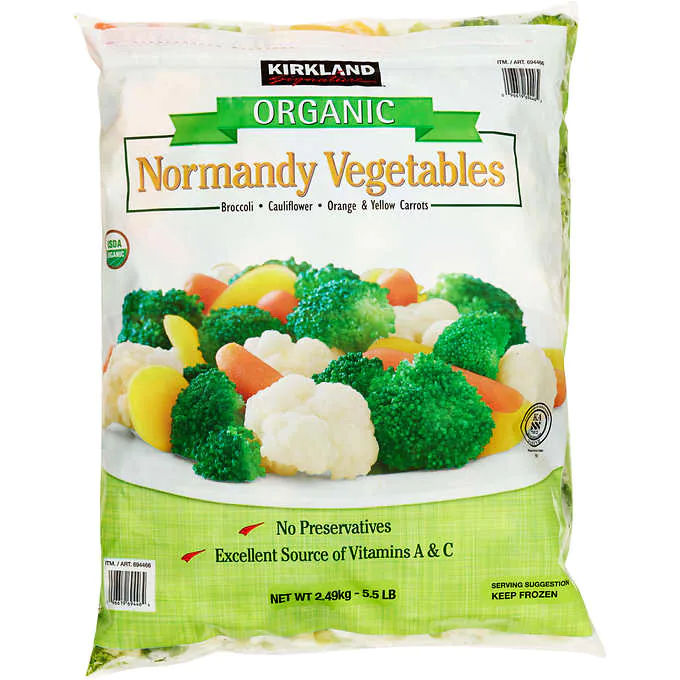
If you are on the Keto diet and want to limit carb intake, then here’s a modification of the recipe above.
For the vegetables, use Kirkland Normandy vegetables.
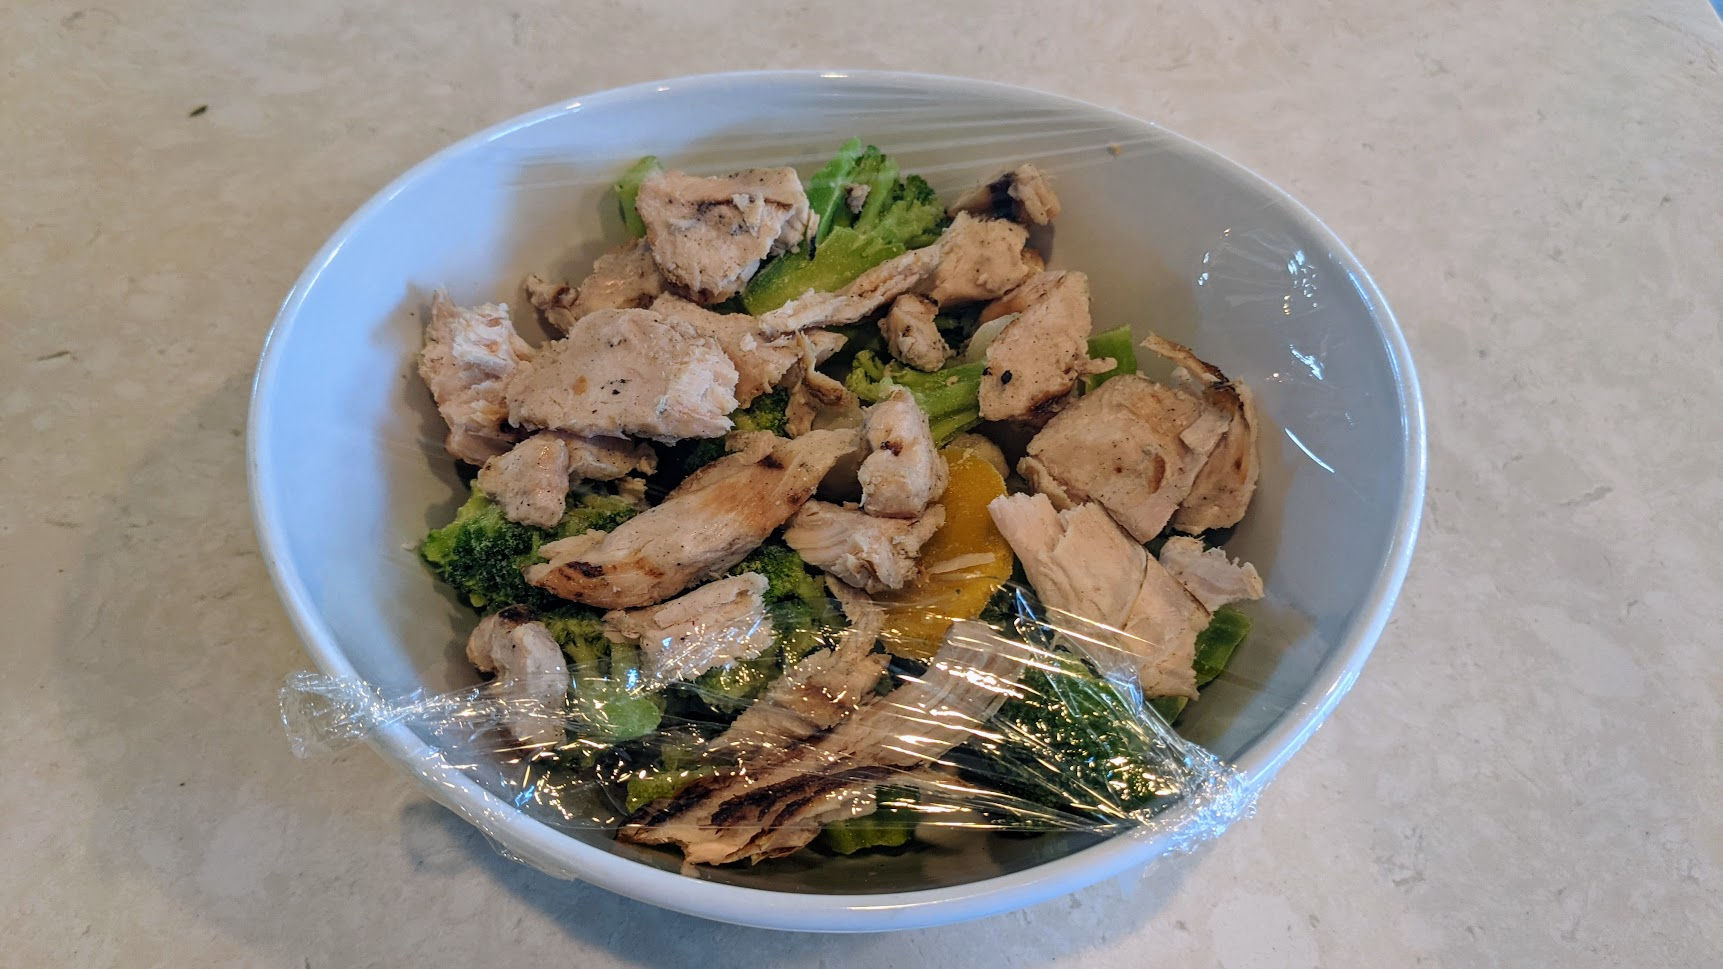
Since this vegetable medley isn’t carb free, you can mix it with Shirataki / Konjac rice (0 net carbs) or riced cauliflower (low carbs) to add bulk to your meal.
For the soy sauce, all you need is Lee Kum Kee Supreme Soy Sauce. It’s got 0 carbs.
For protein, I prefer pre-grilled chicken breast from Costco.
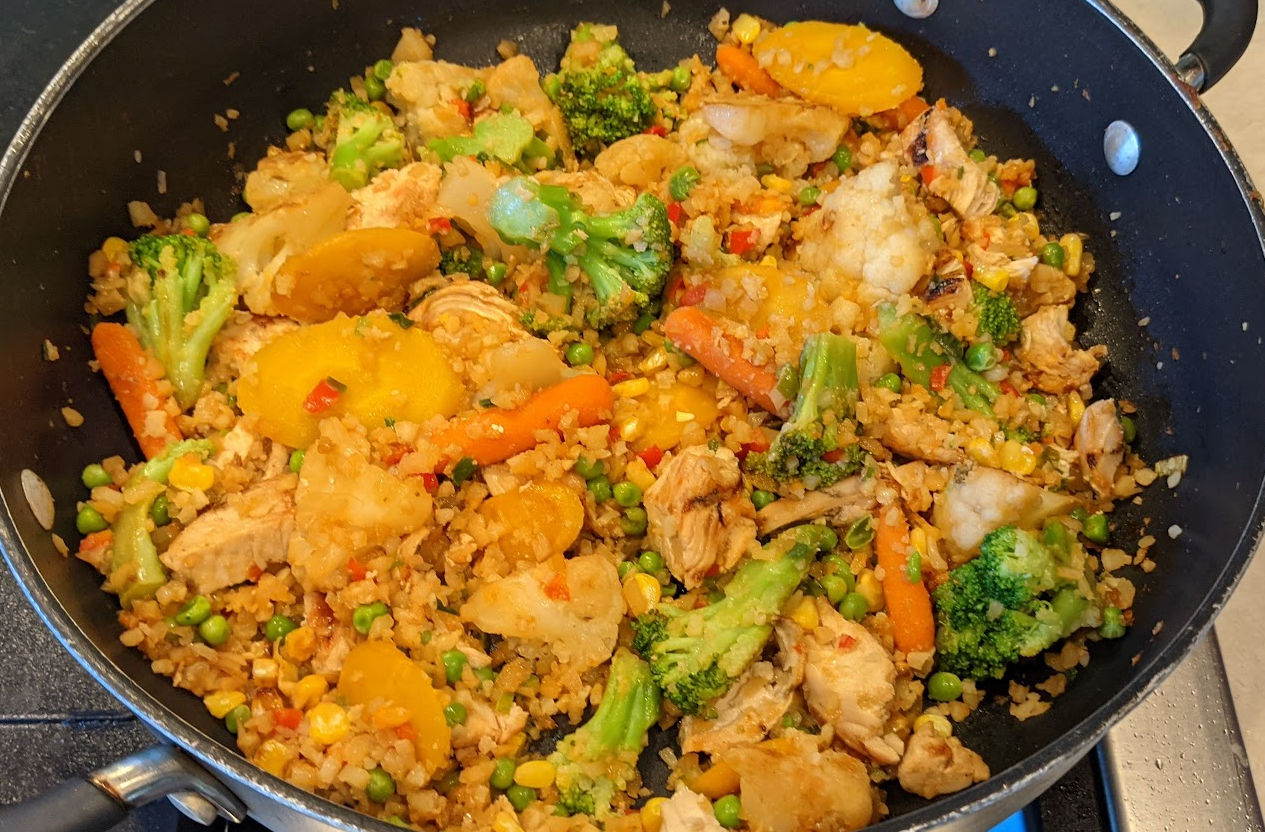
Below is a picture with riced cauliflower.
To simplify cooking, mix the frozen vegetables and refrigerated chicken breast in a covered microwaveable bowl (leaving a small opening in the cover) and heat for 4 minutes. Then transfer to a pan and cook with olive oil. When almost done, add the soy sauce.
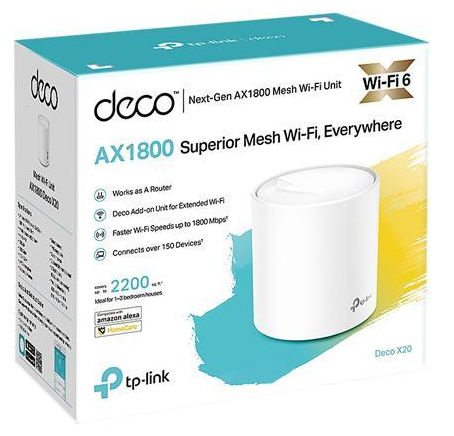
It’s pretty clear now that mesh networks produce stronger wifi signals throughout larger spaces when compared to regular wifi routers even with range extenders. But, many mesh networks only instruct users to connect each router over wifi. While this may be fine in some situations, e.g. where you can’t run ethernet between a main router and a satellite, having a wired backhaul produces a much better wifi signal coming out of the downstream satellite router. Here are instructions to set this up using the TP-LINK Deco AX1800 X20 (W3600 if you bought it from Walmart).
Steps
Restart the modem
Follow the instructions to set up the main router
Follow instructions to set up the satellite router over wifi (default)
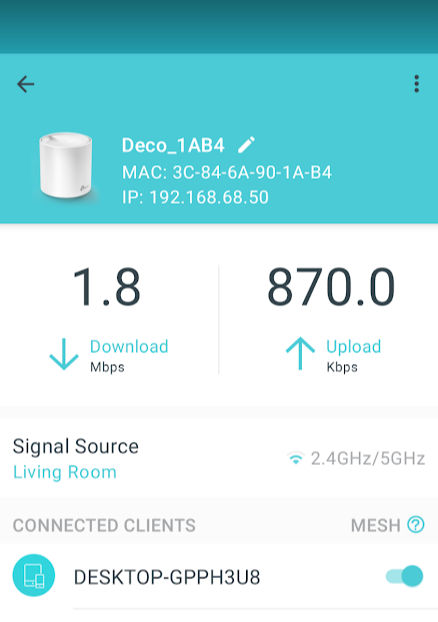
When the light on the satellite turns green, then you know the satellite router is connected to the main router. At this point, since you haven’t connected an ethernet cable between the two routers, the connection is over wifi. You can verify this by opening the Deco app and clicking the satellite router. You should see the “Signal Source” value the wifi symbol followed by 2.4GHz/5GHz.
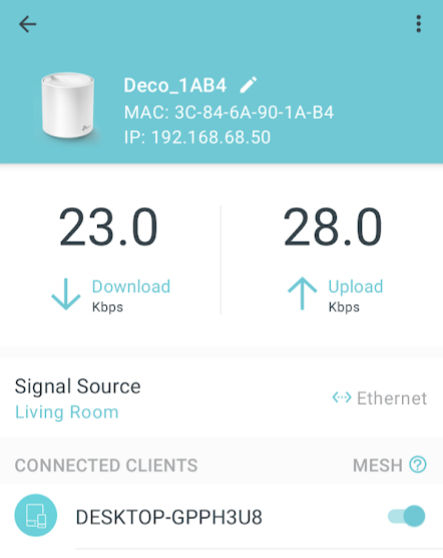
If you have a laptop or smartphone that is connected to the satellite router, you can run a speed test. In this example, I have a laptop that is connected over wifi to the satellite router. After running a speed test, connect an ethernet cable between the two routers. The light on the satellite router will turn red temporarily and then turn green when connected. Similarly, the satellite router’s status in the app will appear disconnected. Click the refresh button and you should see the “Signal Source” value change to “Ethernet” and shown in the screenshot below. This confirms that you are using a wired backhaul.
Now, run a wifi speed test from the satellite router. In my case, my laptop was still connected to the satellite router. The wifi speed test results were clearly much faster when the satellite was connected over ethernet rather than wifi. This setup is very useful when you need a strong wifi signal very far away from your main router and you can run an long ethernet cable between routers.
Note: I got this 2 router TP-Link AX1800 mesh wifi system from Walmart for $129. At Walmart, the model number is W3600 whereas on Amazon it’s X20.
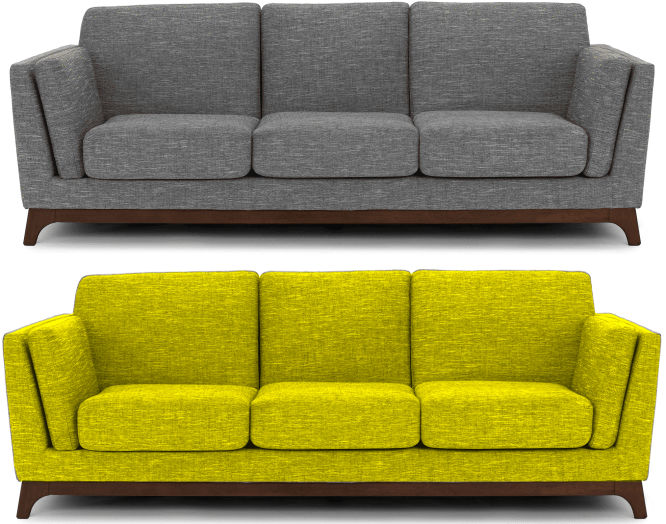
Let’s say you want to make this gray sofa become a yellow sofa.
Here’s how to do it in Photoshop.
1. Select the object
Use the object selection tool and create a selection that is larger than the object itself. Photoshop will then shrink the selection to just the object.
As you can above, Photoshop selected the sofa but missed a part of the left leg. Since we only want to color the fabric and not the wood frame, remove the wood frame from the selection, e.g. using the rectangular marquee tool in Remove mode. Now, only the fabric is selected.
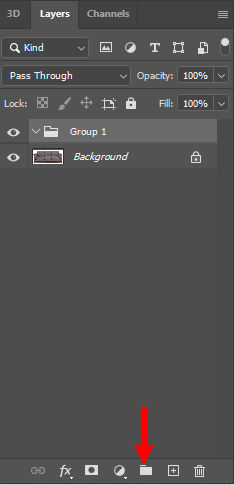
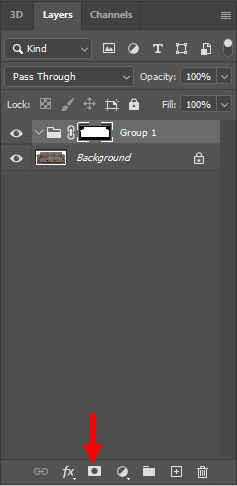
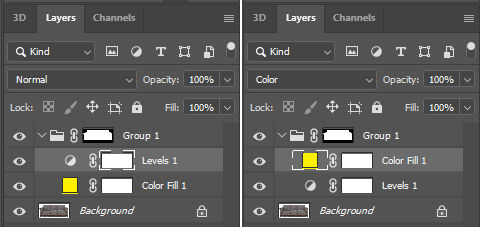
2. Create a new group
Click the Create a new group icon to create a new group.
3. Add layer mask
Click the Add layer mask icon to add a layer mask
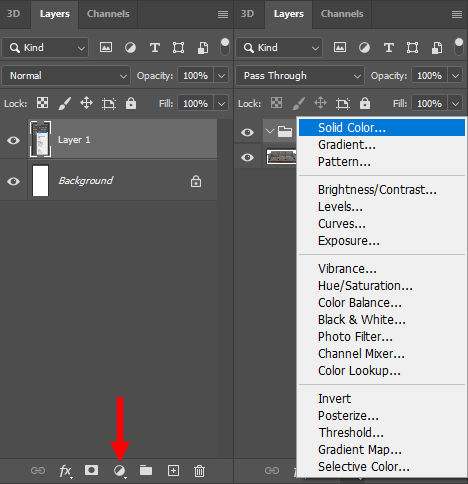
4. Add Solid Color
Click the “Create new fill or adjustment layer” icon and choose “Solid Color”
5. Choose a color
In the popup color picker, choose a color.
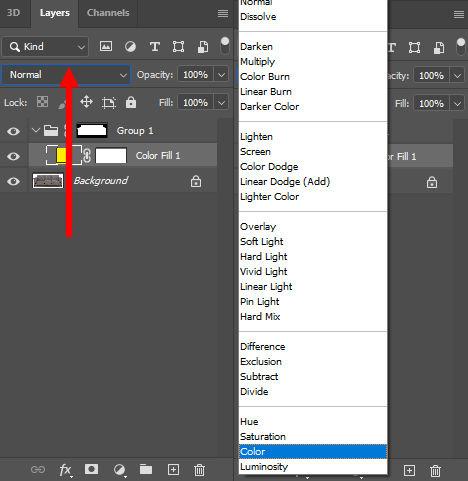
6. Change blending mode
Click the Blending Mode dropdown and select “Color”.
The resulting image will look like this.
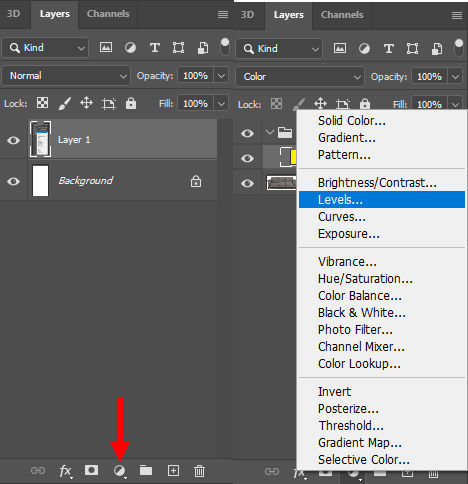
7. Adjust brightness
Click the “Create new fill or adjustment layer” icon and choose “Levels”
The Levels layer will appear below the Color Fill layer so drag the Color Fill layer above the Levels layer.
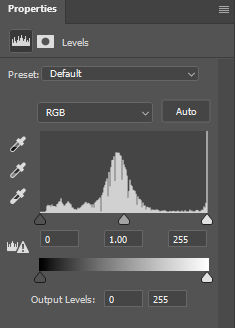
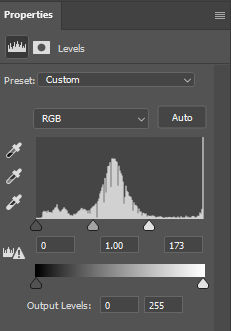
8. Adjust Levels
Drag the markers to adjust the brightness.
For example, when I drag the white marker to the left to the right end of the curve, the brightness increases.
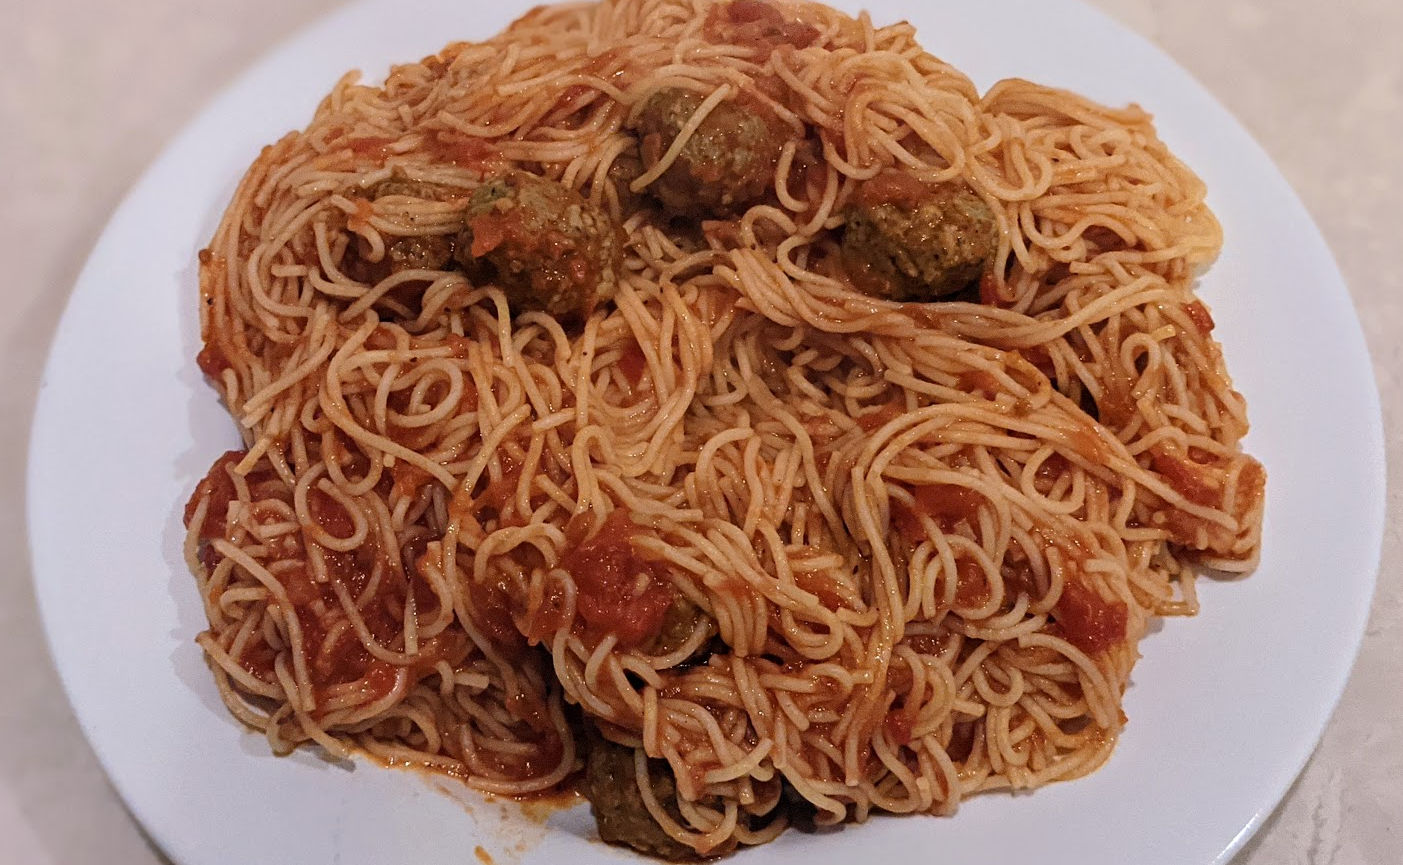
I prefer angel hair pasta. Since it’s long, break it into 3.
WARNING: Pasta will grow like crazy when cooked. Put half or a third of the raw pasta amount.
3. Cook the pasta
Put the pasta in the pot and cook till it reaches your desired hardness
4. Prepare meatballs
For convenience and speed, just buy pre-cooked, frozen meatballs. Then, heat them up in a microwave on high for 4 minutes.
5. Prepare pasta sauce
For convenience and speed, just buy premade pasta sauce. Rao’s marinara sauce is particularly good and available at Costco. Pour an adequate amount over the cooked meatballs.
then heat in a microwave for 2 minutes.
6. Strain pasta
When pasta is cooked, strain it and put it back into the pot.
7. Mix sauce, meatballs and pasta
Pour the sauce and meatballs into the pot of pasta and mix.
Many people just need to create a simple website. There are many online website builders that offer this including Google Sites. However, what if you also need to simply password-protect some pages. WordPress.com makes this very easy. Following are steps on how to create a clear, no-frills website using WordPress.
1. WordPress.com
Go to https://wordpress.com/ and create an account. You can choose all of the free options and pick any theme.
2. Simple Theme
There are many free themes to choose from. But, if you want the most basic and intuitive theme, click on Appearance > Themes > search for the “Twenty Fifteen” theme and activate it.
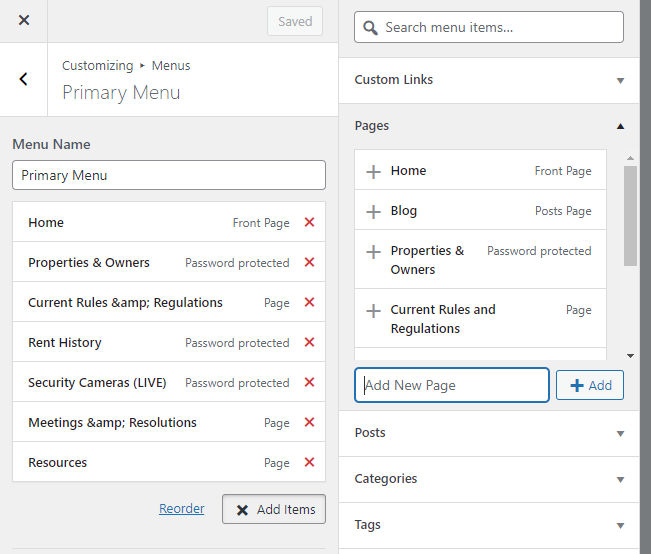
3. Create Pages
Click to “customize” the theme and then choose “Menus” > Primary Menu. There will be two pages by default: Home and Blog. If you are not creating a blog, you can delete the Blog page. Then, click “Add items” > Add New Page” and add as many pages as you like. You will then need to drag the pages from the right column to the menu in the left column.
4. Edit Pages
While still in the Customize view, you can preview the site in the right column and click on the various menu links you just created. For each page, you can click the “Edit” link which will take you to the page editor view.
5. Paste Images
The nice thing about the page editor is you can just paste images where you want them and WordPress will upload the images for you. There’s no need to have an image file on your computer and then browse to it to upload it.
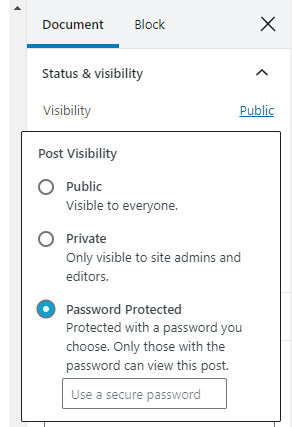
6. Password-protect Pages (Optional)
If you want to password protect some pages, then in the right column of the page editor view, click Document > Public > Password Protected and type in a password.
Once you publish your site, password-protected pages will appear as follows:
Once you enter the password, you’ll have access to the page’s content.
7. Publish
Now, you can click the “Publish” button to publish new page and the entire site. The site will be accessible at XXXX.wordpress.com where XXXX is customizable. You can also pay to buy a custom domain and link it to your new site.
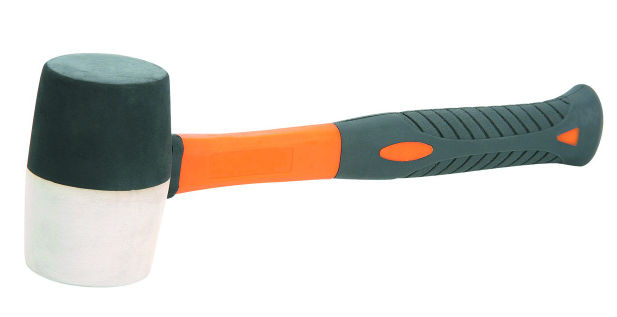
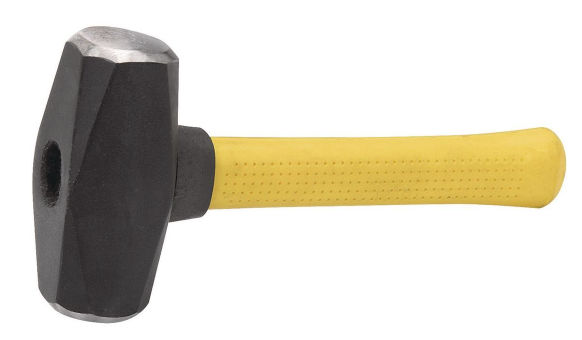
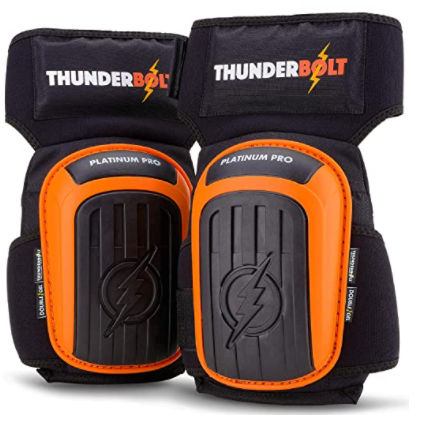
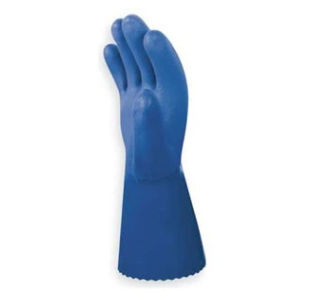
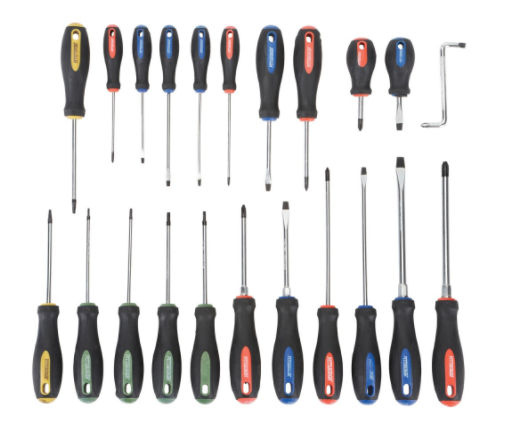
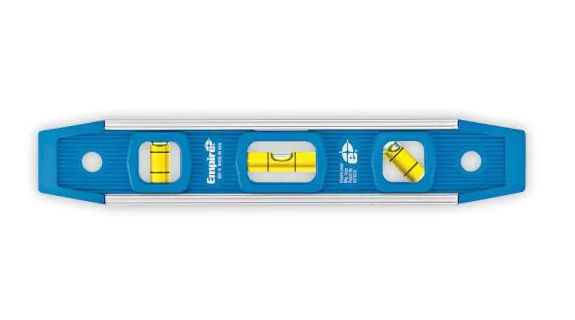
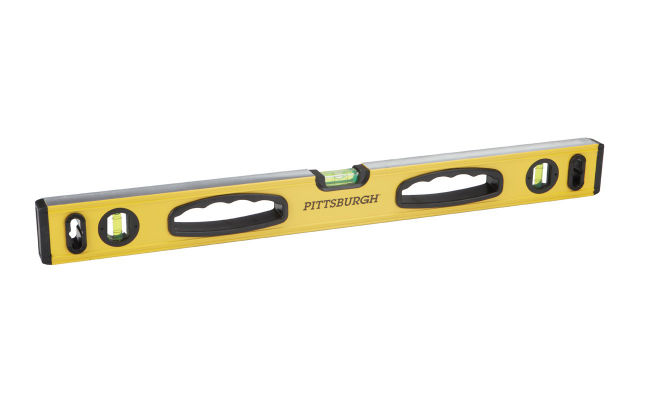
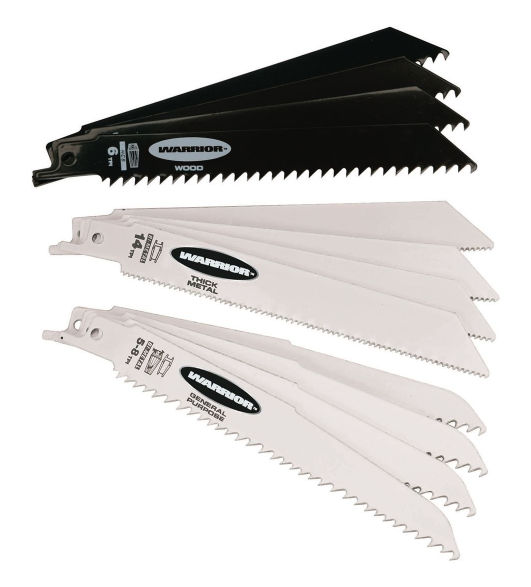
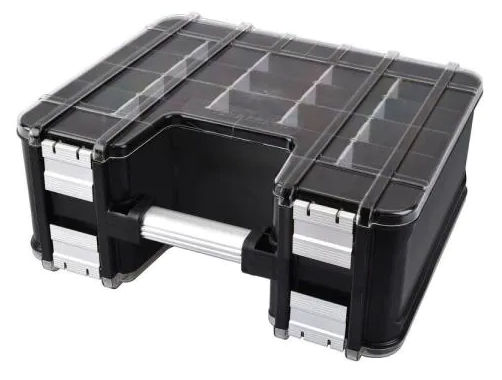
Here’s a list of the minimum tools I think a DIYer would need. To keep costs low, I chose tools that had good reviews but were not necessarily brand name.
Power Tools
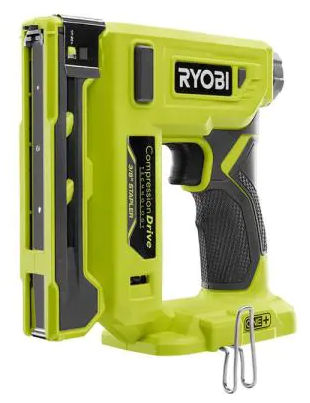
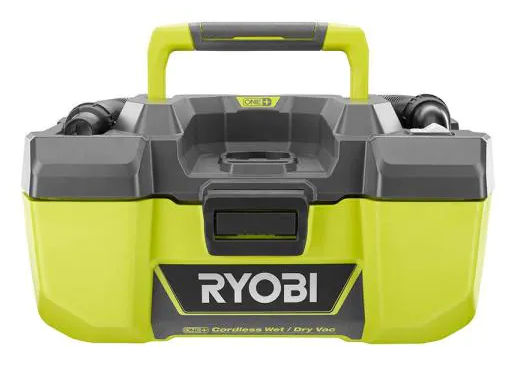
Since it’s cheaper to buy a bundle, I picked this bundle of 12 tools. Not all are essential like the brad nailer but since you can save $259 with this bundle, it doesn’t matter. Also, Ryobi has the most battery-powered tools which is a big plus.
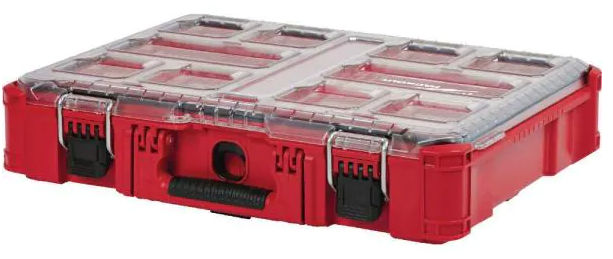
The Husky organizer above is good but the latches can easily open on their own possibly causing everything to fall out. A better but much more expensive option would be to buy one or two of the Milwaukee organizers below.
We’ve all seen them. Weeds. Along your concrete driveway expansion joints. Many, if not most, people will just remove the weeds only for them to grow back as soon as it rains. So, why do weeds grow along these lines? Apparently just a little bit of dirt that makes its way into these gaps is enough to cause weeds to grow. I’ve had enough of these weeds growing every year so here’s my attempt to resolve this annoyance once and for all.
Remove Weeds
To remove weeds, you can use an oscillating tool, a small reciprocating saw, or even a utility knife or flathead screwdriver. Since I like doing things the quick and easy way, I use an angle grinder with a wire wheel.
To prevent kickback and potentially hurting yourself, stand perpendicular to the direction the wire wheel rotates.
If you need to enlarge some gaps or smoothen them out, you can use an angle grinder with a diamond blade.
Fill Gaps
Now, my driveway has gaps that are small (1/4″), medium (1/2″) and wide (3/4″ – 1″) in width and the depths range from 1/4″ to maybe 3″ deep. The small and shallow gaps are usually not a problem.
At first, I thought about filling some small gaps with Sakrete Concrete Crack Filler since the driveway is made of concrete.
Concrete Crack Filler
I tried this on a small gap and product was very easy to apply and it settles nicely producing a nice bead.
However, it turns out you shouldn’t do that because apparently those gaps – called expansion joints or control joints – are by design so filling these gaps with concrete defeats their purpose. Concrete Crack Filler is good, however, if you do have a thin, natural crack (not expansion joint) because it hardens just like concrete.
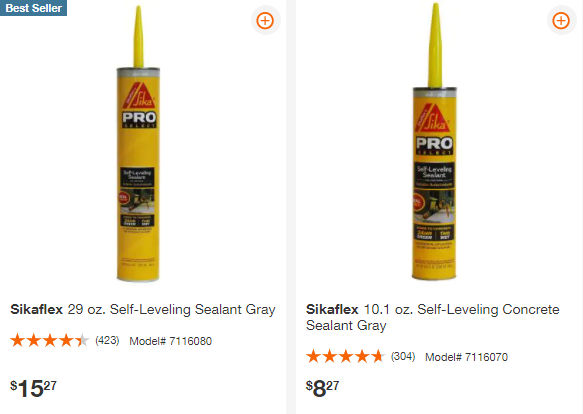
Concrete Filler and Sealant
For horizontal surfaces or slightly sloped surfaces like your driveway, use Sikaflex Self-Leveling Sealant.
Foam
Now, for some of the larger gaps, it would be too expensive and wasteful to fill them with sealant. For those, I decided to use a foam gap filler.
Apply Foam
This stuff really does expand and is pretty sticky when wet. It’s great for filling large gaps. Of course, you’ll need to trim the foam in order to apply sealant. This can be done with a utility knife, a mini reciprocating saw, or, better yet, an oscillating tool.
I cut away the foam a little bit below the surface of the concrete to allow for a layer of sealant.
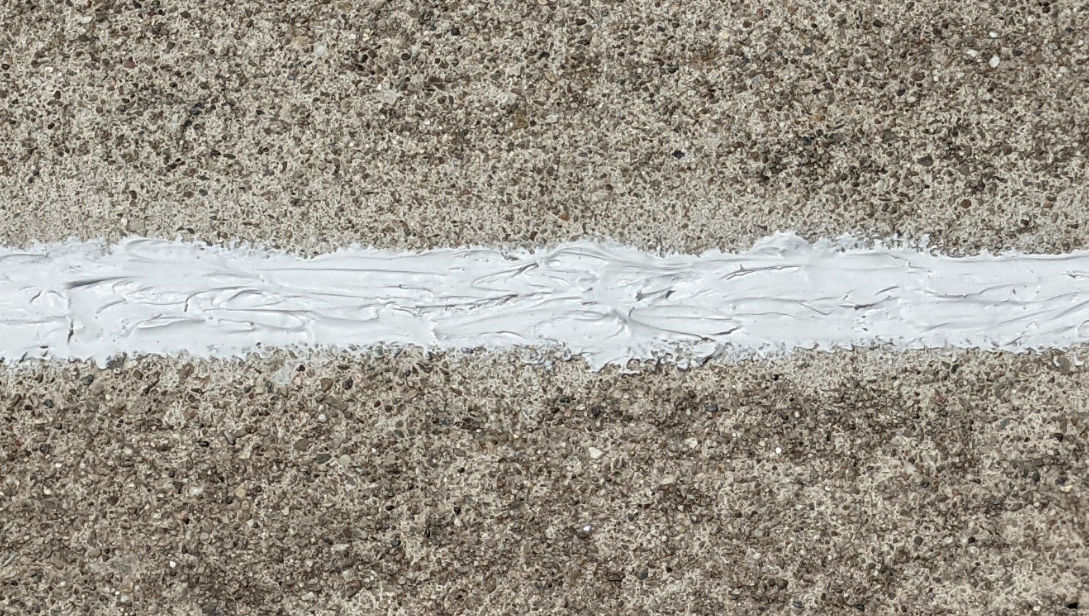
Apply Sealant
At first I bought the 10 oz sealant but because I wanted to seal all joints, I got the 28 oz sealant (cheaper) and a 29 oz caulking gun. As you can see below, the sealant self levels resulting in a nice, smooth finish.
Had I gone with non self-leveling sealant like Sikaflex Construction Sealant
then the result would look like this:
You could try to smoothen it out using a taping knife by why bother. This type of sealant is better for vertical surfaces.
Now, if you don’t like the look of a gray joint, you can color your driveway with Rustoleum Epoxy or Behr Granite Grip and the entire driveway will be the same color.
Sand
You can also sprinkle sand on the sealant to prevent debris from sticking to it while it dries.
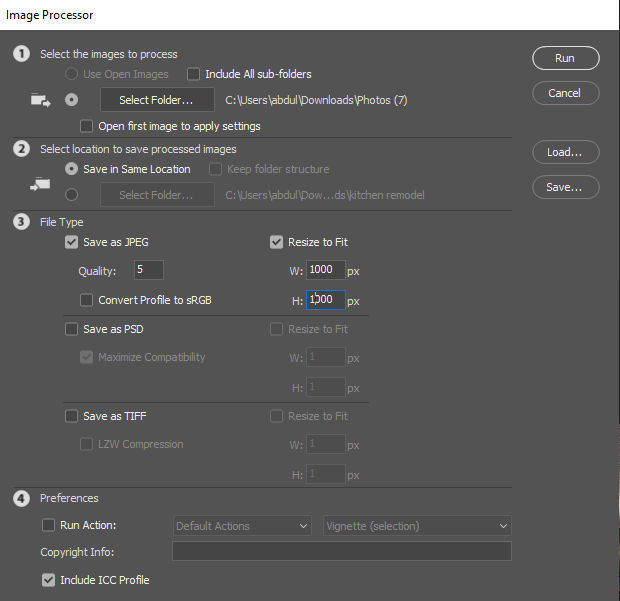
We often take pictures with our smart phones which may save photos at very high resolutions resulting in large file sizes. What if we want to quickly resize and compress these images for uploading to a website or sharing via email. One quick was is to use Photoshops Image Processor Automation Script.
File > Script > Image Processor
You’ll then see a dialog where you
select a folder containing the large images
select a location to save the processed images
check a file type (JPG) and optionally resize the image to fit within a specified width and height
Then, just click the Run button and Photoshop will do the work.
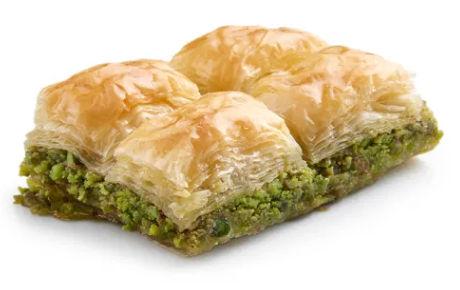
Though you can find baklava all over the world including in the US and the Middle East, I find that the best baklava is Turkish baklava. This should come as no surprise as you will find baklava shops on almost every street in Istanbul and probably all over Turkey. Since a main ingredient in baklava is pistachio, and the center of pistachio cultivation in Turkey is in the city of Gaziantep, some consider Gaziantep baklava to be the best. In 2013, Gaziantep baklava became the first Turkish product with a European protected designation of origin and geographical indication.
According to the Lonely Planet guide book on Istanbul, following are some of the best baklava shops there.
Karaköy Güllüoğlu Karaköy, Rıhtım Cad. Katlı Otopark Altı No: 3-4 Istanbul / Turkey T: +90 212 293 09 10
Köşkeroğlu Restaurant Kemankeş Karamustafa Paşa Mahallesi, Mumhane Caddesi, No 2/D, Beyoğlu, Istanbul – Tel: 0212 245 35 14
Kaşıbeyaz Baklava Nispetiye Mahallesi, Aytar Caddesi, No 31/C, Beşiktaş, İstanbul – Tel: 0212 281 10 50
Emiroğlu Baklavacısı Murat Reis Mahallesi, Nuh Kuyusu Caddesi, No 289/A, Üsküdar, İstanbul – Tel: 0216 334 58 26
Hacı Bozan Oğulları Bahçelievler Mahallesi, İzzettin Çalışlar Caddesi, No 13, Bahçelievler, Istanbul – Tel: 0212 575 49 49
Gaziantep Baklavacısı Küçükyalı Merkez Merkez Mahallesi, Rüştü Sarp Caddesi, No 25/A, Maltepe, Istanbul – Tel: 0216 417 71 20
Gaziantepli Altınoğlu Baklavaları Kadirga Liman Cad. 17, 34450 Istanbul, Turkey
I have personally tried Emiroğlu baklava and can confirm that it is one of the best. It’s got just the right amount of moisture unlike some other baklava which are too dry or wet.
One baklava shop you will most likely see in Istanbul is Hakkizade Hafiz Mustafa 1864. Their baklava is good but a bit too dry for my taste. Emiroglu is better.