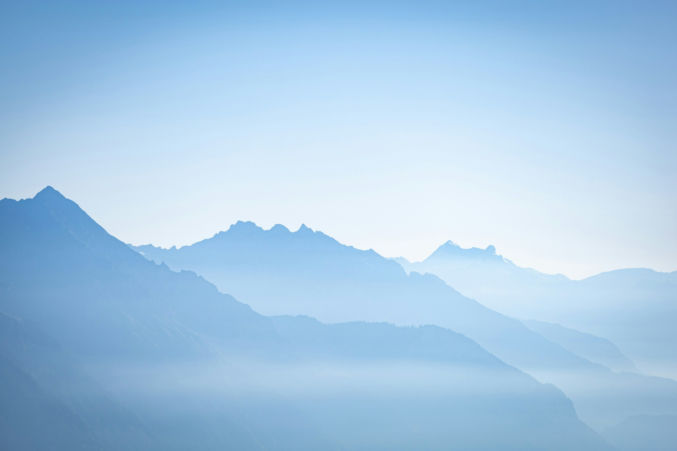
If you have a photo that is too small and you wish it were wider or taller, you can use Photoshop’s Generative Fill feature to fix that. Here’s an example.
Open the image in Photoshop
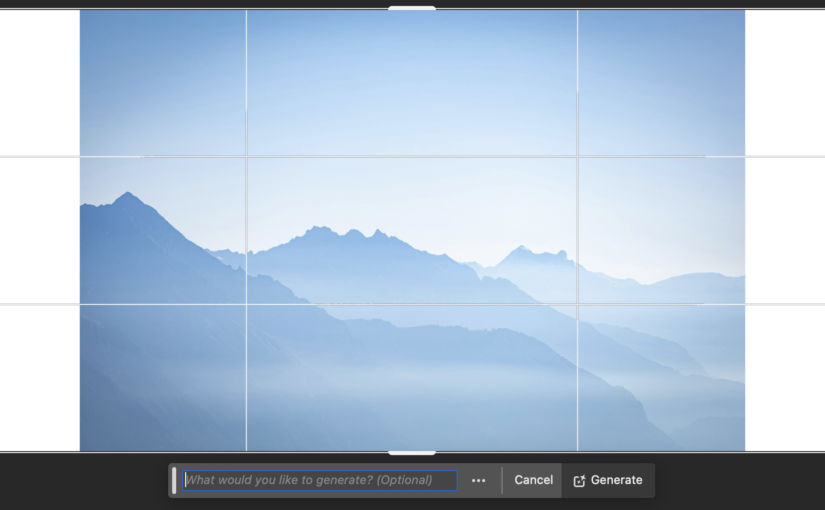
Enlarge the canvas
Let’s say I want to make the image wider. Using the Crop tool, enlarge the canvas.
When you do this, you’ll see a command prompt below the image.
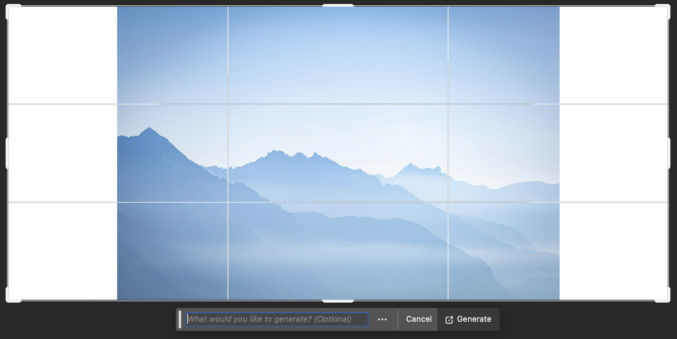
Click Generate
If you just click Generate, Photoshop will fill in the empty parts to blend in with the original image.
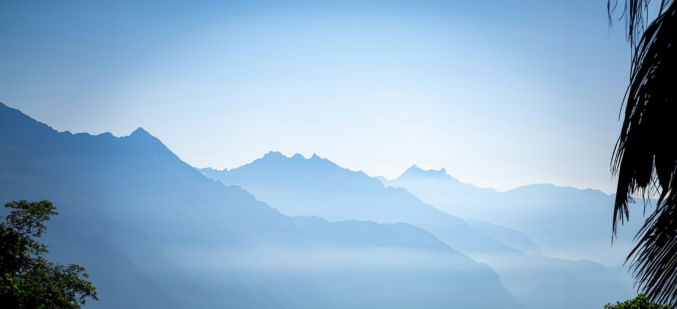
Try custom commands
You can also tell Photoshop how you want to fill in the empty space. For example, if I write, “Fill the empty space with a jungle”
Adjustable-color LED Light Bulbs (This is for the sconces. I set the color to pink.)
Uplights (This one on Amazon lets you change the color of the light) In the picture above, I just have one behind the sofa with a soft white (yellow) light.
LED Light Strip (I got mine from Costco. You can adjust the color.) In the picture above, this is the blue light behind the TV.
1.5 RPM Speed Disco Ball Motor(I chose a speed of 1.5 RPM. Faster speeds make the lights move too quickly, which is distracting and headache-inducing)
Spot Light (This is for the mirror ball. I bought this one because it allows me to adjust the aperture size / spot diameter.) In the picture above, I put it on the ottoman facing up to light up the mirror ball.
Northern Galaxy Light Aurora Projector (In the video above, I set the color to red (R) and blue (B) and disabled the green “star” lights. It’s on the ottoman and illuminates the ceiling).
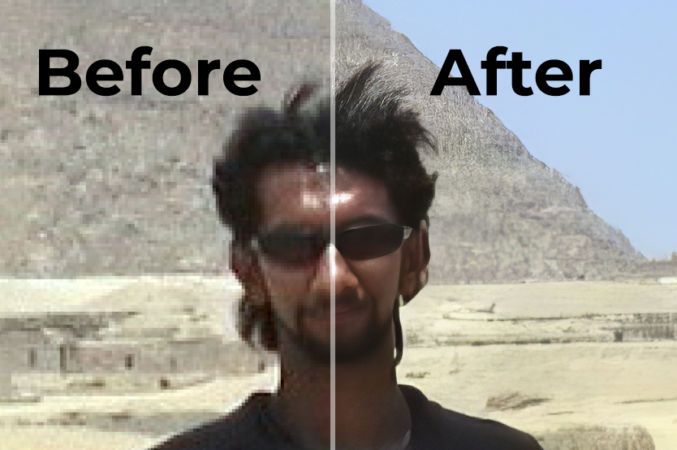
If you have old, low-res photos that you want to enhance and upscale or if you want to zoom in on a hi-res photo while preserving quality, you’ll be impressed with what artificial intelligence (AI) can do. Compare the following.
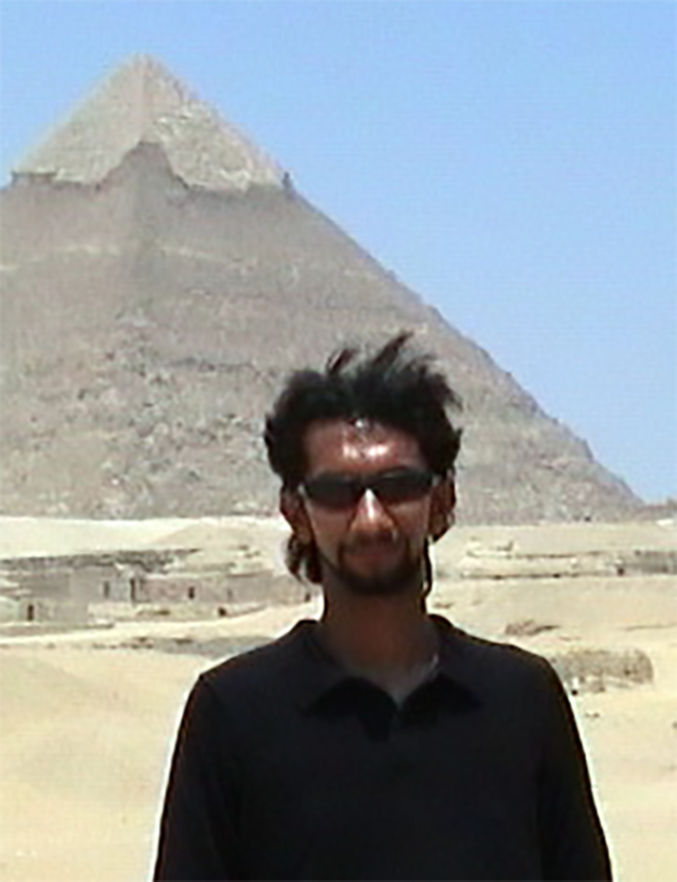
Original Photo
This photo was taken in Cairo, Egypt back in 1997. The original photo was 640 by 480 pixels. I’ve cropped it to focus on the subject. It’s now 238 px wide.
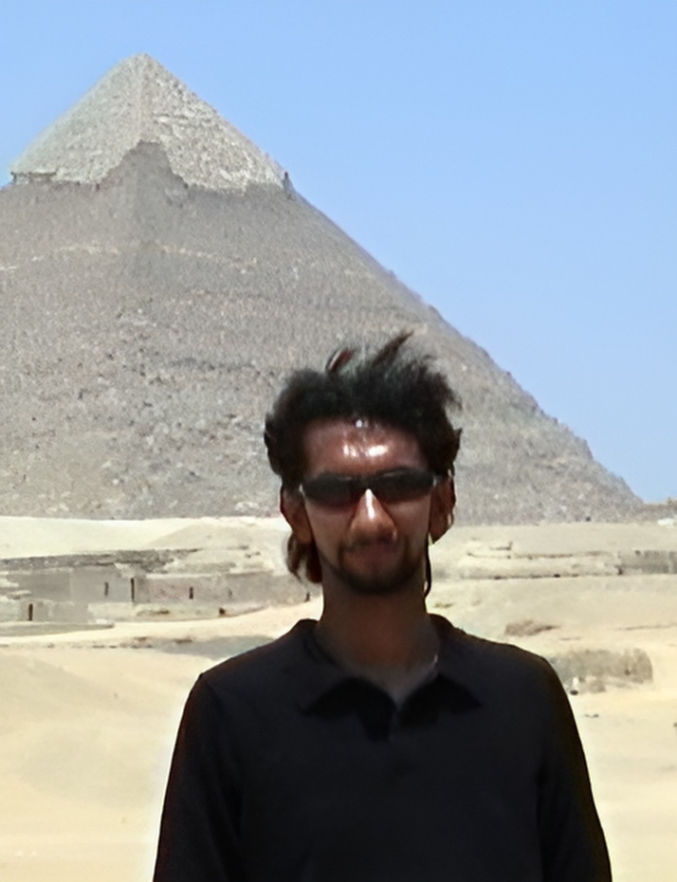
Photoshop
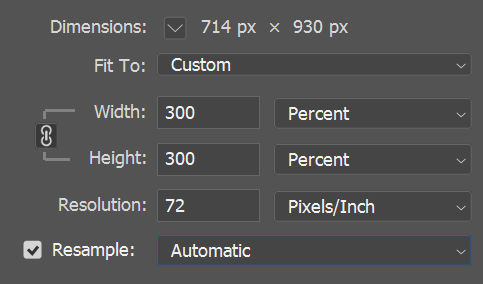
In Photoshop, you can increase the dimensions of an image. I’m going to enlarge it by 300% to 714 px wide.
Here are the results using the “Automatic” resampling option. Notice the graininess.
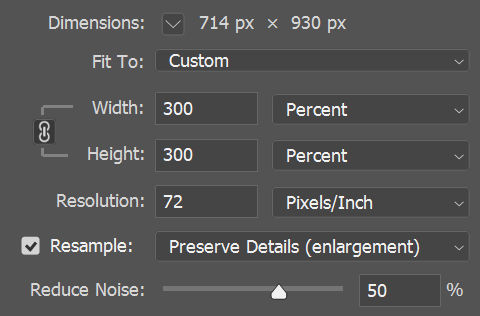
Now, I’ll do the same using the “Preserve Details (enlargement)” option with a 50% noise reduction.
Here are the results. It’s less grainy, but still not sharp at all.
I’ll try one more time. Below are the results with 100% noise reduction. Still not great.
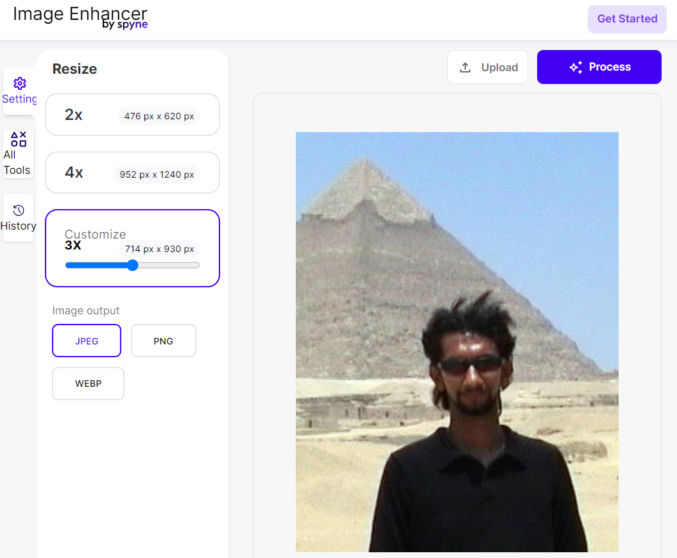
Here are the results. This is definitely an improvement compared to Photoshop.
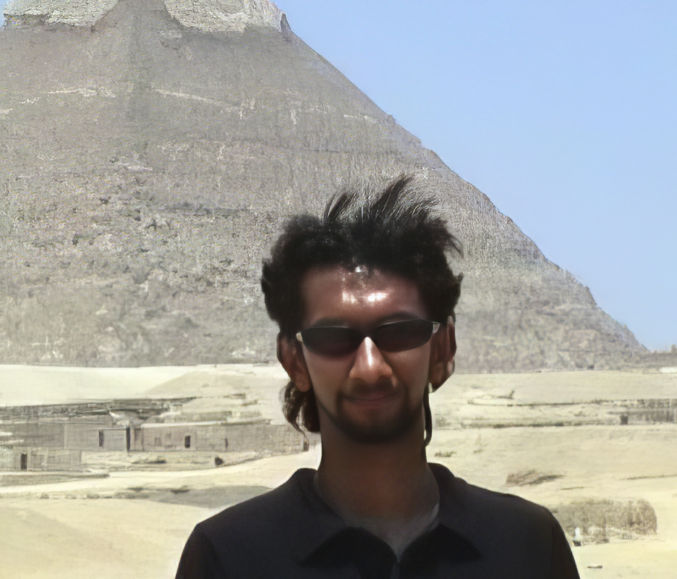
Topaz Labs Photo AI
Now I’ll try Topaz Labs Photo AI 2.4.0. This software costs $200, so I’ve just taken a screenshot of the preview. As you can see, the results are way better than both Photoshop and Spyne. There is no noise and everything is sharp, including the hair. If the face looks a bit too soft, you can sharpen it in Photoshop under Filter > Sharpen.
So there you have it. Successfully upscaling an image using AI with realistic results.
A lower third is a text title or graphic overlay placed in the lower region of the screen. Motion Graphics templates are a file type (.mogrt) that can be created in After Effects or Premiere Pro. Here’s an example of a motion graphic lower third.
There are many motion graphic templates for lower thirds available online, e.g.
In this tutorial, I just get a free one from Mixkit.
Download MOGRT template
Download this free template and unzip it. You’ll get an mogrt file and an mp4 file showing how the animated title looks.
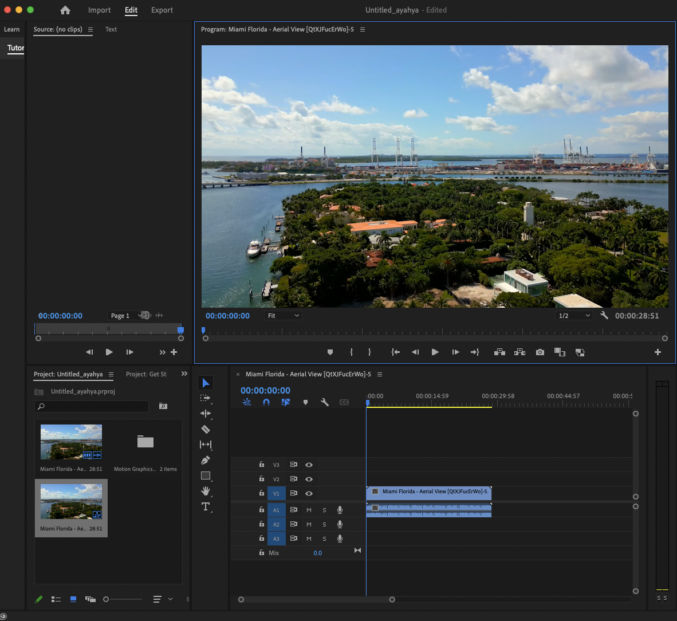
Add a video to your timeline in Premier Pro
Drag a video to the timeline pane.
Open the Essential Graphics pane
Click on Window > Essential Graphics. You’ll see the Essential Graphics pane on the right.
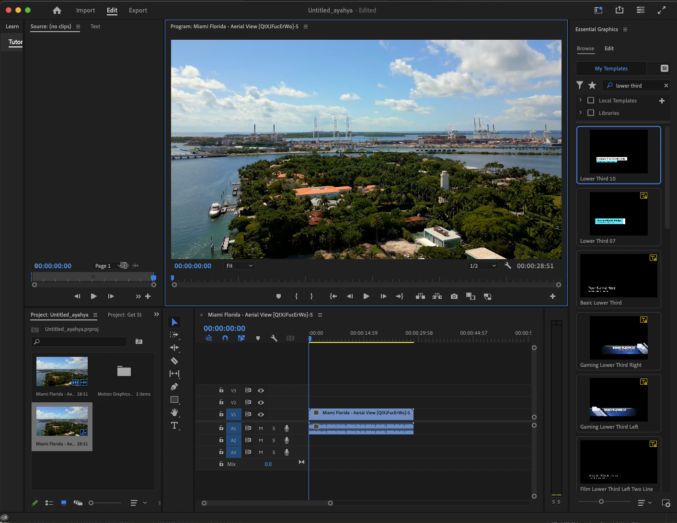
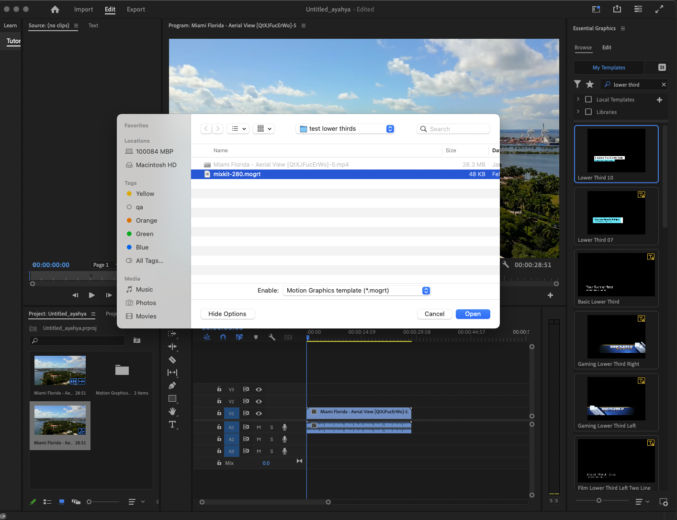
Install the mogrt file
In the Essential Graphics pane, click the “Install Motion Graphics template” button in the bottom right corner. Browse to the mogrt file and click Open. The template will appear at the top of the list of templates in the Essential Graphics pane.
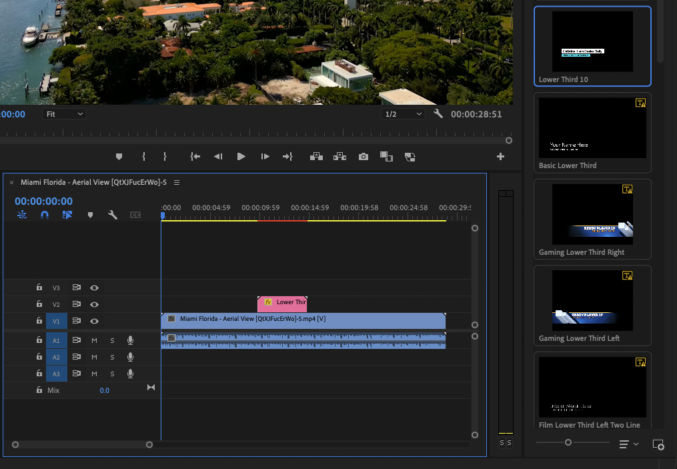
Drag the template to the timeline
I dragged it to the V2 track.
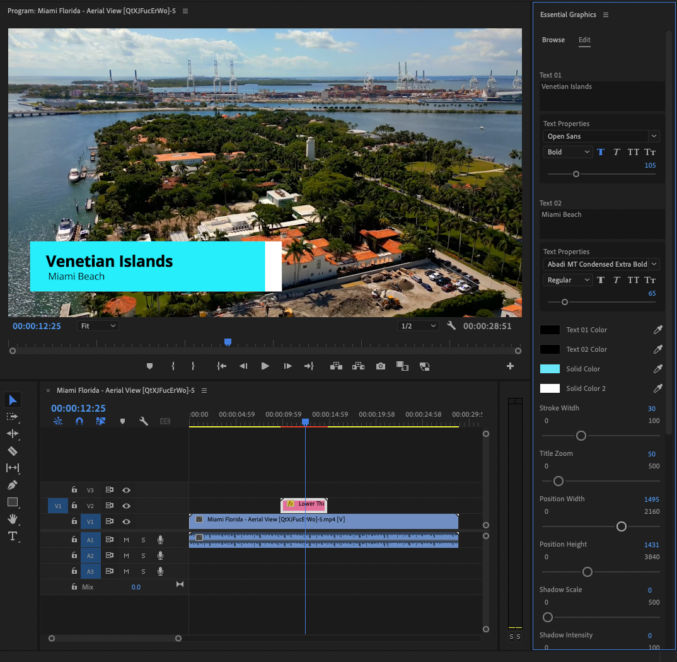
Edit the template
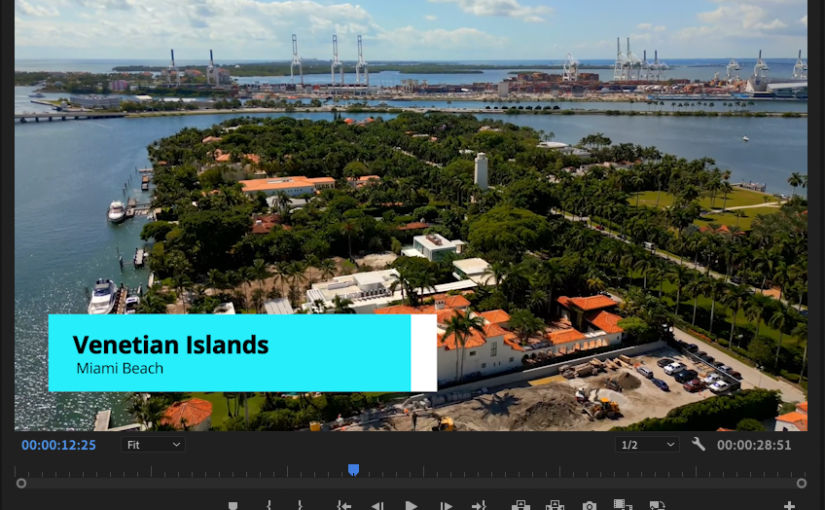
Double-click the motion graphics clip in the timeline (pink bar) to edit the template. Depending on the template, you can edit the text, colors, size, positioning, etc.
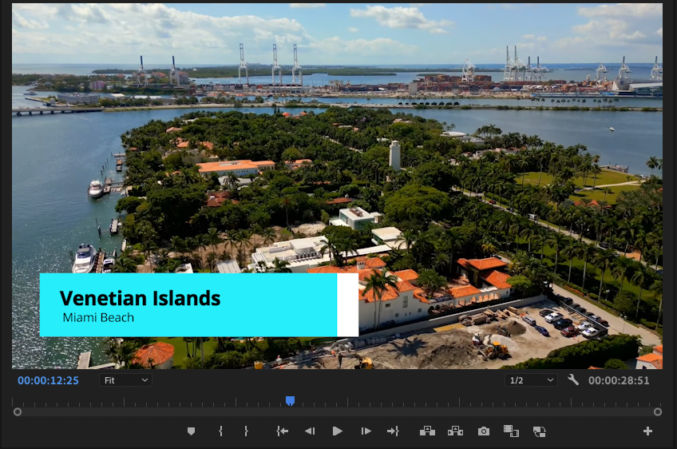
Preview the lower thirds title
Click the play to preview the lower thirds animated title. You may find the duration to be too short.
Extend the duration of the lower thirds title
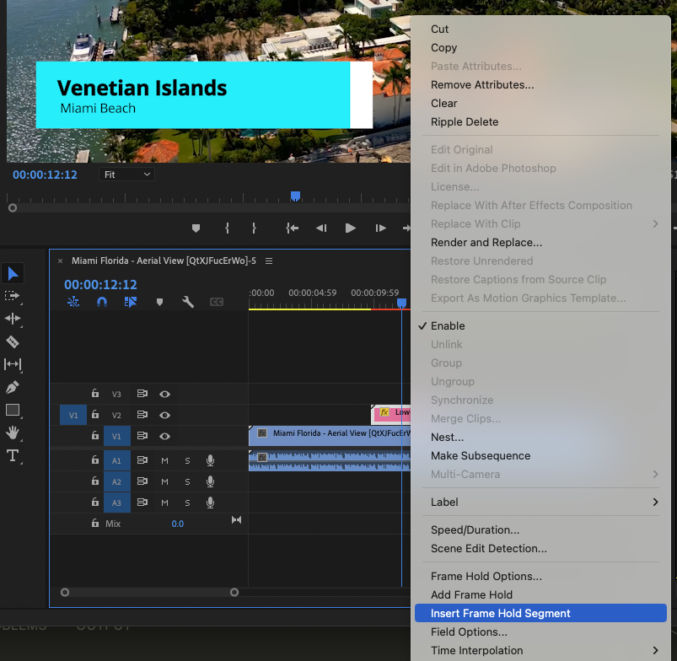
Move the playhead in the timeline to the point where the title text is fully shown and not moving. At that point, right-click on the motion graphic clip in the video track (pink bar) and click on “Insert Frame Hold Segment”.
This will split all clips at that timestamp and the motion graphic clip will be split such that you can extend the middle subclip, which is the clip containing the frame showing the full title text, to increase the duration of the title. You will need to move the right subclip of the animated title to the right to make room to extend the duration of the middle subclip.
For the split video clip, just drag the right clips toward the left clip.
You may end up with something like this.
Preview the animated lower thirds title. If it looks good, export the video. Otherwise, tweak the title further.
The video below is the same video but with the text removed.
Same video with text / watermark removed
We can remove objects like text and watermarks from videos using Adobe After Effects (AE) content-aware fill feature. Here’s how I did it for the video above.
1. Open your video in Adobe After Effects
Choose “New Composition From Footage” and select your video.
2. Shorten work area
The content-aware fill takes a long time to process. To speed up testing, shorten the work area to a 2-second section by dragging the blue start and end markers on the timeline.
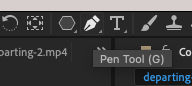
3. Create a mask
Click a tool like the pen tool and create a mask area around the object (in this case, text) you want to remove.
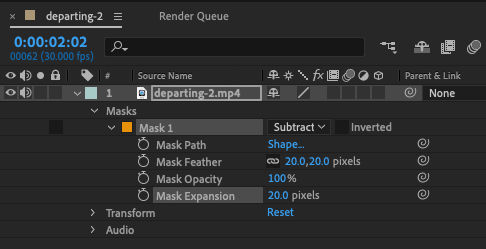
4. Adjust mask settings
In the video track, expand the Masks and select “Subtract”. For the Mask Feature, choose 20 pixels for the vertical and horizontal feather. For the Mask Expansion, choose 20 pixels as well. Play with these settings until you find values that produce good results.
These changes cause the mask to look like this
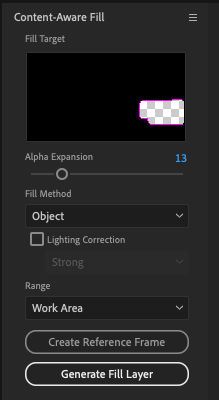
5. Adjust content-aware fill settings
If the content-aware fill pane isn’t open, open it by going to Window > Content-Aware Fill.
For the alpha expansion, I set the value to 13. You can experiment with different values.
For the fill method, choose “Object”.
For the range, choose “Work Area” because we only want to apply the fill to the short 2-second work area for now.
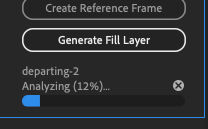
Click the “Generate Fill Layer” button. You will be asked to save the project if you haven’t already done so. You will then see AE analyze and generate the fill layer.
You will see the fill layer above the video layer in the list of tracks / layers.
6. Preview the content-aware fill layer
Click the play button in the preview pane to preview the content-aware fill.
This is how it looks for me. I think that looks good. If it doesn’t look good, go back and tweak some of the previous settings and try again.
7. Apply content-aware fill to the entire range containing the text to remove
Move the blue start and end work area markers to the beginning and end where the object / text you want to remove.
Disable the test content-aware fill layer by toggling the eye icon.
In the content-aware fill pane, click “Generate Fill Layer”. AE will create a new content-aware fill layer above our test layer. If the work area duration is long, this will take time to process.
Content-are fill will go through an analyzing phase followed by a rendering phase.
8. Preview complete content-aware fill effect
Click the play button in the preview pane again to see how the fill effect looks in the entire clip. If it looks good, you can export the video.
9. Export the video
Click File > Export > Add to Render Queue.
If the output location is unspecified, choose an Output To location. Then click the Render button.
Update: Use a reference frame for better results. The more reference frames, the better the results.
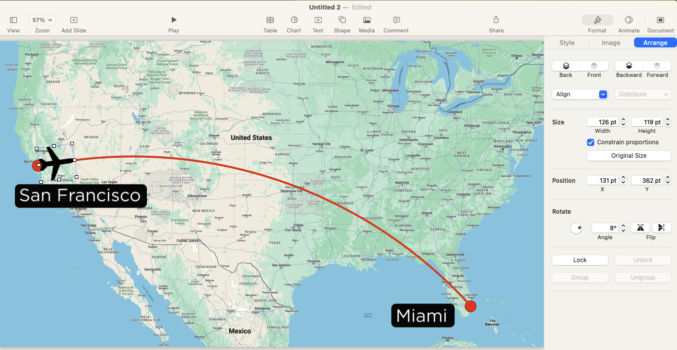
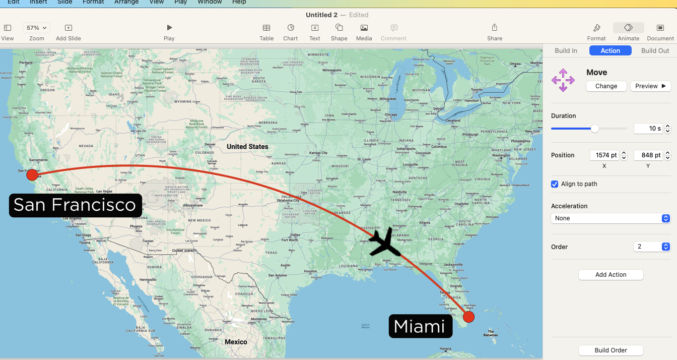
In this post, I’ll show you how to make an animated travel map like the one below using Apple Keynote.
1. Get an image of a map
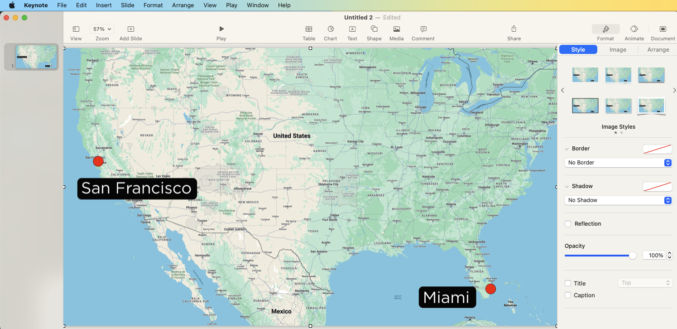
I usually just go to Google Maps, zoom in/out to the area I want to show, then take a screenshot. In this example, I took a screenshot of the USA because I want to show an animated flight path from San Francisco to Miami.
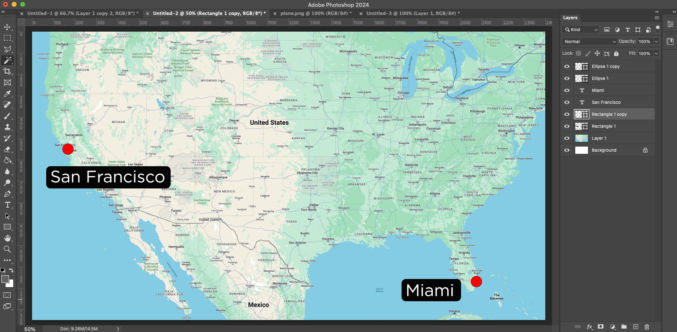
2. Crop map and optionally add labels
Open the screenshot in an image editor (I use Photoshop) and crop to your target video resolution. My target resolution is 1920 x 1080 (standard HD). I also added some red dots where the start and end points will be as well as some city labels.
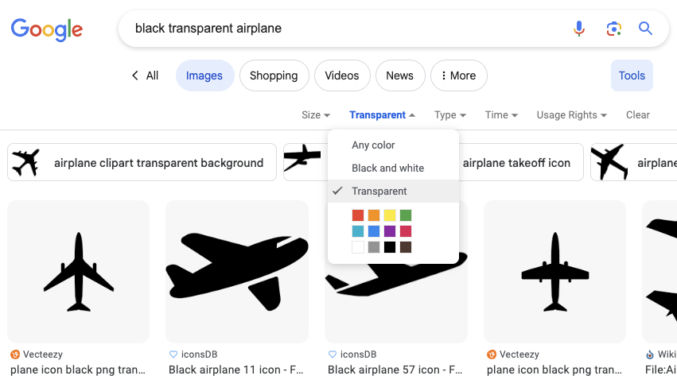
3. Get a transparent image of a plane, car, train, boat, etc
Since I want to show an airplane animate along a path, I looked for an image of one in Google Images. The background should be transparent. In Google Images, you can choose Tools > Color > Transparent to find images on a transparent background.
I chose this image.
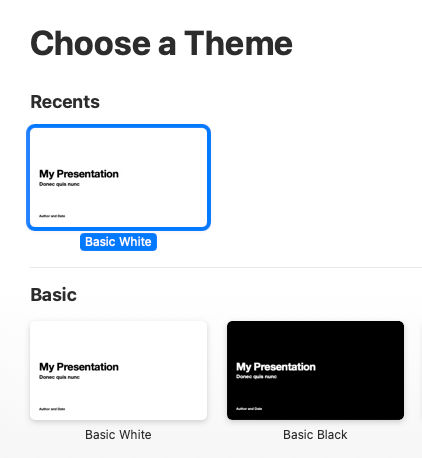
4. Create a blank Keynote presentation
Open Apple Keynote and choose the basic white theme.
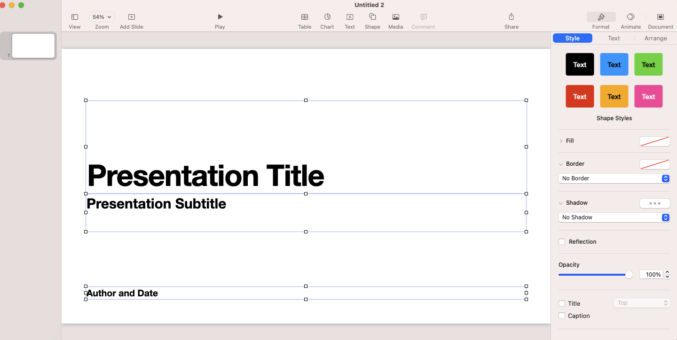
You will get a single slide. Select and delete everything in the slide.
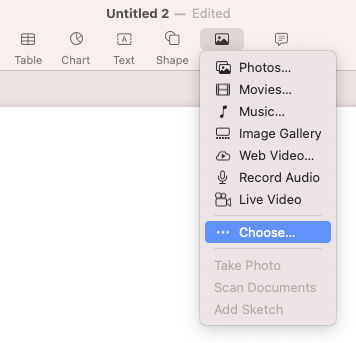
5. Insert background map
Go to Media > Choose and select the background map.
6. Draw a path
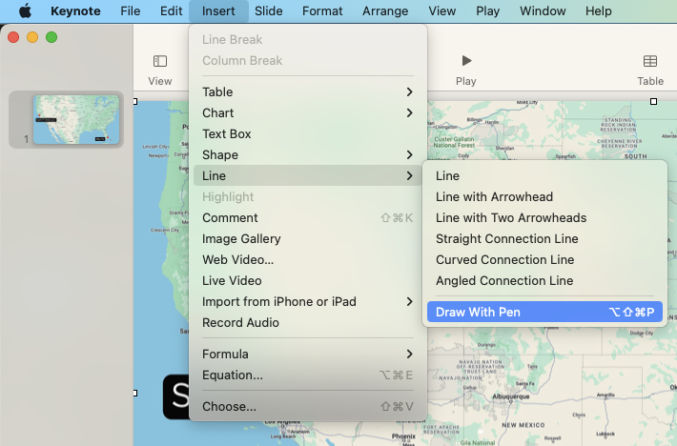
Go to Insert > Line > Draw With Pen and draw your travel path.
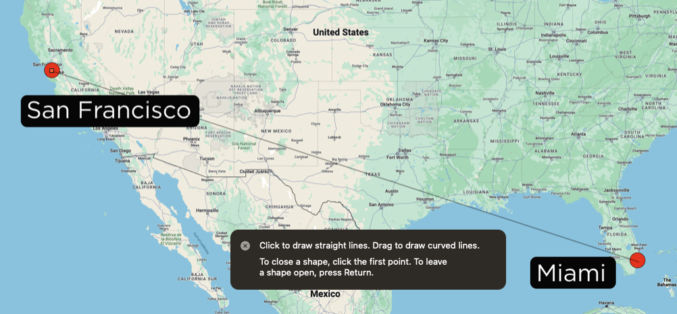
Click on the start point then click on the end point. You will get a straight line.
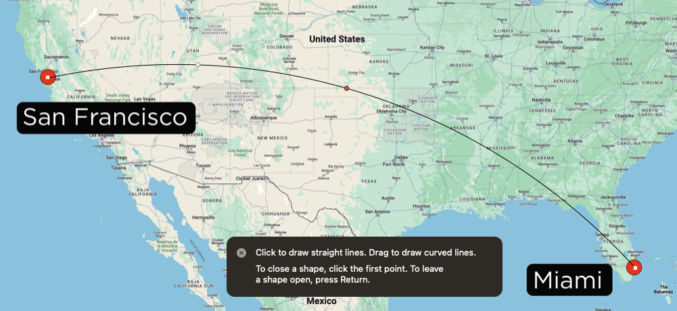
In the middle of the line, there will be a point. Click and drag it up if you want to create a curve. Repeat with other midpoints as necessary.
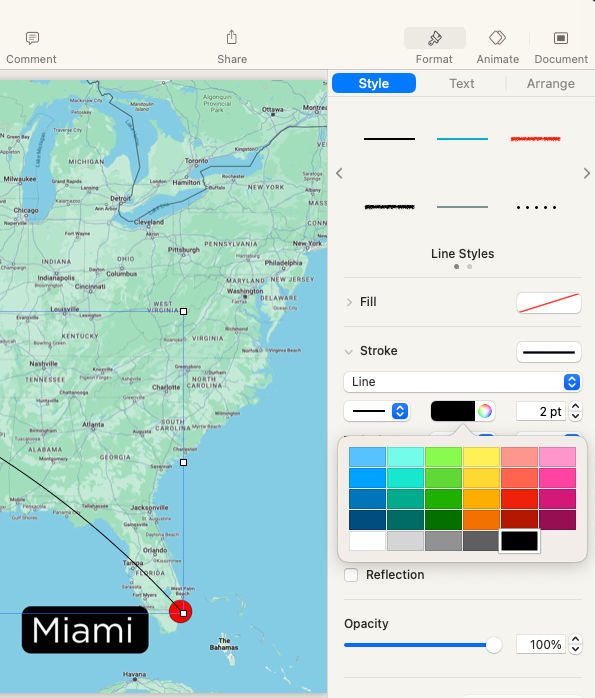
When you’re done, hit the ESC key. We now have our travel path. Let’s change the style of the path. I’m going to make it red and thick. In the right pane, under Format > Style, you can edit the style of the element (curve). I choose a red color that is 7 pt thick.
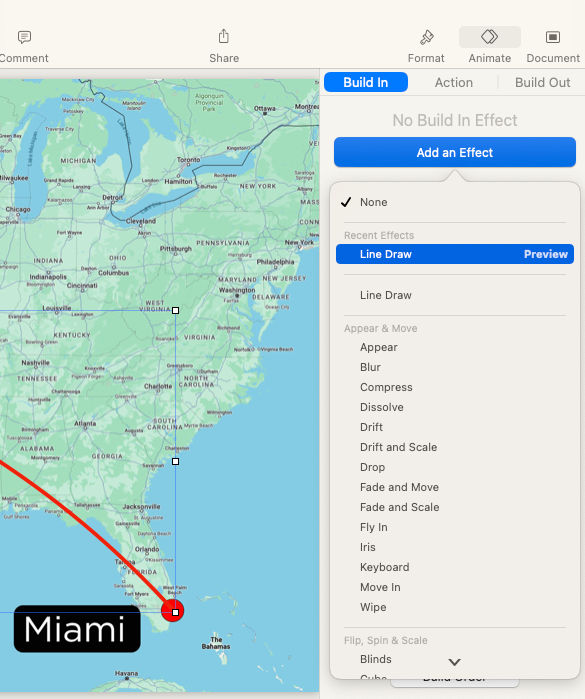
7. Animate the path
In the top right corner, choose the Animate tab and then “Add an Effect” > “Line Draw”.
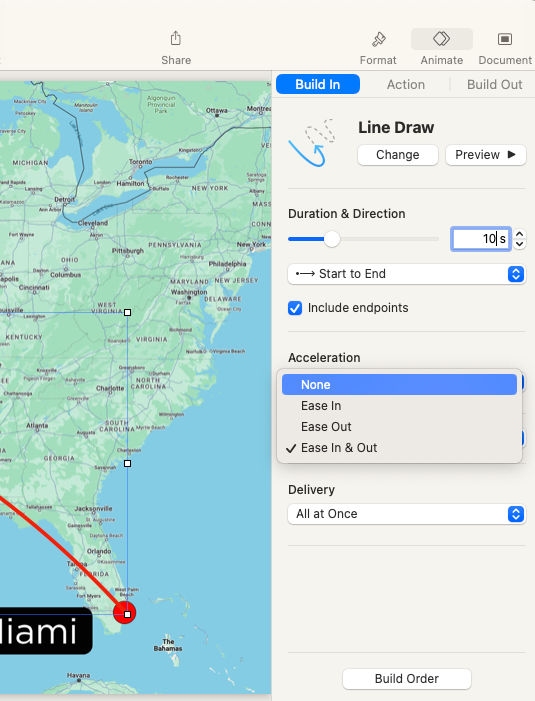
You can then change the default animation from 2 seconds. I changed the duration to 10 seconds so that in my video editor, I can slow it down without it appearing jumpy. I also changed the acceleration to “None”.
Click the “Preview” button to preview the path animation.
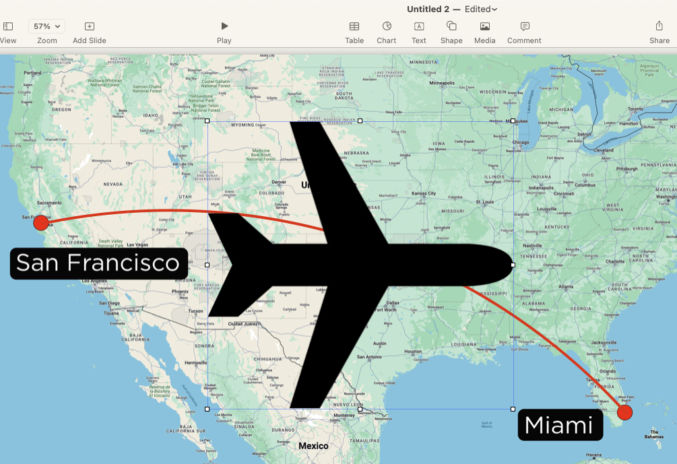
8. Add the airplane image
As in step 5, go to Media > Choose and select the airplane image.
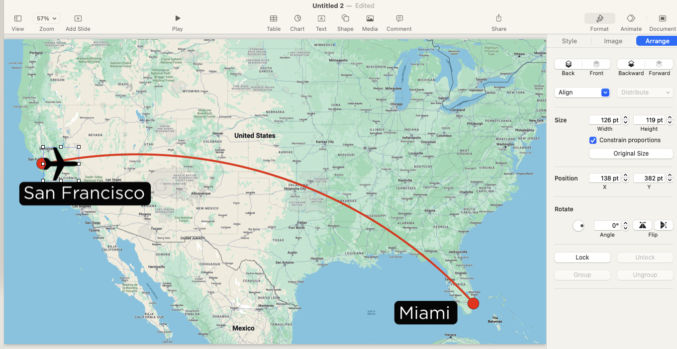
Scale the airplane by dragging one of the corners. Drag the airplane to position it at the start point.
Rotate the airplane. In the top right choose Format > Arrange and adjust the rotation value such that the nose of the plane is aligned with the flight path.
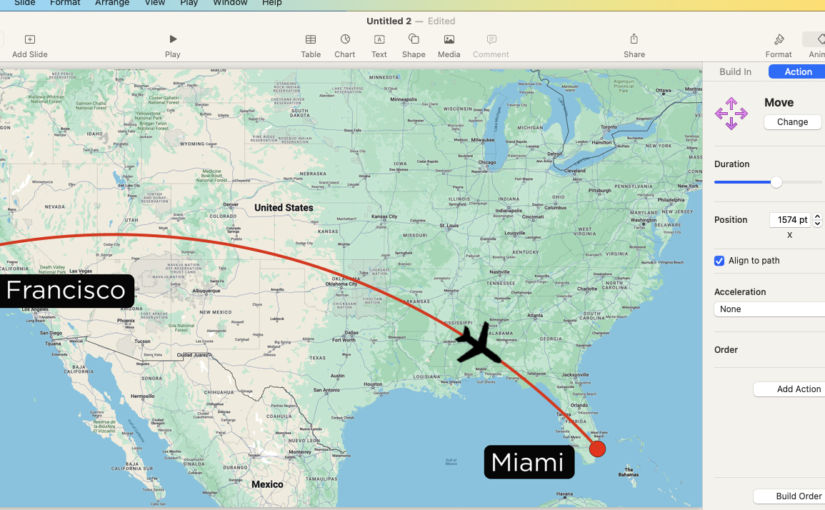
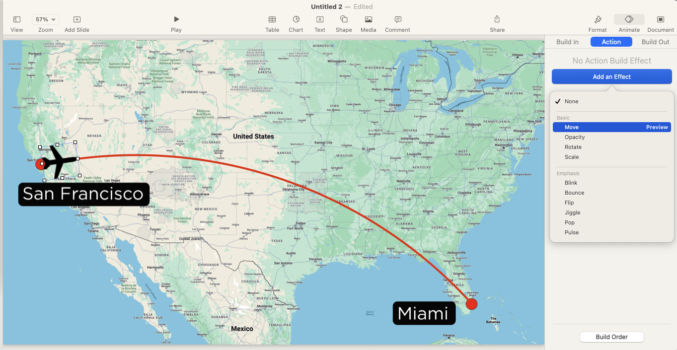
9. Animate the airplane
In the top right, click Animate > Action > Add an Effect > Move.
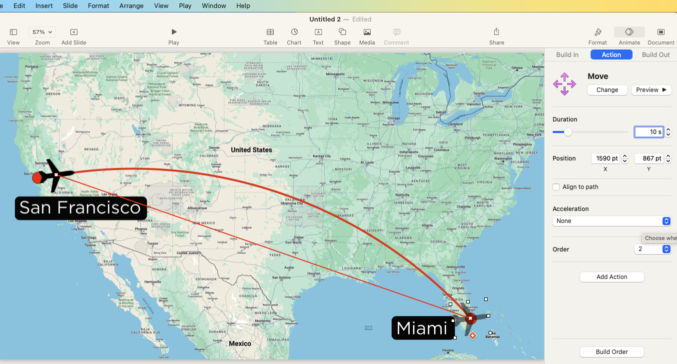
Drag the airplane to the end point. Set the duration and acceleration to match that of the flight path (10 sec, None).
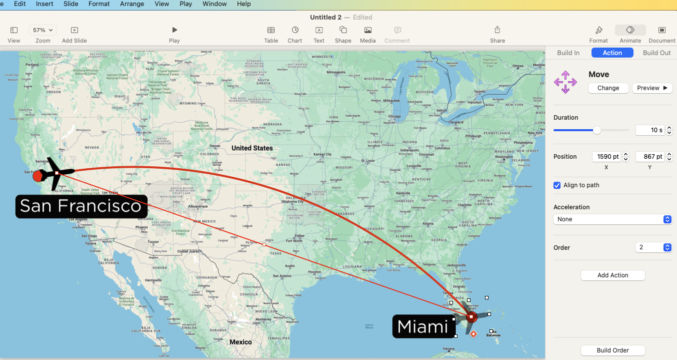
Click Preview to preview the animation. The airplane doesn’t yet follow the flight path. Check the “Align to path” checkbox. A point will appear along the line between the airplane’s start and end points. Drag that middle point to where the flight path is.
Click Preview again. You will see the airplane animate along the flight path.
10. Animate the flight path and airplane at the same time
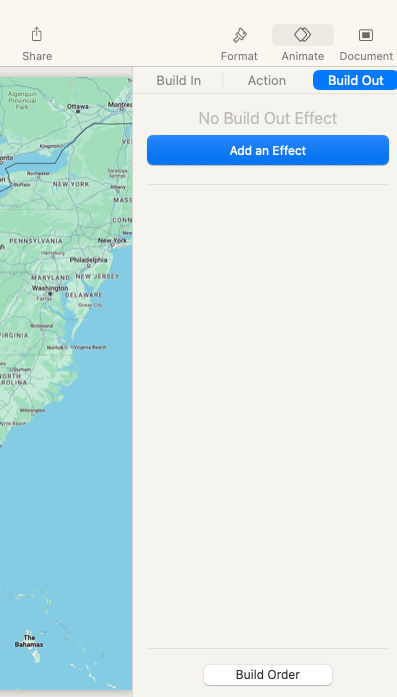
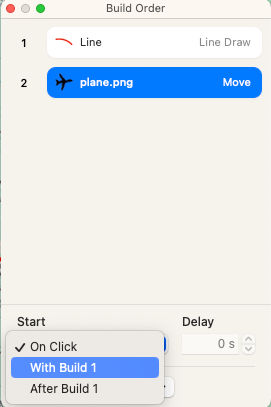
In the top right, click Animate > Build Out > Build Order.
You will see a list of all animation effects. The first animation is the line (flight path). The second is the plane. Choose te second animation and then under “Start”, select “With Build 1”.
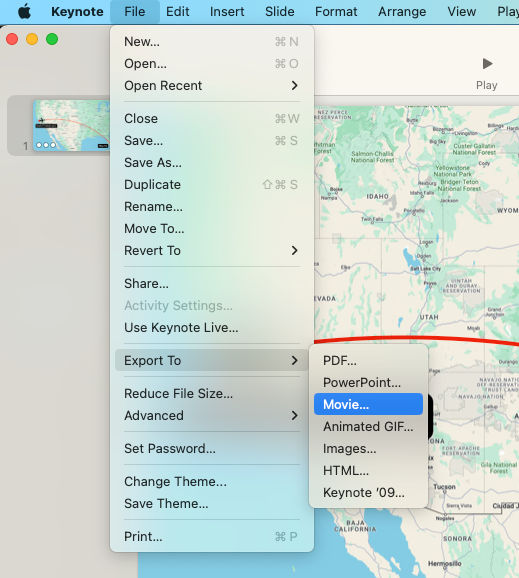
11. Export the animation
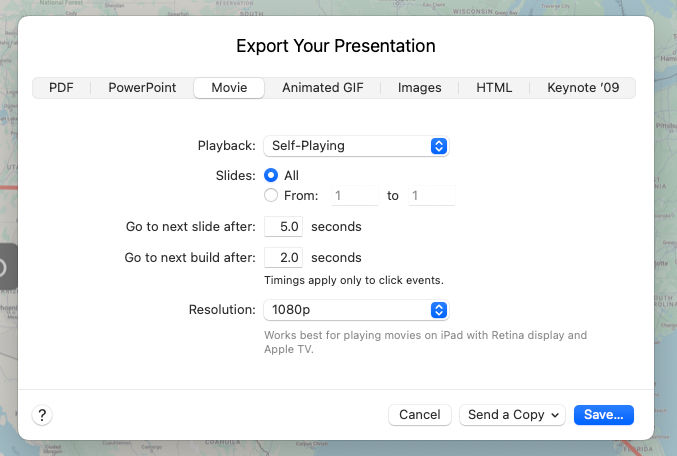
Choose File > Export To > Movie.
Since there’s only 1 slide, you can leave “Slides” to “All. The resolution should match that of the background image (1080p).
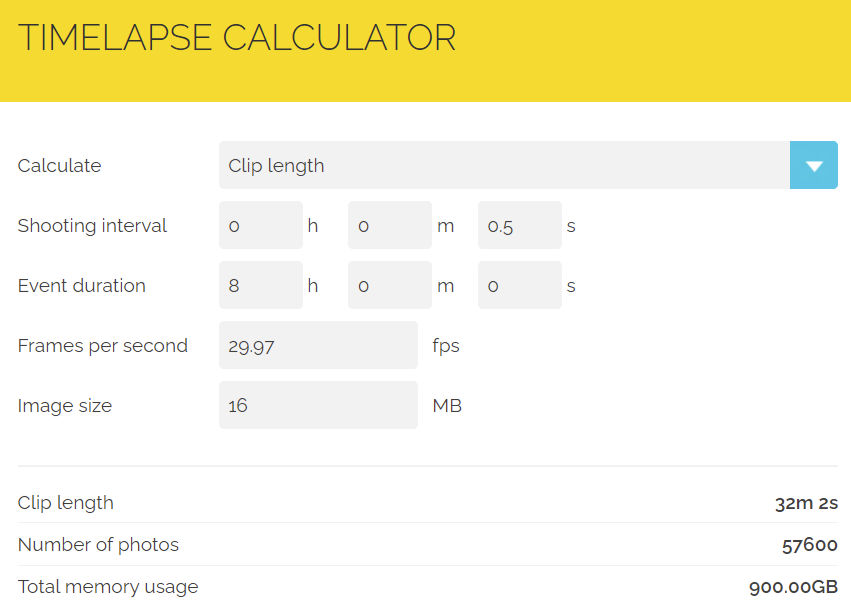
You can create timelapse videos using the Insta360 ONE X2/3. The resulting timelapse will be a 360-degree video that you can edit the same way you can non-timelapse videos. Unfortunately, the interval setting between when a picture is taken to create the timelapse can only be set from your phone. The interval options are 0.5s, 1s, 2s, 4s, 10s, 30s, 1min, 2min. Note that standard video is 29.97s, which is like making a timelapse video where the interval between still images is 1/29.97s or 0.03s. According to this timelapse calculator, if you film for 8 hours straight (event duration) with a shooting interval of 0.5s, then the camera will take 57600 photos. If you want the resulting timelapse video to have a frame rate of 29.97 fps, then the resulting timelapse video duration will be 32m 2s long.
Here are the number of photos and video durations for an 8-hour event duration for the shooting intervals supported by the ONE X2.
Interval
Number of Photos
Video Duration
0.5s
57600
32m 2s
1s
28800
16m 1s
2s
14400
8m
4s
7200
4m
10s
2880
1m 36s
30s
960
32s
1min
480
16s
2min
240
8s
I wouldn’t choose a timelapse interval greater than 10s since an 8-hour-long filming session would produce a video that’s longer than 1m 36s. If 1m 36s is too long, then in post-production, whether in Insta360 Studio or some other video editing program, you can speed up the timelapse to produce an even shorter video.
The battery that comes with the Insta360 ONE X2 is good for 80 minutes. You can buy additional batteries, but if you’ll be recording a long timelapse video, it would be annoying to have to keep changing the battery every 80 minutes. In this case, you’re better off recording with the USB charging cable plugged in. To prevent overheating, remove the battery. The camera can still operate and record while plugged in.
When taking a 360-degree timelapse video, make sure the following options are set
360-degree mode (not 150-degree mode)
Left to right: 360-degree mode, panorama mode, 150-degree wide-angle mode
Video timelapse mode
Slow Motion Videos
If you want to make a slow-motion video, e.g. a real estate tour video, then you definitely want to record at a high frame rate like 60 fps. Then, in your video editor, slow down the video and export it at 30 or 60 fps. If the original video is recorded at 30 fps, then the slowed-down video will be choppy.
https://www.youtube.com/watch?v=6ywQnh2gmX0
Action Videos
When filming action scenes, it’s better to record at a high frame rate so that playback will be sharp, more fluid, and not blurry.
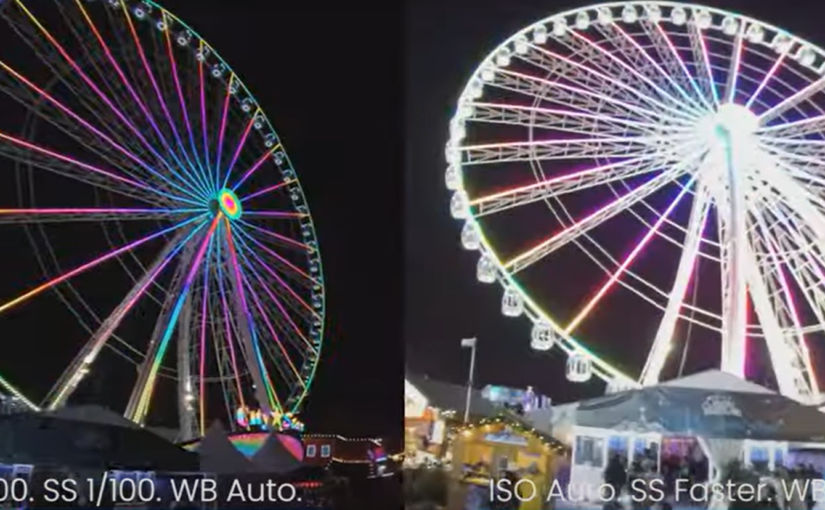
Low-Light / Night Scenes
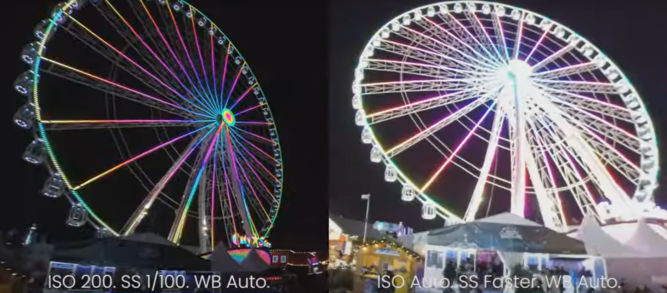
When filming in low light like at night, you’ll get much better results if you manually adjust the exposure.
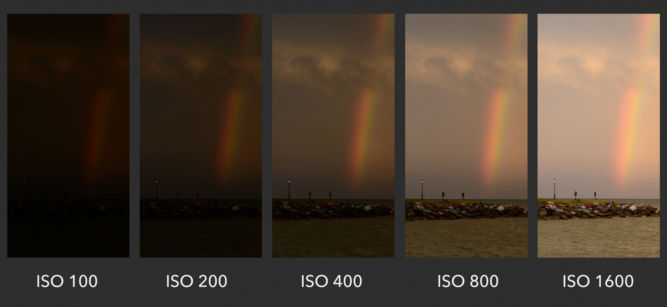
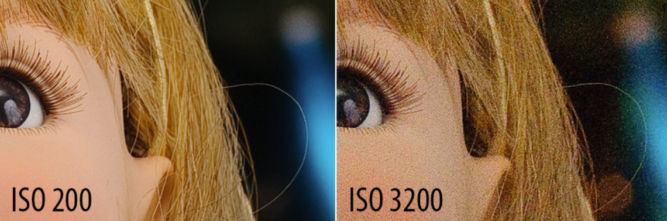
ISO
ISO is a camera setting that will brighten or darken a photo.
However, if you increase the ISO too high, you’ll see a lot of grain.
You should only raise your ISO when you are unable to brighten the photo via shutter speed or aperture instead (for example, if using a longer shutter speed would cause your subject to be blurry). The ISO 200 image on the left was brightened with a long shutter speed.
Shutter Speed
Shutter speed is responsible for two particular things:
changing the brightness of your photo and
creating dramatic effects by either freezing action or blurring motion.
Shutter speed is the length of time in seconds the camera shutter is open, exposing light onto the camera sensor. Essentially, it’s how much time your camera spends taking a photo. When the shutter is open, light passes through the lens and is collected on the camera sensor. The button that fires the camera is also called “shutter” or “shutter button,”
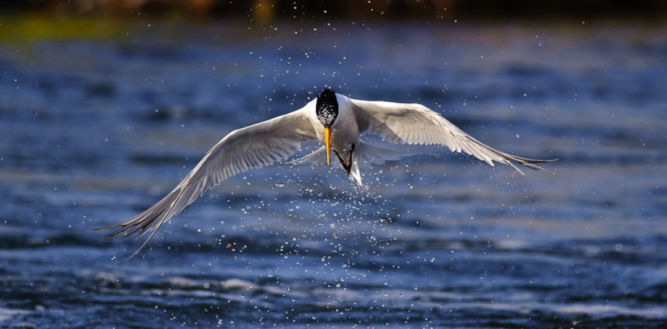
Fast / Short Shutter Speed > Freezes Action
A fast shutter speed is a small fraction of a second, like 1/250th of a second.
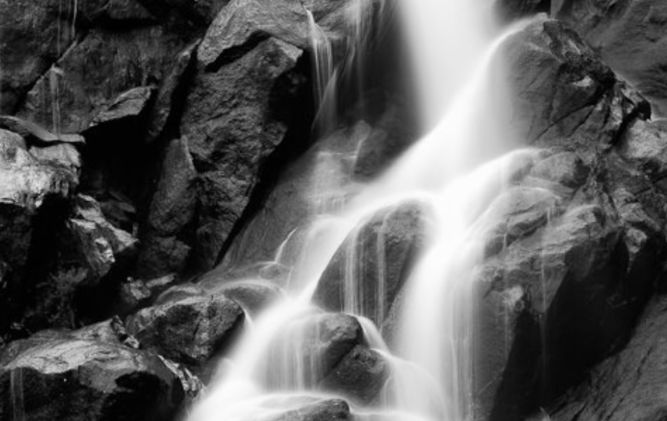
Slow / Long Shutter Speed > Motion Blur
A long shutter speed is 1 second or longer. A slow shutter speed is like 1/2 or 1/4 of a second.
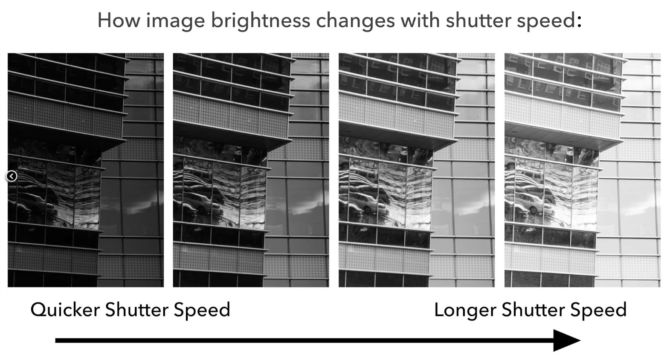
Shutter Speed and Exposure (Brightness)
If you use a long shutter speed, your camera sensor gathers a lot of light, and the resulting photo will be quite bright. If you use a quick shutter speed, your camera sensor is only exposed to a small fraction of light, resulting in a darker photo.
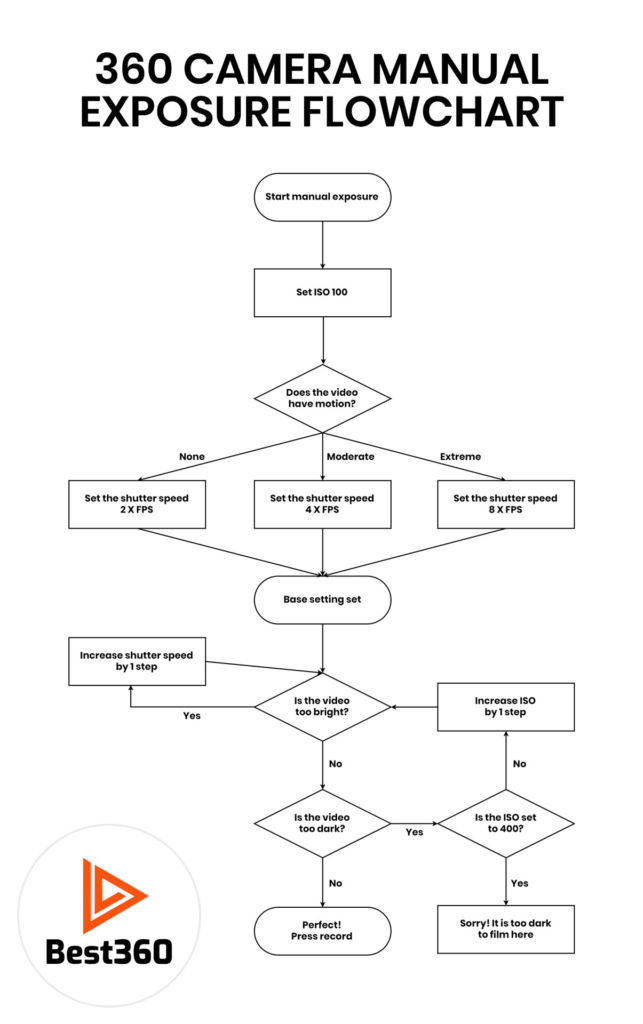
The following flowchart can help you tweak the ISO and shutter speed.
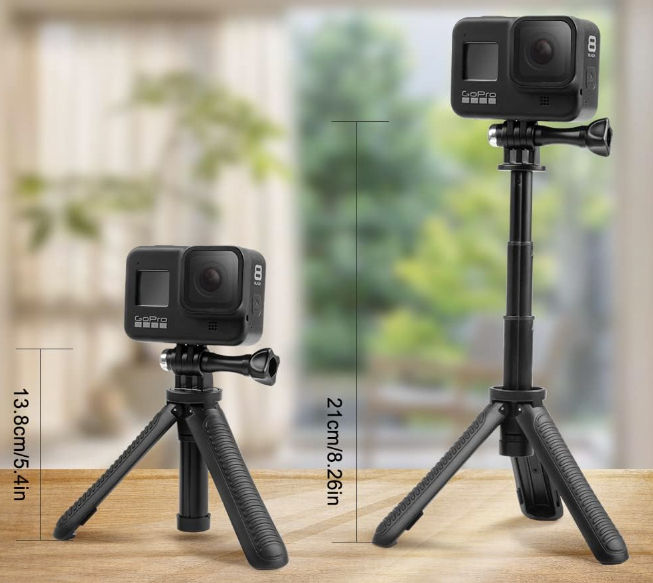
Following are how some videos look when using each stick.
3.4′-long selfie stick, front, face level
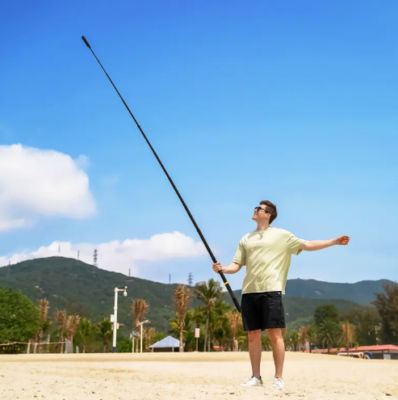
10′-long selfie stick extended to about 5′, front, face level
3.4′-long selfie stick, front, stomach level
3.4′-long selfie stick, 45-degree angle, face level
3.4′-long selfie stick, side, face level
3.4′-long selfie stick, side, face level
3.4′-long selfie stick, front, feet level
3.4′-long selfie stick, straight up
10′-long selfie stick, straight up
10′-long selfie stick, up, back
10′-long selfie stick, up, side
10′-long selfie stick, front spin, face level
10′-long selfie stick, low to high, facing down
10′-long selfie stick, low to high, facing up
Selfie Drone
For comparison, following are some videos taken with the Hover Air X1 selfie drone.
Bird’s Eye, no spin, 10 feet
Bird’s Eye, no spin, 10 feet, return
Bird’s Eye, no spin, 50 feet
Bird’s Eye, no spin, 50 feet, return
Bird’s Eye, fast spin, 50 feet
Bird’s Eye, fast spin, 50 feet, return
Bird’s Eye, slow spin, 50 feet
Bird’s Eye, slow spin, 50 feet, return
Dolly track
Dolly track
Follow
Hover with target tracking
Orbit, 5 feet
Orbit, 20′
Zoom out, down
Zoom in, down, return
Zoom out, flat
Zoom in, flat
Zoom out, up
Zoom in, up
Zoom out, up, far
Zoom in, up, far
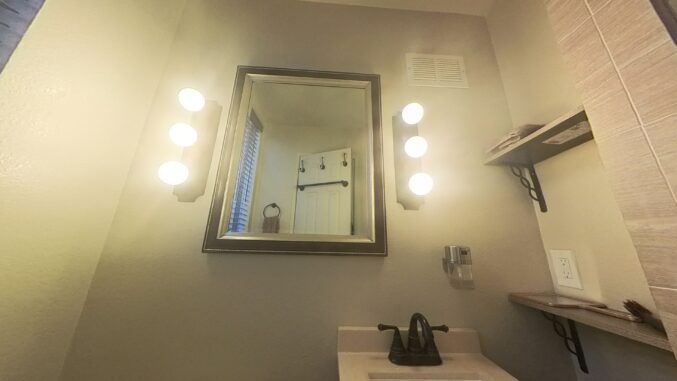
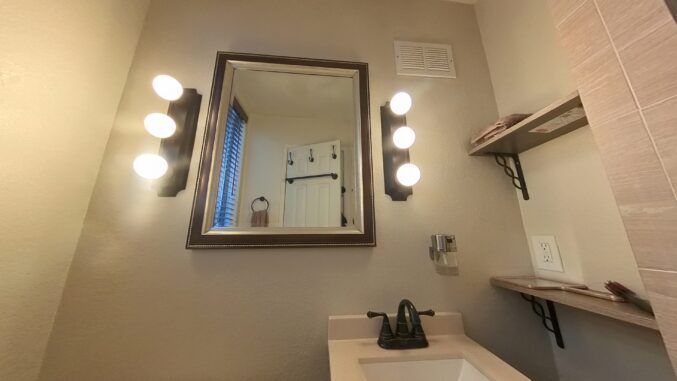
Lens Care
The Insta360 X2/X3 camera has protruding lenses on two sides. As such, the lenses can easily get scratched, so extreme care must be taken to prevent that from happening. Also, before shooting, you should always clean the lens to remove any dirt or fingerprints. A dirty lens can easily result in a blurry shot. Following are comparisons of image quality when different lens conditions.
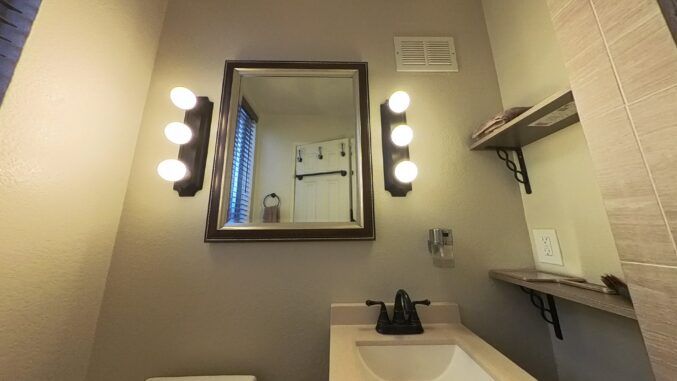
Brand New and Clean Lens
The image quality is relatively sharp.
Brand New Lens But Full of Fingerprints
The image is blurry, especially around the lights.
Scratched But Clean Lens
Despite being cleaned with a new cloth, the image is partially blurry due to the scratched part of the lens.
Here’s a collection of mounts for action cameras like the Insta360 X3 that I’ve found useful. These accessories can mostly be used with other cameras as well.
This clamp is lightweight. Since it’s curved, it’s ideal for clamping to cylindrical objects like bike handlebars. You can connect it to a long selfie stick or a 1/4″ rod that accepts a 1/4″ screw.
Example Use Cases
Clamp to a bike handlebar with or without a short selfie stick or rod
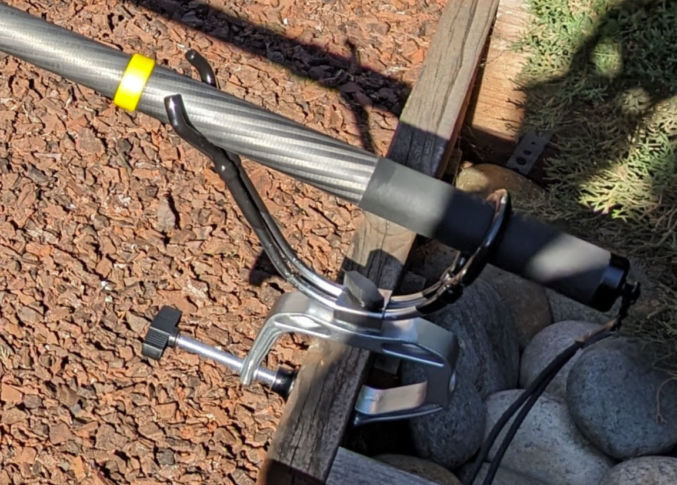
This clamp is designed for fishing poles, but it can be used for selfie sticks because selfie sticks are like fishing poles. You can adjust the angle of the stick.
Example Use Cases
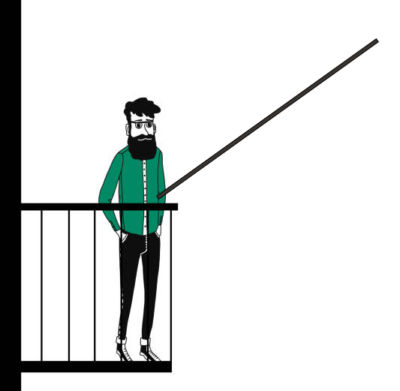
Secure to cruise ship railing and insert 10′ selfie stick to get drone-like footage.
Medium (3.4′) Invisible Selfie Stick With Tripod and Invisible Quick Release Adapter
This selfie stick is invisible when used with the Insta360 X3 camera. To quickly attach and remove an Insta360 X3 camera, use the invisible quick release adapter designed specifically for the Insta360 X3.
Example Use Cases
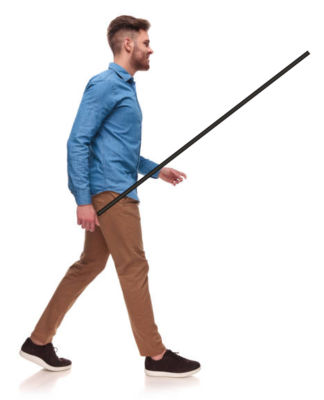
Walking around
Placing it on the floor / ground using the tripod while you perform an activity, e.g. painting a room
When walking, I find it best to keep the camera at face level, unless you want to create some interesting perspectives like positioning the camera near your feet.
If you’re worried about dropping your selfie stick and losing it, you can attach a 1/4″ camera screw to the bottom of it and a wrist lanyard to the screw.
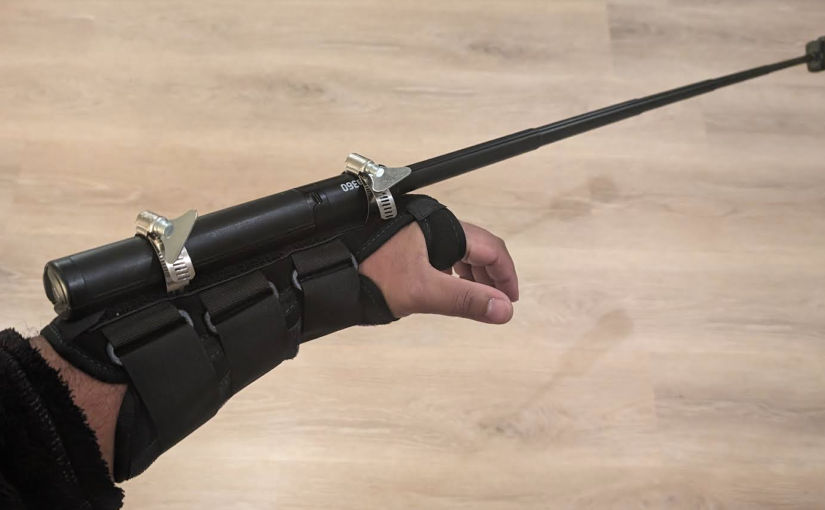
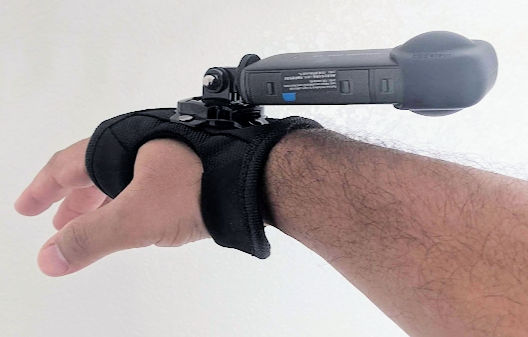
Having a selfie stick extended away from you allows you to get shots that look as if someone is filming you. You can also get more of yourself in the shot. In certain situations, however, you may not be able to hold the stick in your hand. That’s when having a forearm mount comes in handy. Since no one makes these, I had to engineer one myself using a forearm brace and an adjustable clamp.
The brace comes with a thin aluminum bar that is inserted in a pocket at the top of the brace. Using a utility knife, I had to make minor incisions to be able to insert the clamp into and underneath the aluminum bar.
At the front of the brace, I wasn’t able to slide the clamp underneath the bar, so I trimmed the bar to make it a bit narrower.
Like this.
This is the finished product.
The metal bar and clamp can cause discomfort on the top of your hand, especially when the selfie stick is extended and is shaking up and down. To address this, you can simply slide a dishwashing sponge above your hand as shown below to act as a cushion.
Example Use Cases
Any time you want to extend the selfie stick and you can’t mount it on something else and you need your hands free, e.g.
when you are driving a jet ski
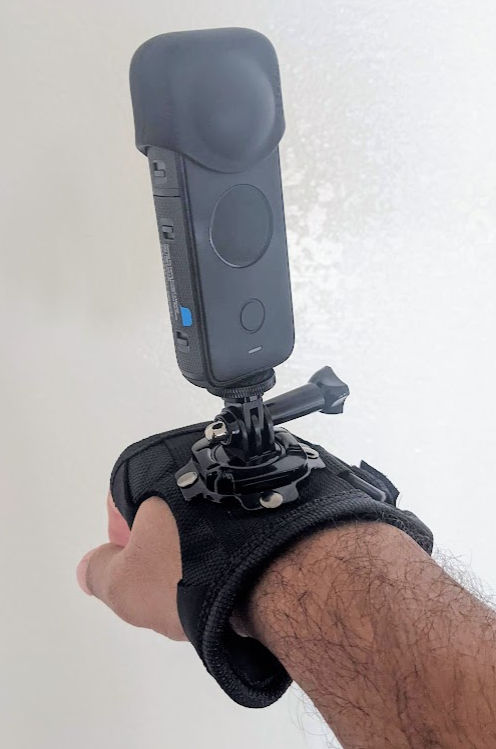
Wrist Mount
If the forearm mount is unavailable or can’t be used, then you can use a wrist mount. This is not as good as the forearm mount because the distance from the camera to your face is just the length of your arm extended.
This mount is very sturdy, but the handlebar clamp opening may be too big for some handlebars. In that situation, you can wrap some rubber around the handlebar, which will also protect it from damage. This mount includes the selfie stick.
This mount has a small footprint and includes a very strong magnet. You can add one or more 1/4″ rods to it. I find this setup particularly useful when eating at a restaurant. The mount doesn’t take a lot of space and it positions the camera high enough that you can film everyone’s food and their faces.
This mount can also stick to any metal surface like the side of a refrigerator.
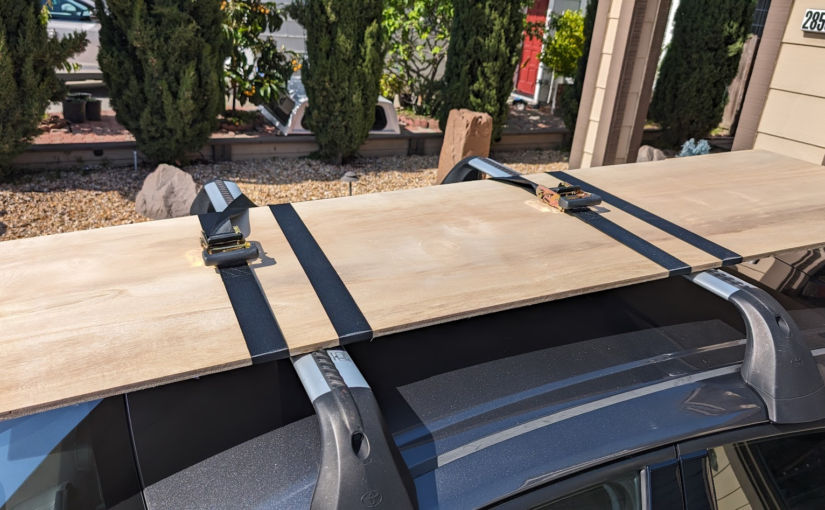
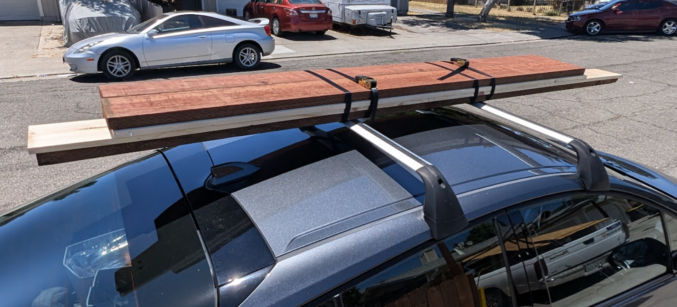
If you’re out and about and want to stand your selfie stick on the ground, you can easily do that with the 3.4′ stick with built-in tripod. But, if you try that with 10′-long selfie stick extended at max length, then there’s the risk of it falling and destroying your camera. In this case, one thing you can do is strap the stick against an object like a rail. You can also try to use a c-clamp to clamp onto something flat and then strap the selfie stick to the clamp.
There are many adjustable and removable straps you can use, including
According to the Insta360 ONE X2 manual, you must use a UHS-I Micro SD card with a V30 or above speed class and exFAT format. UHS-II and UHS-III Micro SD/TF cards are not compatible with ONE X2. You can find V30 cards on Amazon. Note that the U3 symbol in the image below doesn’t mean UHS-III but rather U3. According to Wikipedia, U3 has to do with software rather than speed.
The cards below have been tested to work well with ONE X2 and X3.
SD Card
Model Number
Capacity
Speed Class
Sandisk Extreme V30 A1
SDSQXVF-032G-GN6MA
32G
V30
Sandisk Extreme Pro V30 A1
SDSQXCG-032G-GN6MA
32G
V30
Sandisk Extreme Pro V30 A1
SDSQXCG-064G-GN6MA
64G
V30
Sandisk Extreme V30 A1
SDSQXAF-128G-GN6MA
128G
V30
Sandisk Extreme V30 A2
SDSQXAF-128G-GN6MA
64G
V30
Sandisk Extreme V30 A2
SDSQXA1-256G-ZN6MA
256G
V30
Sandisk Extreme Pro V30 A2
SDSQXCZ-1T00-ZN6MA
1TB
V30
The first character of the 3rd part of the model number may differ, e.g. “G” in GN6MA vs “Z” in ZN6MA. According to this forum, that just identifies a different manufacturer.
The last character of the 3rd part of the model number may differ, e.g. “A” in GN6MA vs “N” in GN6MN. “A” means it comes with an adapter and “N” means it doesn’t.
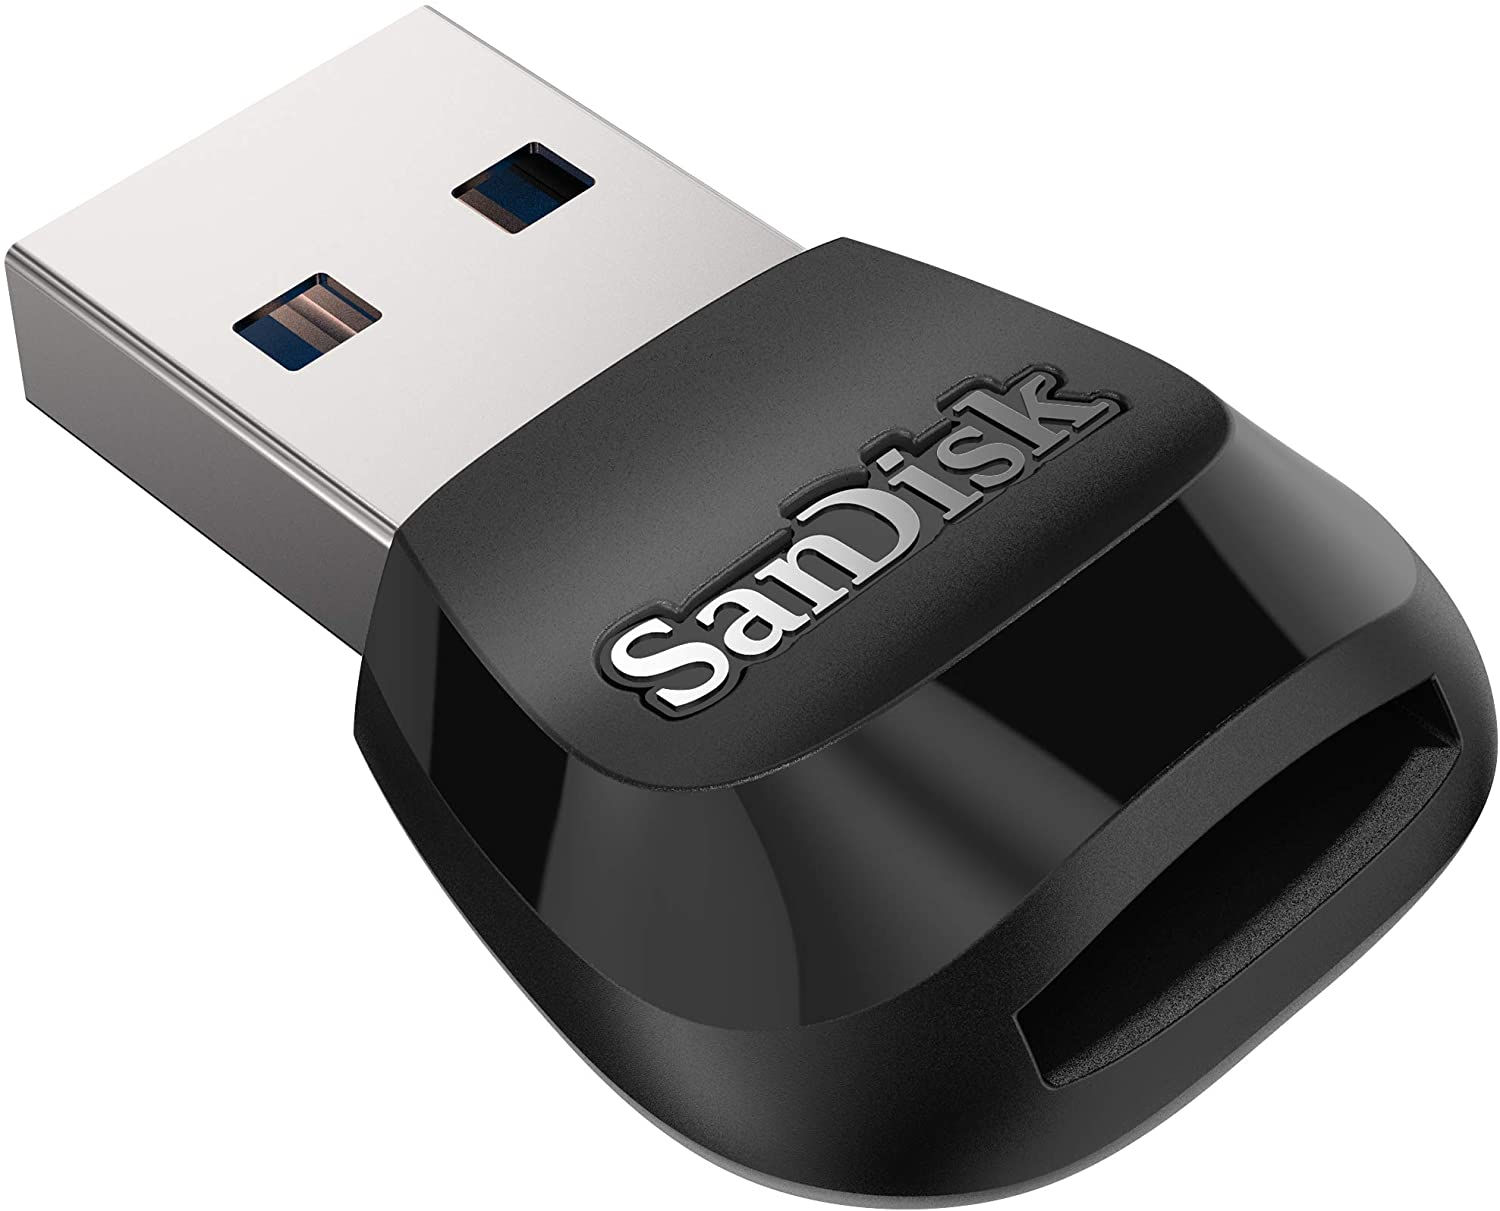
SanDisk MobileMate USB 3.0 microSD Card Reader
Transferring video files from the Insta360 ONE X2 to your computer can be really slow. To speed this up, use a USB 3 card reader. I use this one: SanDisk MobileMate USB 3.0 microSD Card Reader- SDDR-B531-GN6NN. It supports transfer speeds of up to 170 MB/s. With USB 3.0, move content up to 10x faster than USB 2.0 readers.
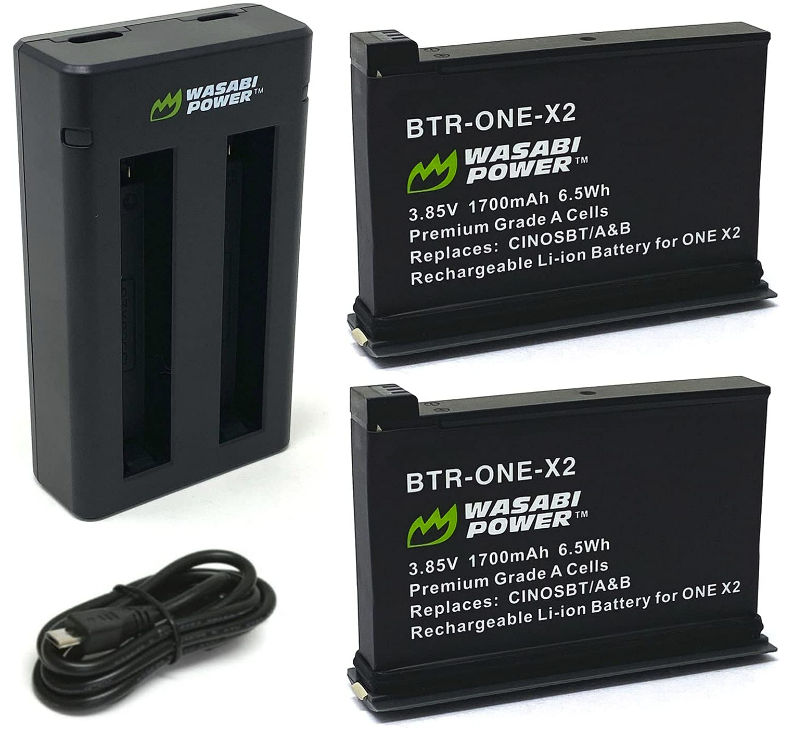
Extra Batteries + External Charger
The battery that comes with the Insta360 ONE X2 is good for 80 minutes. It may be a good idea to buy additional batteries just in case. I bought a pack of 2 batteries on Amazon. It comes with a charger and the batteries work.
Mount Adapter
For the adapters, this one is better because you can tighten it with the camera facing any direction you want.
Waterproof Pouches
When you’re swimming, having a waterproof pouch to keep your camera dry can give you peace of mind. Though the pouches pictured below are for phones, they fit the Insta360 X2/3 cameras as well.
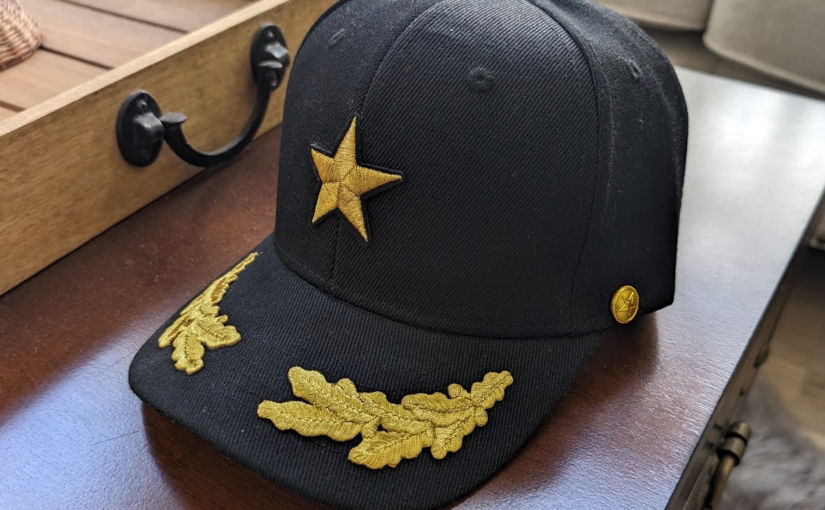
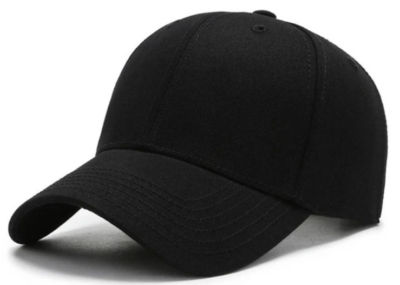
While there are many services that let you buy a hat and customize it, you may not like the style, quality or fit of the hat. Also, you are limited in how you can customize it. In this post, I explain how I customized a hat I already own. Since I’m planning to go on a cruise, I wanted a hat that kinda looked like a captain’s hat. My preferred hat is a black cap that I get at a nearby mall.
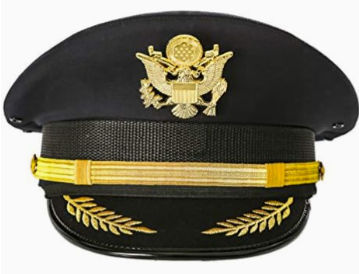
I wanted to customize it with design elements from the captain hat shown below.
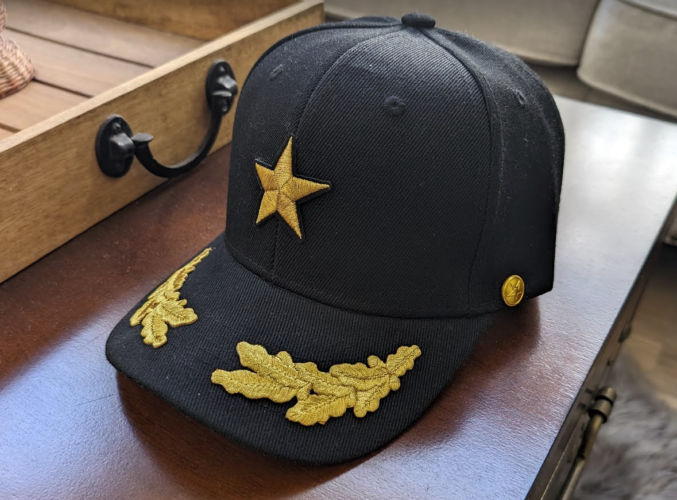
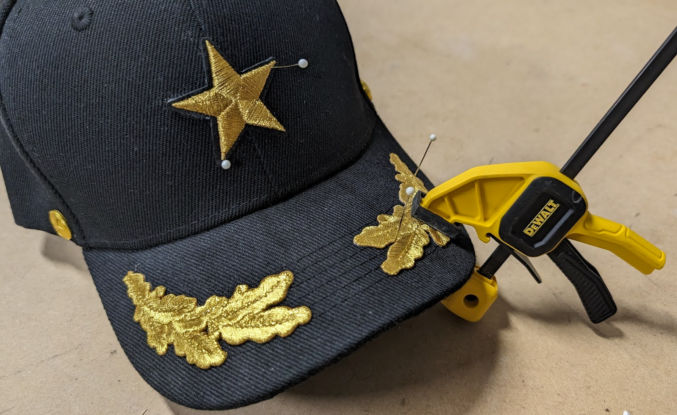
After much research, trial and error, I ended up with this:
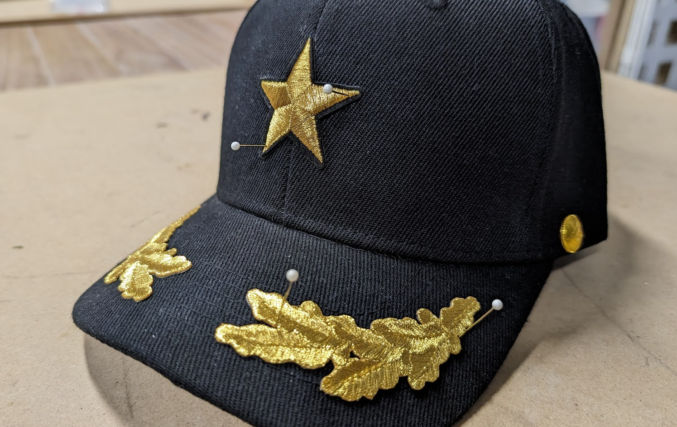
Place the patches on the hat and secure using sewing pins.
When you know where the patches should go, put sewing pins in hat at certain points along perimeter of patches to guide where the patches should go.
Add glue to the back of the patches and place patches on hat.
Insert sewing pins into hat through patches to secure patches in place. If necessary, clamp patches to hat using a clamp.
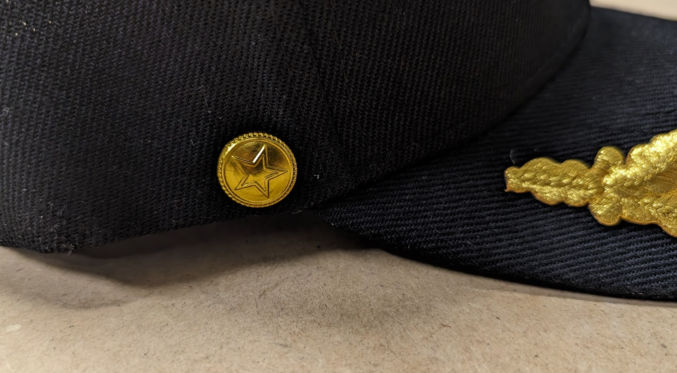
Decide where to put the gold buttons.
Drill hold in hat where gold buttons would go.
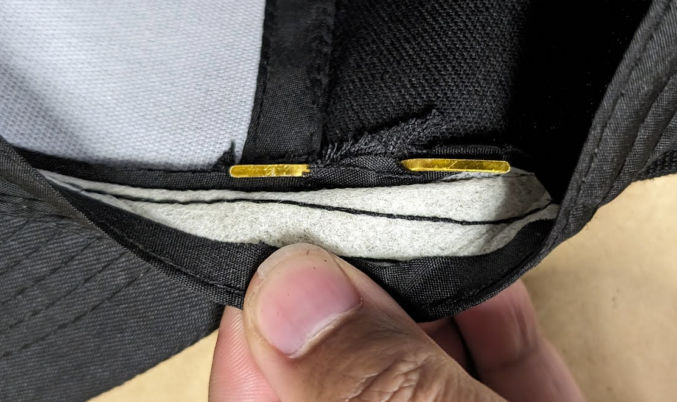
Fasten gold buttons to hat via the holes you just created.
For the buttons, I actually took mine off of a cheap hat I had bought on Amazon. The buttons have 2 flat metal pins that can be folded to secure the buttons.