One of my rental properties is a triplex in Stockton, California. The roof uses standard residential shingles and has an area of about 4000 square feet. I got a roof replacement quote from a licensed contractor that specializes in roofing on May 10, 2023, for $28,270. Here are the details:
- Tear off existing 1 layer of composition roofing
- Any dry rot will be an extra charge to replace. Dry rot repair labor rate is $85.00 per hour per man plus material.
- Roofing will be limited lifetime Certainteed Landmark Solaris cool shingle over one layer of Certainteed Roof Runner synthetic underlayment.
- Venting per title 24 codes. 11 intake vents and 11 exhaust vents.
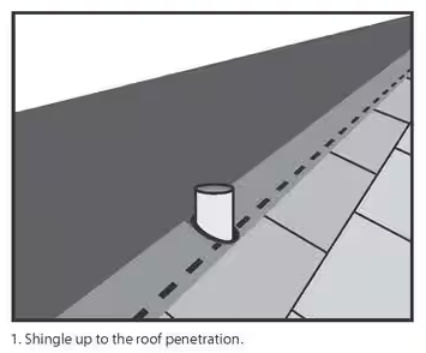
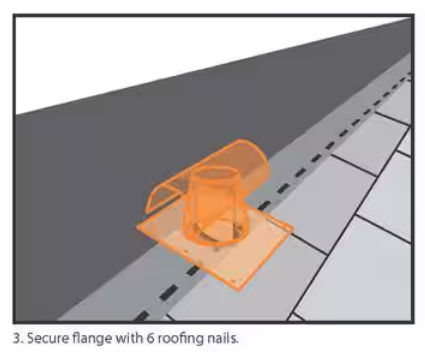
- New pipe flashing painted to match roof color.
- Certainteed Sure-Start 4 Star Warranty (10-yr. labor warranty % 50-year material warranty)
- New TPO membrane roofing in dead valley
- Includes building permit and dump fees.
- New 5″ gutters with new down leaders an extra $3700
I got a quote from an all-purpose contractor who could do the job for $26,000. Here are the details:
- Replace roof with California Cool shingles
- Replace any dry rot
- Underlayment would be felt paper, not synthetic underlayment
Since I think these quotes are outrageous, I decided to replace the roof myself with some friends, one of whom happens to be a roofer. Here’s how I did it.
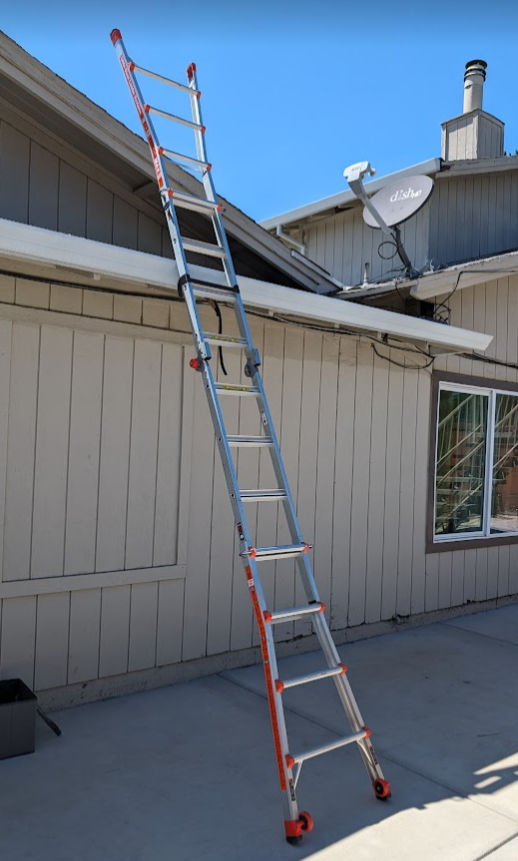
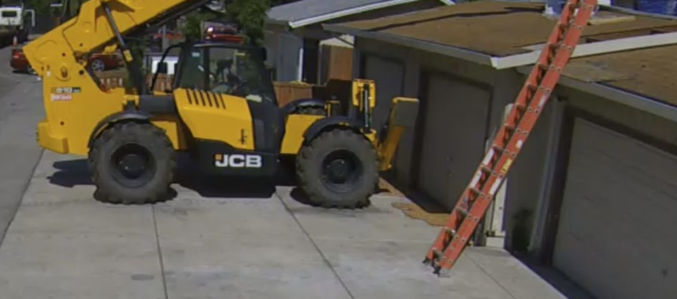
Set up a ladder
A ladder must be on the job site for the Building Inspector’s use. The ladder must be set up to meet the following minimum standards.
- The ladder shall meet OSHA Standards and be rated a minimum of 250 lbs.
- Find a level, hard, slip-resistant spot on the ground free of debris to set the ladder feet on.
- The ladder shall extend no less than 36 inches above the edge of the roof at the point providing access and secured (tied off).
- Place the feet of the ladder at a distance of 1⁄4 the height of the ladder away from the building. In other words, if the ladder is 8 feet tall, place the bottom of the ladder 2 feet away from the building. If the ladder is 12 feet tall, place the bottom 3 feet from the building.
- If you have a gutter, slip a 2 x 4 into it to keep it from being crushed by the ladder.
Note: Inspectors will not walk on tile roof coverings or pitches exceeding 5/12. Ladders are still required for access to the roof edge for these inspections. If a ladder is not provided or if the ladder does not meet the minimum requirements listed above, the inspection will be canceled. If a second inspection request is canceled for lack of access, a reinspection fee will be issued.

I have the Little Giant MegaLite 17 Ladder with Tip & Glide Wheels. This foldable and extendable ladder is very sturdy. I used a ratchet strap to secure the ladder to the builder.
Measure roof area
To measure the roof area, I took a screenshot of the roof from a satellite view in Google Maps. I then annotated the roof with letters, printed out the image, and took it with me on the roof.

To make taking measurements easier, instead of using a tape measure, I used a measuring wheel (Crescent Lufkin 4 in. Dual Wheel Small Measuring Wheel).

A measuring wheel allows you to take long measurements quickly and keep you away from the roof edges.
My estimated roof area was about 4000 sq ft. When ordering shingles, it’s best to add 10%.
Existing Roof
My existing roof consisted of the following:
- Composition Shingles
- Underlayment (tar paper)
- 11 intake vents and 11 exhaust vents
- Thermoplastic polyolefin (TPO) membrane roofing in the dead valley
New Roof
For the new roof, I estimate an area of 4500 sq ft.
- For the shingles, I chose California Cool Roof GAF Timberline HDZ Reflector Aged Chestnut Laminated High Definition Roofing Shingles.

The Cool Roof Rating Council (CRRC) ID is 0676-0130a.

- Ridge cap shingles
- Edge starter shingles
- TPO membrane roofing in the dead valley: Valley roll 60’ long x 6’. Just one roll of TPO.
- Insulation (which goes under the TPO in the dead valley)
- GAF FeltBuster 1000 sq. ft. Synthetic Roofing Underlayment. One roll is 1000 sq ft, so I needed 5 rolls.
- Fascia. For the fascia boards, I bought 2×6 lumber.
- For the roof edges, 2 in. x 3 in. x 10 ft. roof edge L flashing
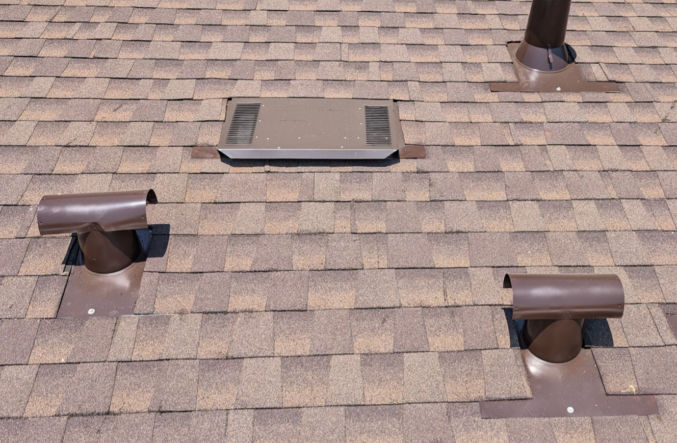
- For the vents, there are different types.
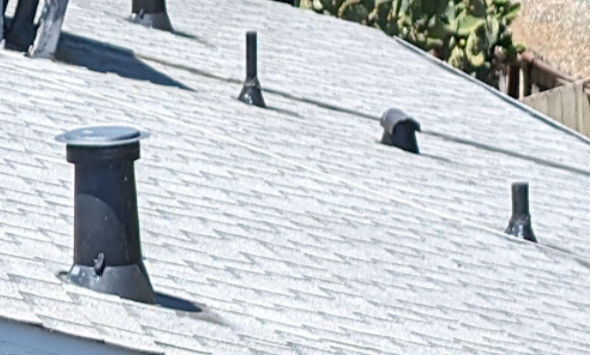
You can add additional vents near the ridge.

Apply for a permit
There are 2 types of permits:
- Owner-Builder
- Licensed Contractor
To do the job yourself, you need to apply for the owner-builder permit. Here are some application details:
- Apply for “reroof”e-permit online on City of Stockton’s website
- Type: Owner-Builder (not “Licensed Contractor”)
- Permit Fee: $185
- E-Permit: Residential
- Tear Off: Yes
You can have up to 2 layers of shingles. If you have one layer, you can add another layer on top of the first layer. If you have 2 layers, then you’ll need to tear off both layers. I had one layer, but I decided to just tear it off anyway. - Resheet: No
Resheeting is to replace all plywood under the shingles. - Structure: Main Structure
- Original Roofing Material: 30yr Laminated Dimensional Composition
- # of existing layers: 1
- Proposed Roofing Material: 30yr Laminated Dimensional Composition
- New Roof Material Product Information: Cool Roof CRRC ID 0676-0133,
- Area: 45 squares (1 square = 100 sqft)
- Conditioned Space: No
A conditioned space is a space between the roof and the ceiling that is air conditioned to be hot or cold. - Roof slope < 2:12 pitch? No
Most residential roofs in California have between a 4/12 and 9/12 slope. Roofs with a pitch exceeding 9/12 are called steep slope roofs. - Reroof less than 50% of the entire roof area: No
Once you get your permit, you must post it on the building. The city inspector will look for it when they come to inspect the work.
Inspections
According to the permit, one inspection is required and some are depending on need.
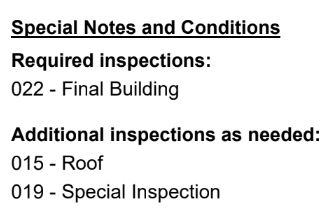
On the permit, there will be a form for the inspection to fill out for each inspection type.


In my case, I don’t think the special inspection (019) is needed, but the other two are needed.
The permit also indicates that the following inspections are needed:
- After removal of existing roofing for the plywood deck inspection.
- After new plywood or OSB sheathing is installed for the nailing inspection.
- After the project is complete for the final inspection
Inspections can be scheduled online at Stocktonca.gov/scheduleInspection. When you enter your permit ID, you’ll see some inspection options.
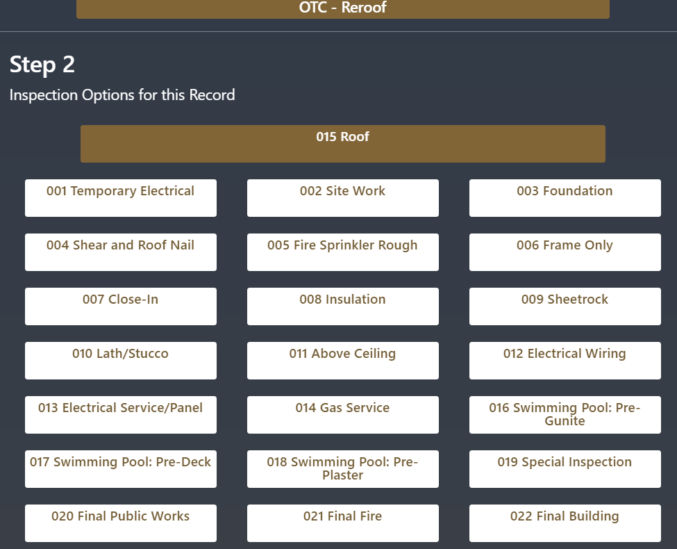
For the inspections, I would choose 015 Roof.
Inspections will occur between 7:30 AM and 4:00 PM. When you schedule an inspection, you can request an AM time window (7:30 AM to 12 PM) or a PM time window (12 – 4 PM) in the “Notes to inspector” field.
UPDATE: After scheduling the first inspection, the city inspector called and said that
- he’d be at the site between 11 AM and 1 PM
- the City of Stockton doesn’t require in-progress inspections, just final inspections.
So, I canceled the in-progress inspection and will just schedule one final inspection when the roof is complete.
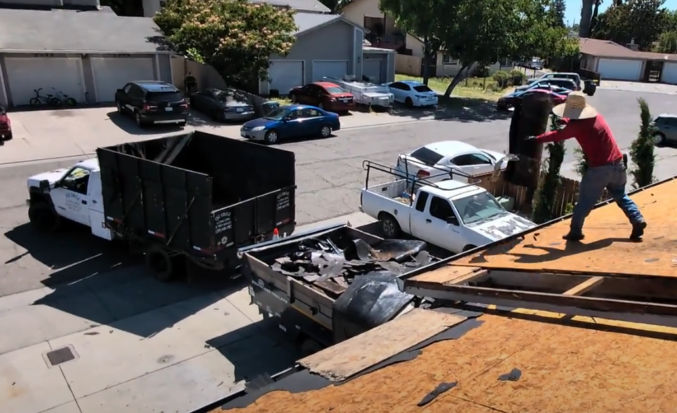
Remove old roof
You’ll need to remove the old shingles and the underlayment (tar paper or synthetic underlayment).

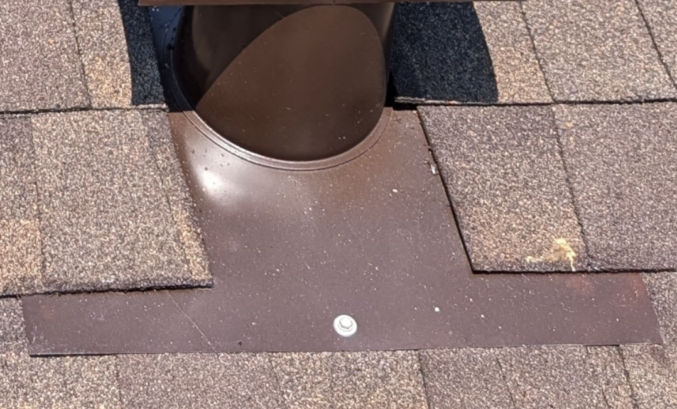
You may also need to remove old roofing materials in places like the dead valley. In my case, there was a metal sheet and old TPO material.

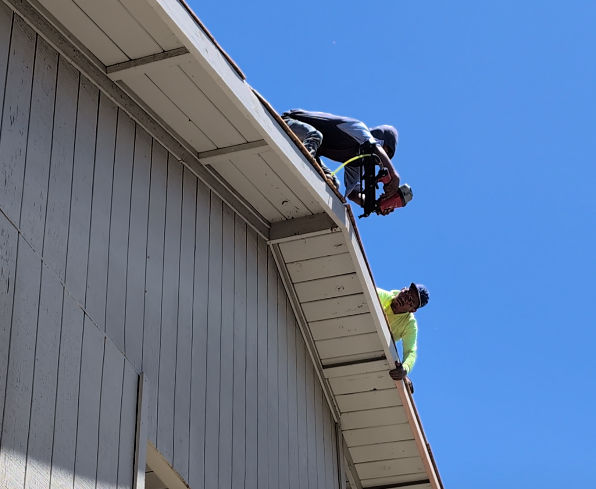
If the fascia boards are rotten, you should remove and replace them as well. Use a pry bar and a metal-cutting blade to cut nails holding the fascia board in place.

For long pieces of fascia board on the 2nd story, you’ll need multiple workers laying down on the roof and leaning over to pull the boards off.

When disposing of the old roof, it’s easiest to park a dump truck in the driveway so you can throw the old roof materials from the roof into the truck. You can rent dump trailers from Home Depot, but then you need a truck to haul the trailer and you need a driver. Also, the trailers at Home Depot may not be available when you need them. In my case, I hired a guy who has a dump truck.
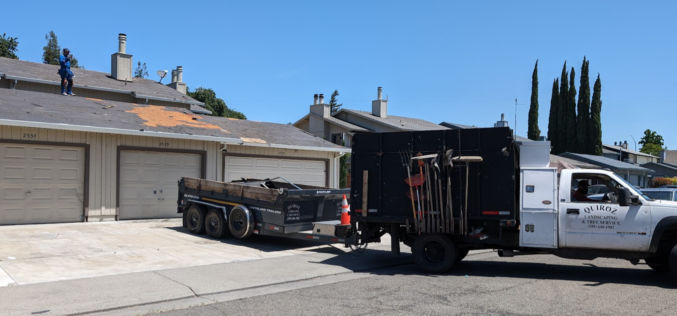
When you’re at the dump, you can just dump the garbage mechanically rather than by hand.

Buy new roof materials
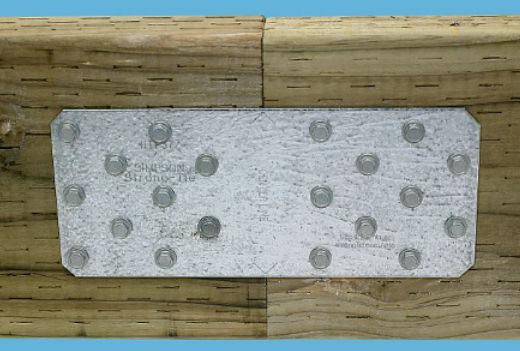
I bought 15 pieces of 2x6x16′ wood for the fascia. You can find boards as long as 20′. However, some edges are longer than 20′, so you’d still have to splice two pieces together, which can be done using a galvanized tie plate.
I also bought 9 sheets of 4×8 OSB plywood to replace any rotten parts of the roof deck.


Paint fascia boards
Make sure to paint the fascia boards before installing them, including the ends after making any cuts. Paint protects the wood and delays rotting.

Install fascia boards
Installing the fascia boards is also a multi-person job.

Nails are shot into the wood using a pneumatic nail gun.
Buy vent flashing
Pipe flashing
1-1/4 in. x 3 in. Galvanized Steel Adjustable Pipe Flashing with Base and Rubber Collar
- Fits 1 in. to 3 in. pipe diameters

T-top exhaust vent pipe flashing
T-Top 4 in. Bonderized Steel Exhaust Vent Pipe Flashing

Code cap vent flashing
4 in. Aluminum Code Cap Top Vent Pipe Flashing

Static air vent
Static roof vents allow air to escape from the attic. Often multiple static roof vents are needed to adequately ventilate the attic. Roof vents should be evenly spaced across the roof and installed just below the peak of the roof where heated air will rise. Learn more.

144 sq. in. NFA Galvanized Round-Top Roof Louver Static Vent

Buy materials

The shingles are
- $43 / bundle
- 3 bundles / square
- 56 bundles / pallet
Replace any dry rot

Install underlayment
Install drip edge metal flashing
Deliver materials
Roof shingles are very heavy. Pay to have them delivered on top of your roof.


Make sure to have already stapled the waterproof underlayment before the shingles and other materials are delivered.

Install starter shingles
Install shingles
Along edges, have shingles extend beyond the edge by 0.5 – 1″.


Install vent flashing


Install ridge shingles

Where there is an exposed nail in the ridge shingles, cover with caulk and a small piece of shingle.

Install vents

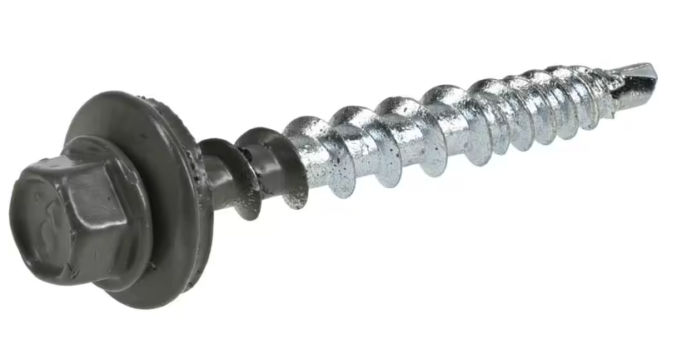
Fasten vents using roofing screws
Spray paint exposed metal area
Install insulation and TPO in valley
Insulation sheets go under the TPO

TPO
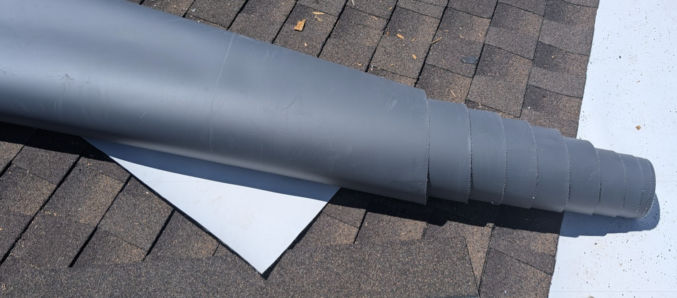

Use a special heat tool to bond to pieces together.
Where the TPO meets shingles, apply caulk.

Put flashing as needed

Apply silicone to small areas that could cause leaks
For example,
- over nails
- where TPO meets shingles
- where fascia boards meet


Apply wet patch to large areas that could cause leaks
For example, where shingles meet an A/C unit.