- Timelapse Videos
- Slow Motion Videos
- Action Videos
- Low-Light / Night Scenes
- Invisible Selfie Sticks
- Selfie Drone (for comparison with selfie sticks)
- Lens Care
- 3rd-Person Pan
- High-Up Shot
- Freestyle
- Hyperlapse
- Rise-Up Reveal
- Upward Tilt
- X3/X4 Picture Quality
Timelapse Videos
You can create timelapse videos using the Insta360 ONE X2/3. The resulting timelapse will be a 360-degree video that you can edit the same way you can non-timelapse videos. Unfortunately, the interval setting between when a picture is taken to create the timelapse can only be set from your phone. The interval options are 0.5s, 1s, 2s, 4s, 10s, 30s, 1min, 2min. Note that standard video is 29.97s, which is like making a timelapse video where the interval between still images is 1/29.97s or 0.03s. According to this timelapse calculator, if you film for 8 hours straight (event duration) with a shooting interval of 0.5s, then the camera will take 57600 photos. If you want the resulting timelapse video to have a frame rate of 29.97 fps, then the resulting timelapse video duration will be 32m 2s long.
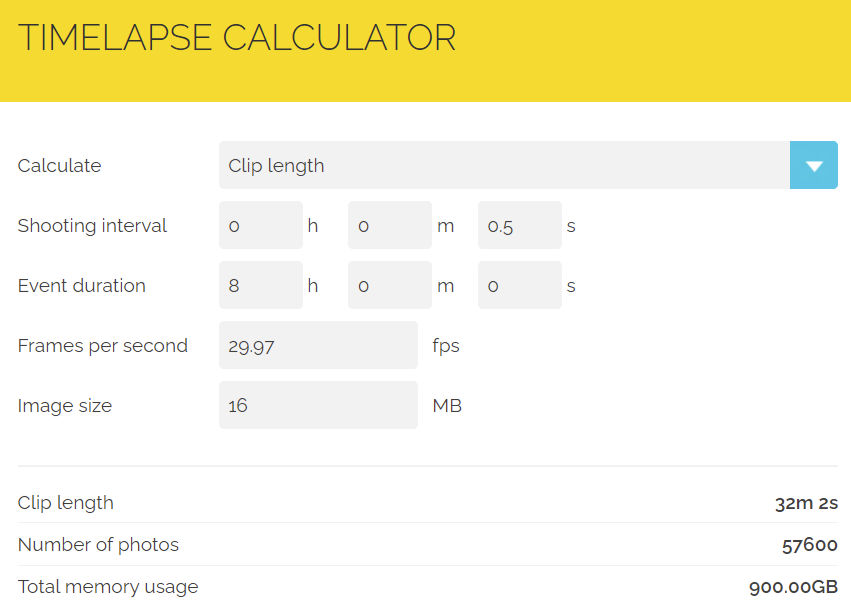
Here are the number of photos and video durations for an 8-hour event duration for the shooting intervals supported by the ONE X2.
| Interval | Number of Photos | Video Duration |
|---|---|---|
| 0.5s | 57600 | 32m 2s |
| 1s | 28800 | 16m 1s |
| 2s | 14400 | 8m |
| 4s | 7200 | 4m |
| 10s | 2880 | 1m 36s |
| 30s | 960 | 32s |
| 1min | 480 | 16s |
| 2min | 240 | 8s |
I wouldn’t choose a timelapse interval greater than 10s since an 8-hour-long filming session would produce a video that’s longer than 1m 36s. If 1m 36s is too long, then in post-production, whether in Insta360 Studio or some other video editing program, you can speed up the timelapse to produce an even shorter video.
The battery that comes with the Insta360 ONE X2 is good for 80 minutes. You can buy additional batteries, but if you’ll be recording a long timelapse video, it would be annoying to have to keep changing the battery every 80 minutes. In this case, you’re better off recording with the USB charging cable plugged in. To prevent overheating, remove the battery. The camera can still operate and record while plugged in.
When taking a 360-degree timelapse video, make sure the following options are set
360-degree mode (not 150-degree mode)

Video timelapse mode

Slow Motion Videos
If you want to make a slow-motion video, e.g. a real estate tour video, then you definitely want to record at a high frame rate like 60 fps. Then, in your video editor, slow down the video and export it at 30 or 60 fps. If the original video is recorded at 30 fps, then the slowed-down video will be choppy.
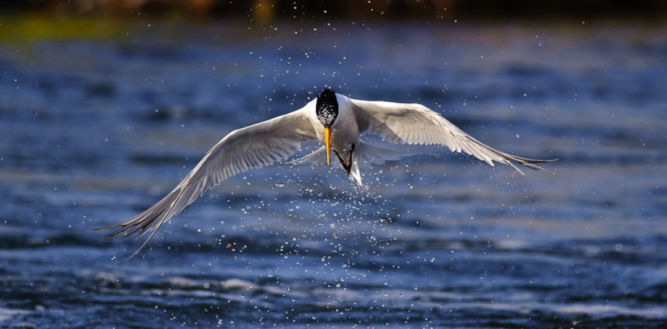
Action Videos
When filming action scenes, it’s better to record at a high frame rate so that playback will be sharp, more fluid, and not blurry.
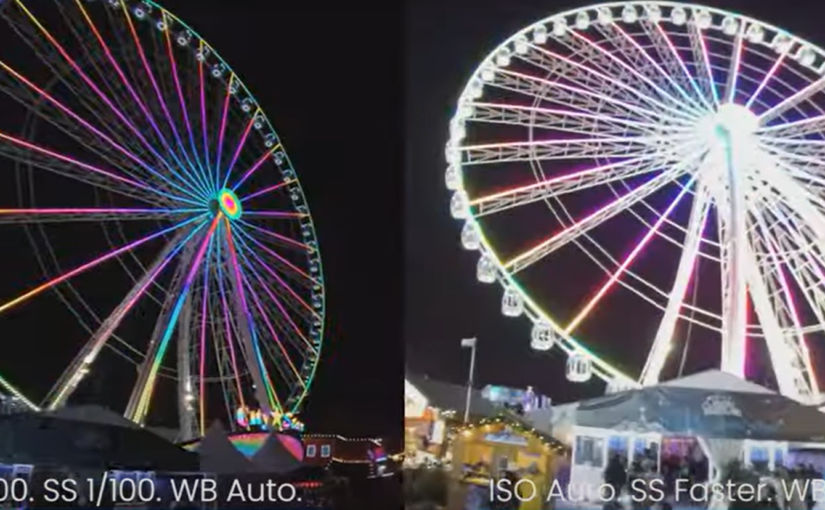
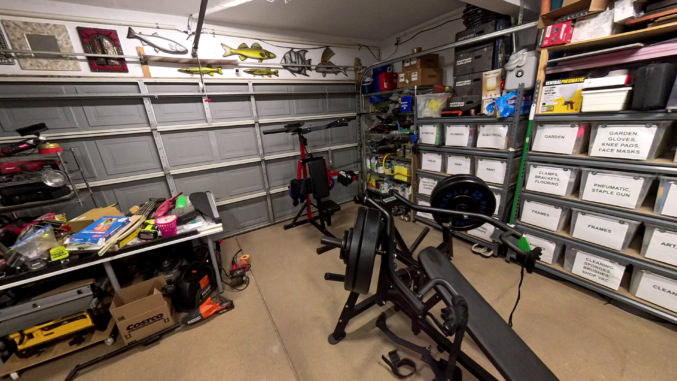
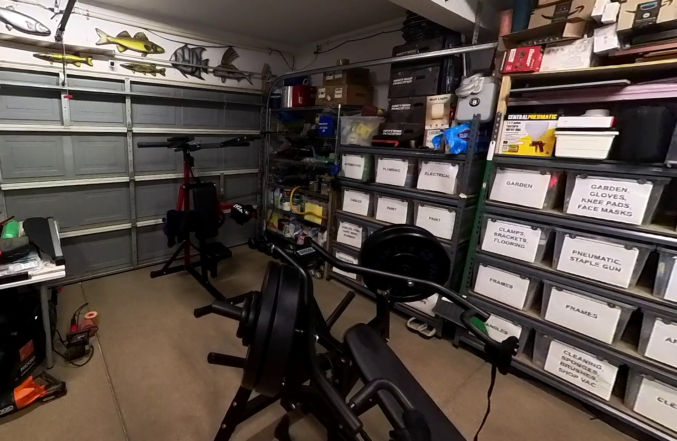
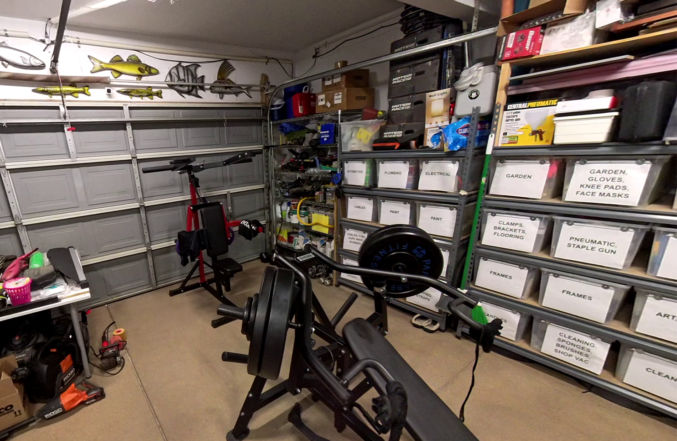
Low-Light / Night Scenes
When filming in low light like at night, you’ll get much better results if you manually adjust the exposure.
ISO
ISO is a camera setting that will brighten or darken a photo.
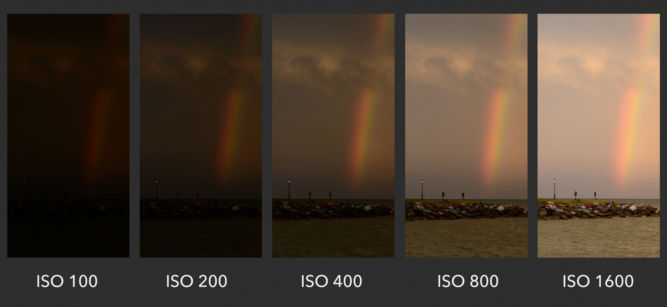
However, if you increase the ISO too high, you’ll see a lot of grain.
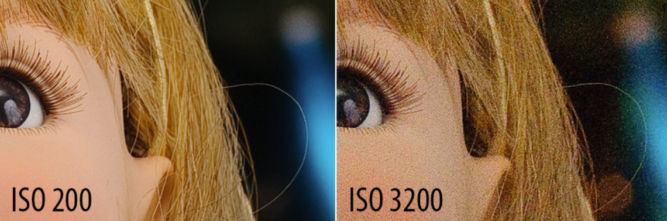
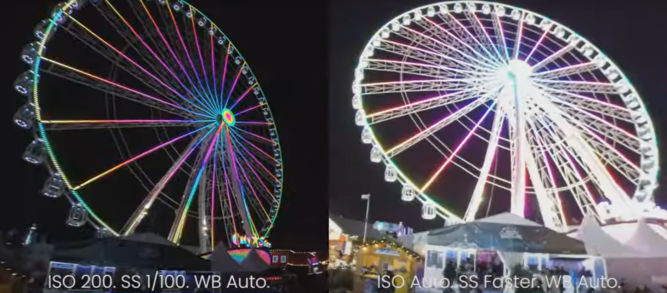
You should only raise your ISO when you are unable to brighten the photo via shutter speed or aperture instead (for example, if using a longer shutter speed would cause your subject to be blurry). The ISO 200 image on the left was brightened with a long shutter speed.
Shutter Speed
Shutter speed is responsible for two particular things:
- changing the brightness of your photo and
- creating dramatic effects by either freezing action or blurring motion.
Shutter speed is the length of time in seconds the camera shutter is open, exposing light onto the camera sensor. Essentially, it’s how much time your camera spends taking a photo. When the shutter is open, light passes through the lens and is collected on the camera sensor. The button that fires the camera is also called “shutter” or “shutter button,”
Fast / Short Shutter Speed > Freezes Action
A fast shutter speed is a small fraction of a second, like 1/250th of a second.
Slow / Long Shutter Speed > Motion Blur
A long shutter speed is 1 second or longer. A slow shutter speed is like 1/2 or 1/4 of a second.
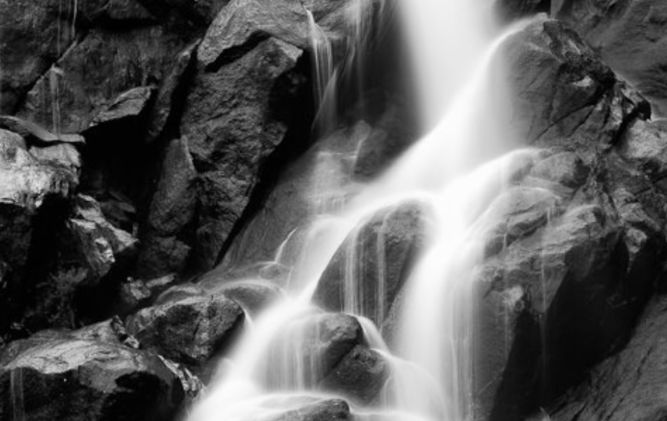
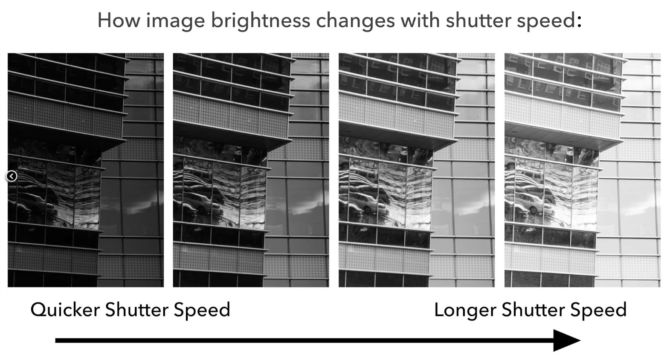
Shutter Speed and Exposure (Brightness)
If you use a long shutter speed, your camera sensor gathers a lot of light, and the resulting photo will be quite bright. If you use a quick shutter speed, your camera sensor is only exposed to a small fraction of light, resulting in a darker photo.
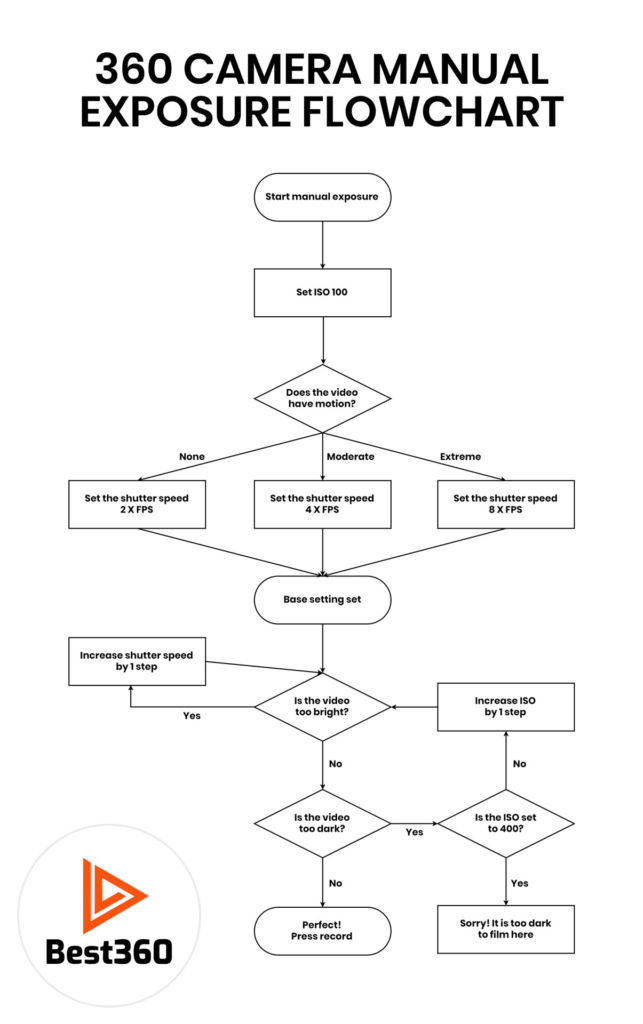
The following flowchart can help you tweak the ISO and shutter speed.
Invisible Selfie Stick
Insta360 offers some selfie sticks that will become invisible in your videos. I have 2 sticks
- 2-in-1 invisible selfie stick with tripod (3.4′ long)
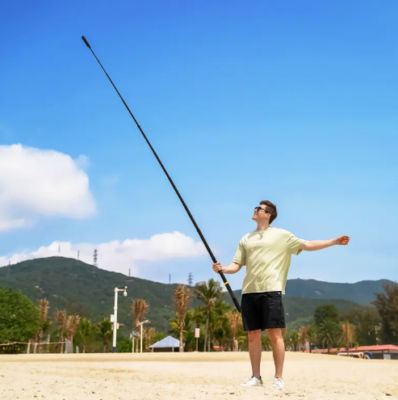
- Extended edition selfie stick (10′ long)

Following are how some videos look when using each stick.
10′-long selfie stick, front spin, face level
Selfie Drone
For comparison, following are some videos taken with the Hover Air X1 selfie drone.
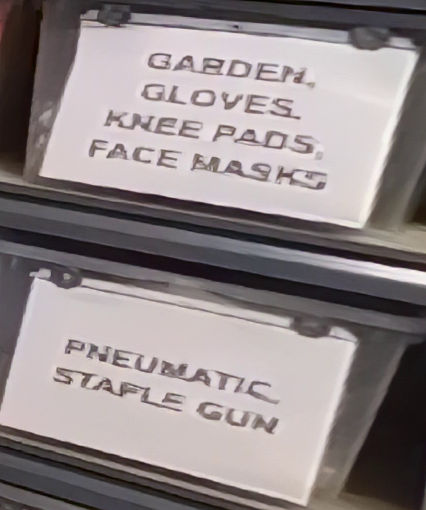
Lens Care
The Insta360 X2/X3 camera has protruding lenses on two sides. As such, the lenses can easily get scratched, so extreme care must be taken to prevent that from happening. Also, before shooting, you should always clean the lens to remove any dirt or fingerprints. A dirty lens can easily result in a blurry shot. Following are comparisons of image quality when different lens conditions.
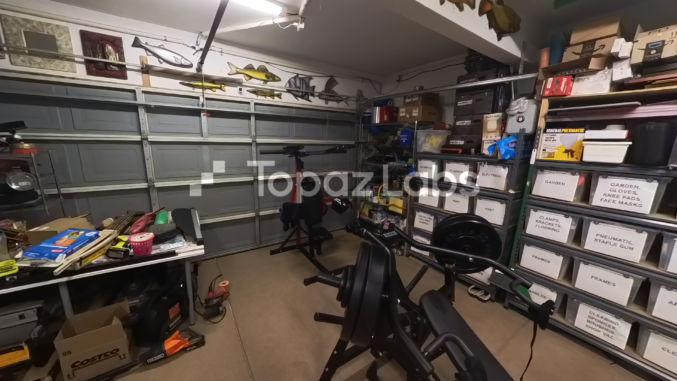
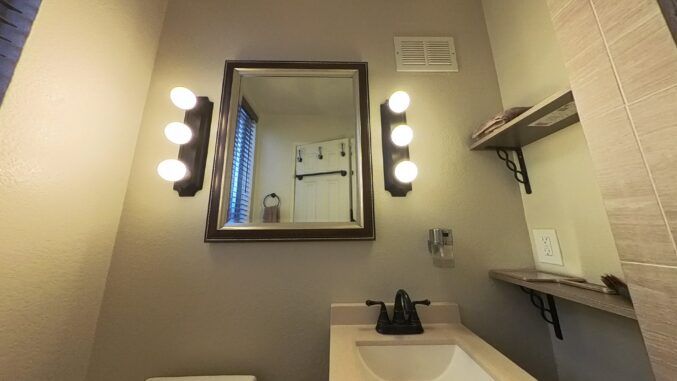
Brand New and Clean Lens
The image quality is relatively sharp.
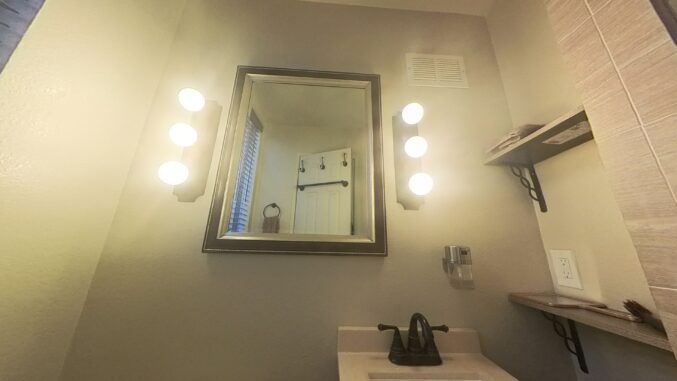
Brand New Lens But Full of Fingerprints
The image is blurry, especially around the lights.
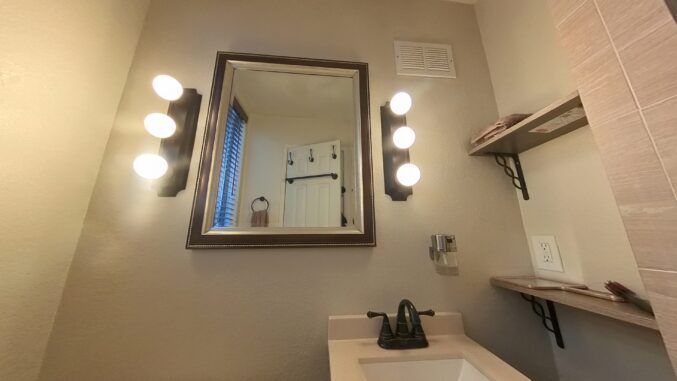
Scratched But Clean Lens
Despite being cleaned with a new cloth, the image is partially blurry due to the scratched part of the lens.
3rd-Person Pan
High-Up Shot
Freestyle
Hyperlapse
Rise-Up Reveal
Upward Tilt
X3/X4 Picture Quality
Here’s a comparison of the picture quality of the X3 and X4 after reframing a 360-degree video and exporting to 1080p and 4K at 20 Mbps, respectively. It’s clear that the X4 produces a brighter and sharper picture, even if the X3 picture is upscaled to 4K using Topaz Video AI.
X3 (1080p)
X4 (4K)
X3 (1080p)
X4 (4K)
X3 (1080p)

X4 (4K)
X3 (1080p upscaled to 4K using Topaz Video AI)