In this post, I’ll show you how to make an animated travel map like the one below using Apple Keynote.
1. Get an image of a map
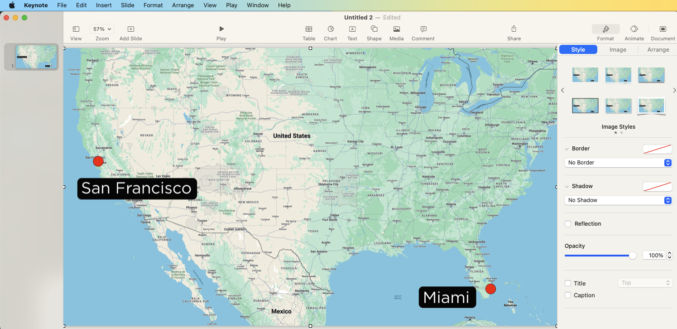
I usually just go to Google Maps, zoom in/out to the area I want to show, then take a screenshot. In this example, I took a screenshot of the USA because I want to show an animated flight path from San Francisco to Miami.
2. Crop map and optionally add labels
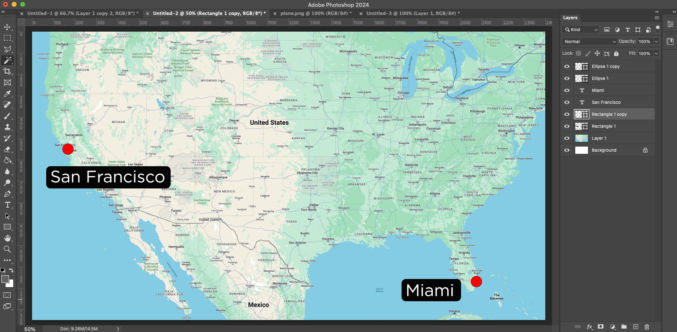
Open the screenshot in an image editor (I use Photoshop) and crop to your target video resolution. My target resolution is 1920 x 1080 (standard HD). I also added some red dots where the start and end points will be as well as some city labels.
3. Get a transparent image of a plane, car, train, boat, etc
Since I want to show an airplane animate along a path, I looked for an image of one in Google Images. The background should be transparent. In Google Images, you can choose Tools > Color > Transparent to find images on a transparent background.
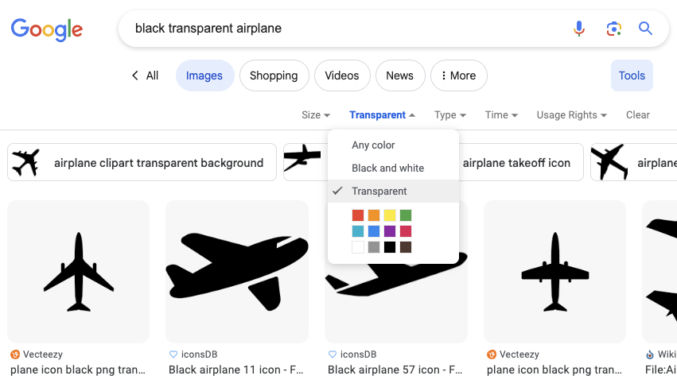
I chose this image.

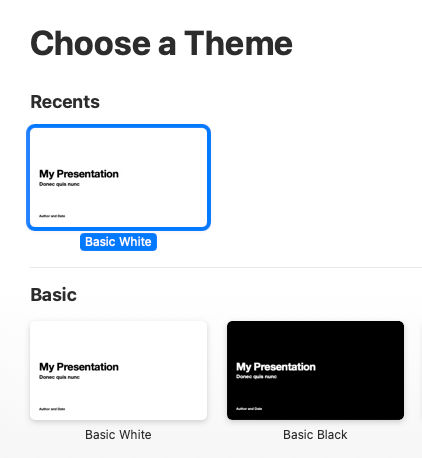
4. Create a blank Keynote presentation
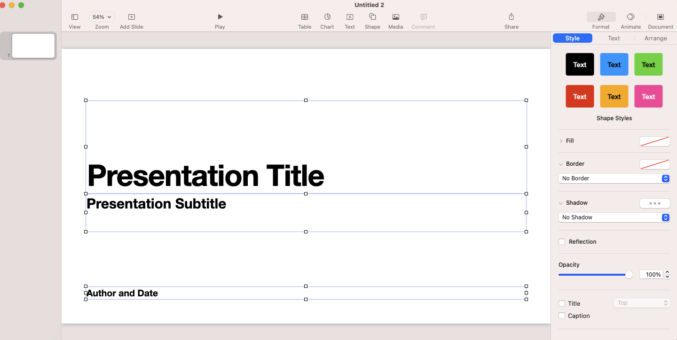
Open Apple Keynote and choose the basic white theme.
You will get a single slide. Select and delete everything in the slide.
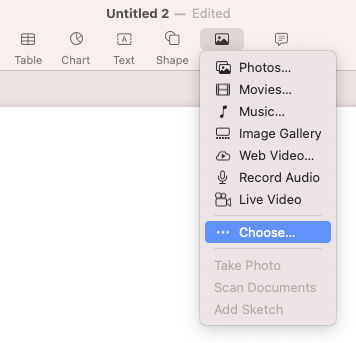
5. Insert background map
Go to Media > Choose and select the background map.
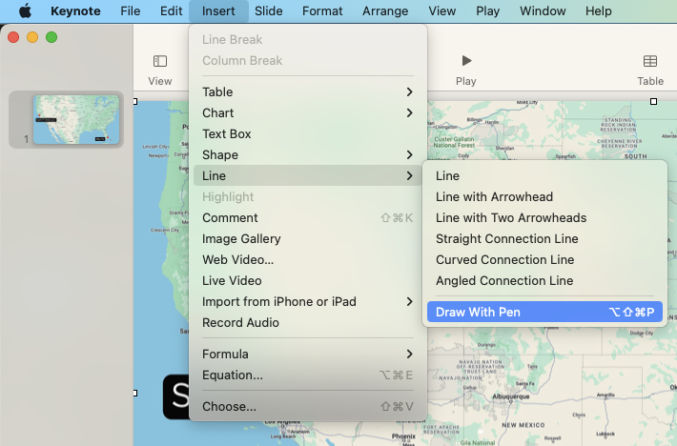
6. Draw a path
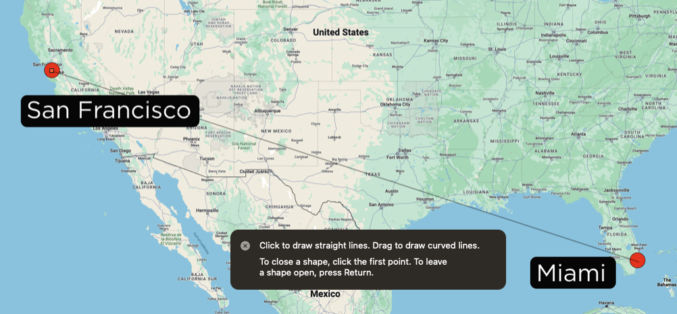
Go to Insert > Line > Draw With Pen and draw your travel path.
Click on the start point then click on the end point. You will get a straight line.
In the middle of the line, there will be a point. Click and drag it up if you want to create a curve. Repeat with other midpoints as necessary.

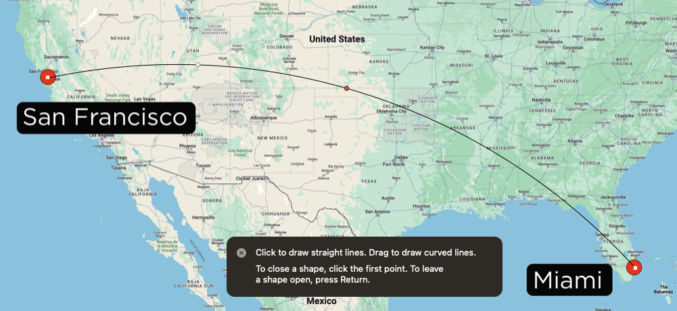
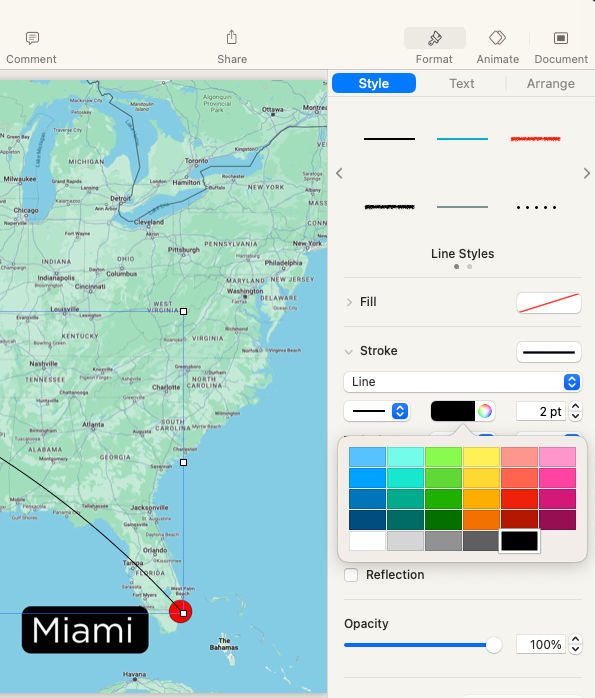
When you’re done, hit the ESC key. We now have our travel path. Let’s change the style of the path. I’m going to make it red and thick. In the right pane, under Format > Style, you can edit the style of the element (curve). I choose a red color that is 7 pt thick.

7. Animate the path
In the top right corner, choose the Animate tab and then “Add an Effect” > “Line Draw”.
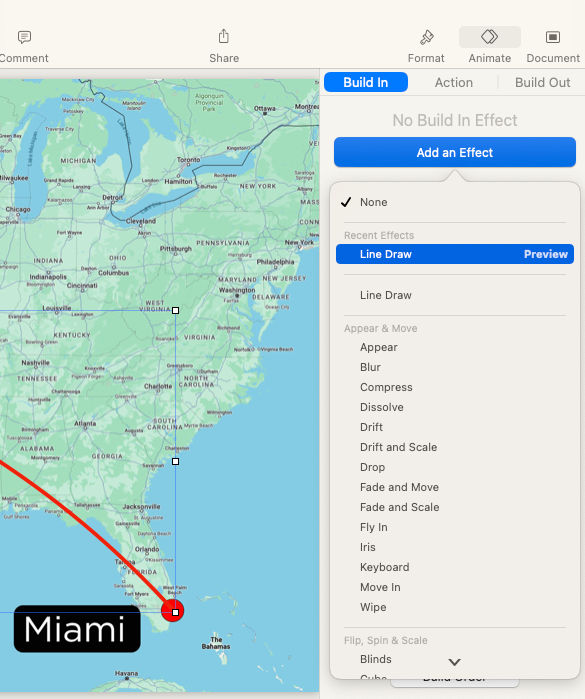
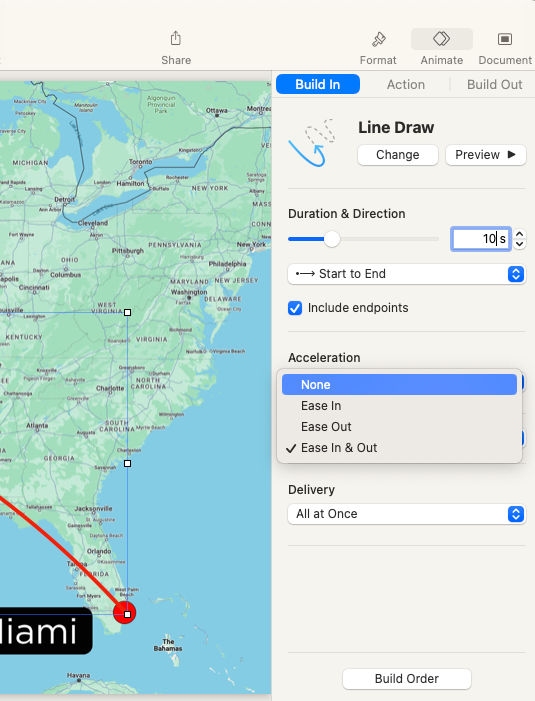
You can then change the default animation from 2 seconds. I changed the duration to 10 seconds so that in my video editor, I can slow it down without it appearing jumpy. I also changed the acceleration to “None”.
Click the “Preview” button to preview the path animation.
8. Add the airplane image
As in step 5, go to Media > Choose and select the airplane image.
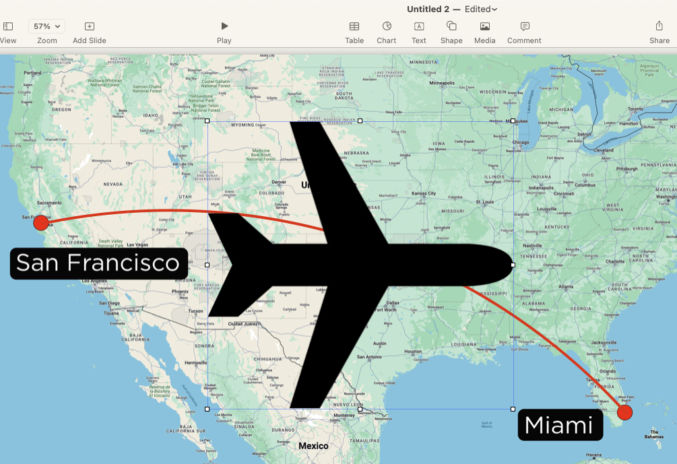
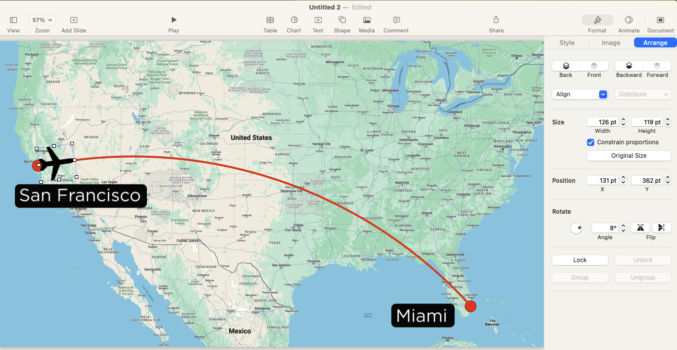
Scale the airplane by dragging one of the corners. Drag the airplane to position it at the start point.
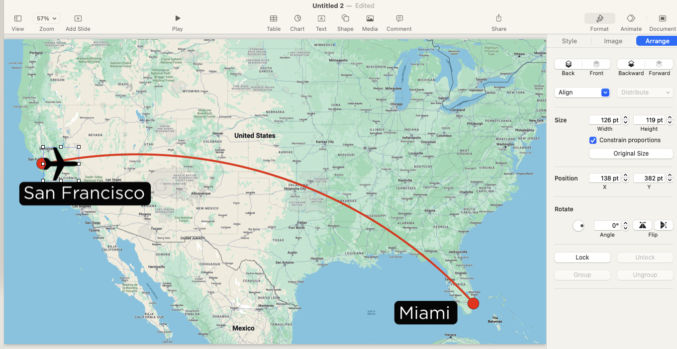
Rotate the airplane. In the top right choose Format > Arrange and adjust the rotation value such that the nose of the plane is aligned with the flight path.
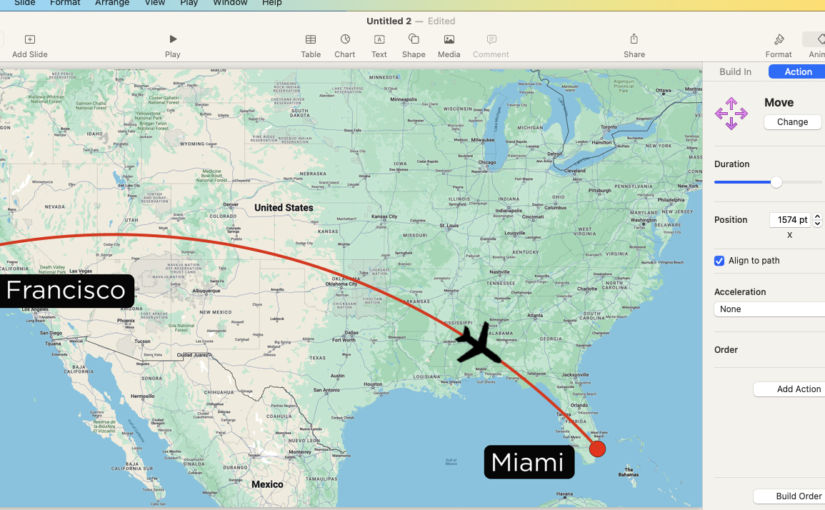
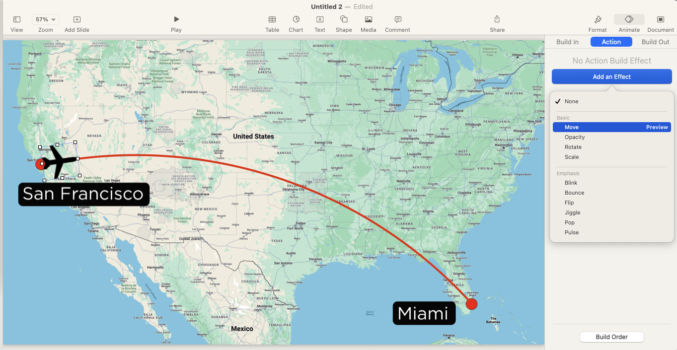
9. Animate the airplane
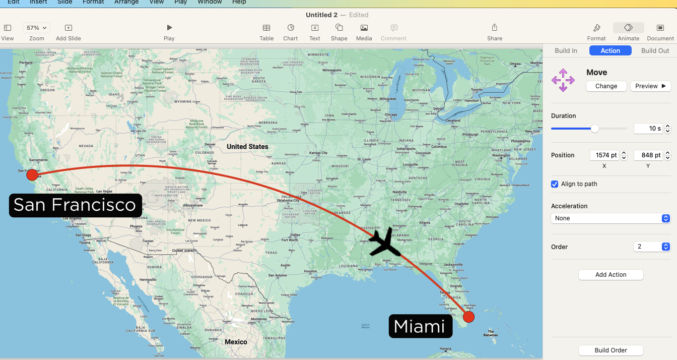
In the top right, click Animate > Action > Add an Effect > Move.
Drag the airplane to the end point. Set the duration and acceleration to match that of the flight path (10 sec, None).
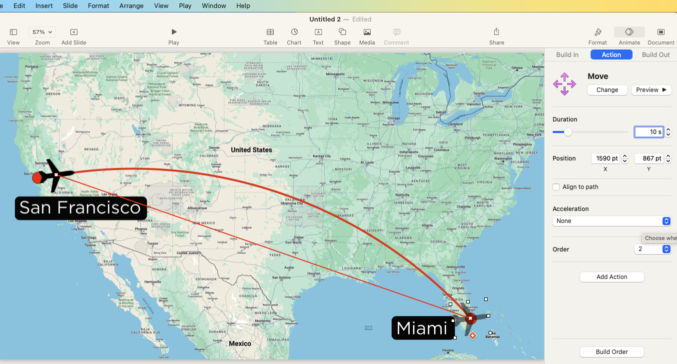
Click Preview to preview the animation. The airplane doesn’t yet follow the flight path. Check the “Align to path” checkbox. A point will appear along the line between the airplane’s start and end points. Drag that middle point to where the flight path is.
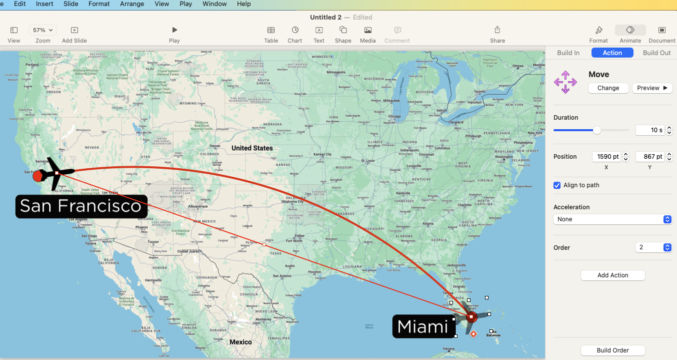
Click Preview again. You will see the airplane animate along the flight path.
10. Animate the flight path and airplane at the same time
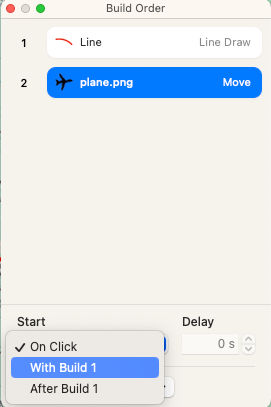
In the top right, click Animate > Build Out > Build Order.
You will see a list of all animation effects. The first animation is the line (flight path). The second is the plane. Choose te second animation and then under “Start”, select “With Build 1”.
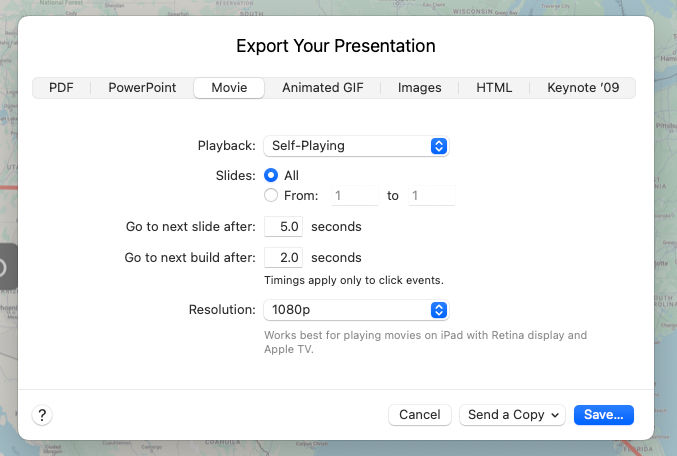
11. Export the animation
Choose File > Export To > Movie.
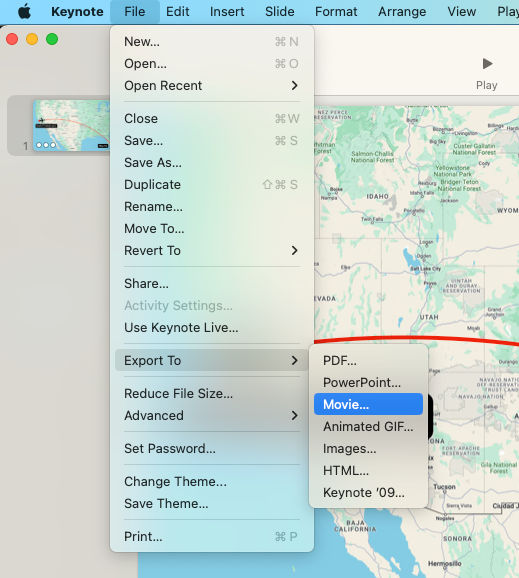
Since there’s only 1 slide, you can leave “Slides” to “All. The resolution should match that of the background image (1080p).