The article is based on this YouTube video. These instructions are similar for adding 120 V circuits as well.
When you open the panel door, verify that you have empty slots to put a one-pole (120 V) or two-pole (240V) circuit breaker. If you don’t, you may need to upgrade your panel to a larger one.
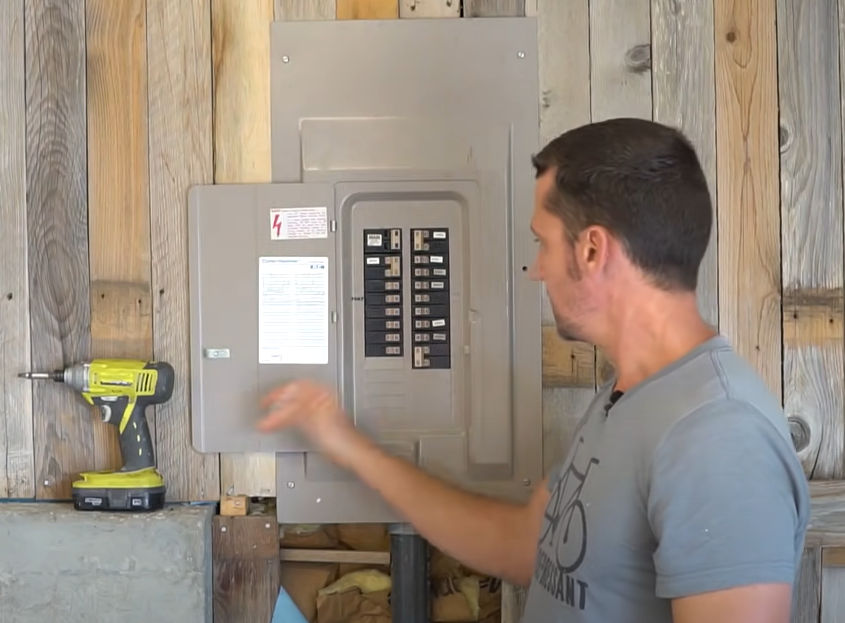
Unscrew the screws and remove the panel cover.

You will usually see two large cables coming into the box.
- One black wire = + 120
- Other black wire = – 120
- Voltage diff between the two = 240
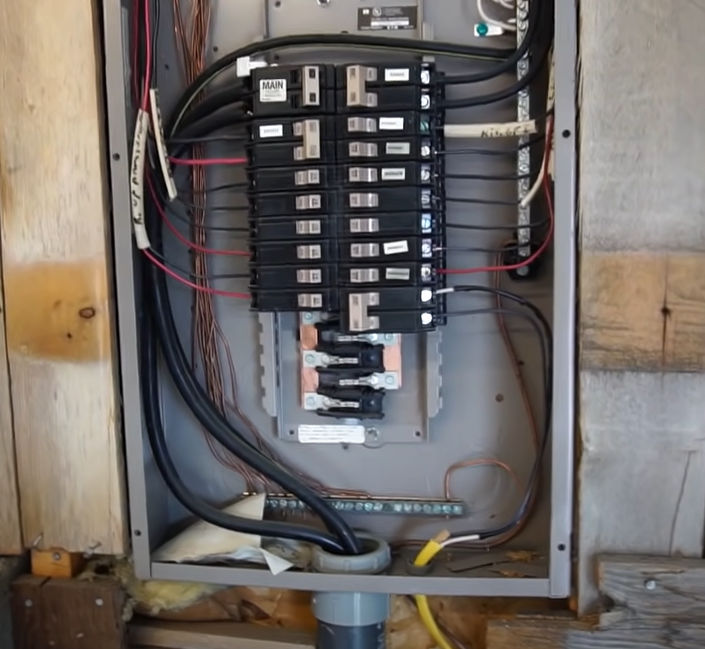
The 2 black wires go into a main breaker.

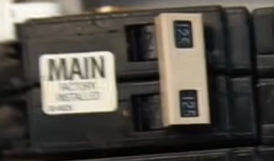
In this example, the main breaker supports 125 amps, and the main breaker is located in the same panel as the circuit breakers.
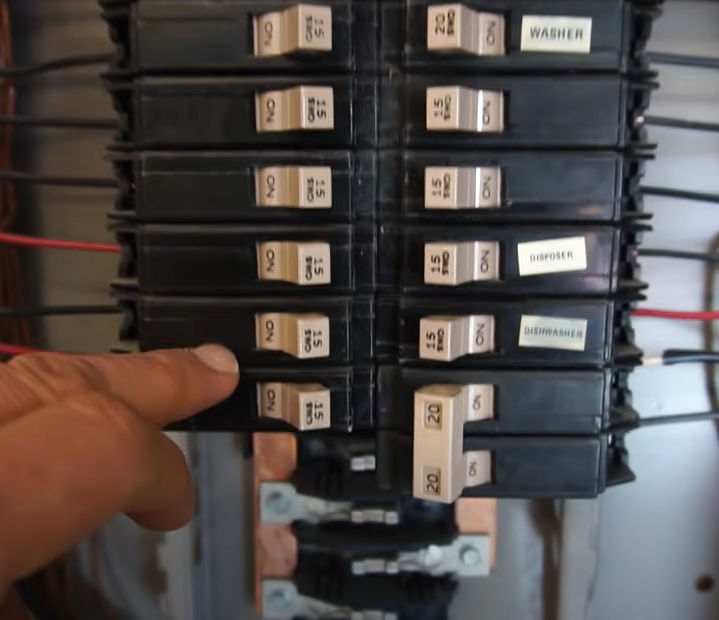
The electricity then goes into the two left and right rails. Usually, you’ll have some 120 V / 15 A circuit breakers for general power, 120 V / 20 A circuit breakers for kitchen and bathroom power, and 240 V / 20 A double circuit breakers for an electric dryer.
Electricity flows from the rail through the circuit breaker through the wires.
Everything in the box is hot until you turn off the main breaker. Once you turn off the main breaker, only the 2 black wires and the terminals they are connected to are still hot.

In my home, the main breaker is located in a separate panel outside whereas my circuit breaker panel is in the garage. This is safer because once you turn off the main breaker outside, there are no hot / live wires in the circuit breaker panel.
Parts Needed
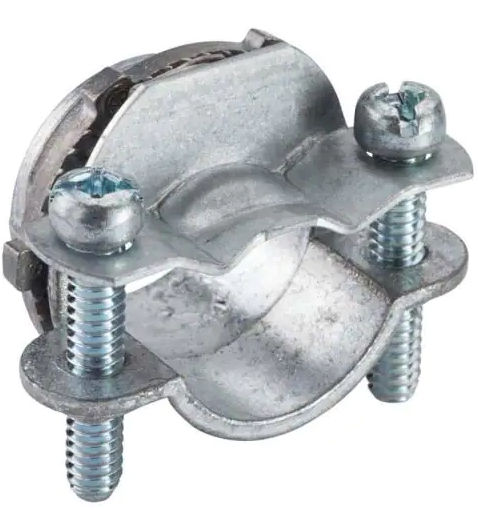
Halex 3/4 in. Non-Metallic (NM) Twin-Screw Clamp Connectors (5-Pack)
Southwire (By-the-Foot) 6/3 Stranded Romex SIMpull CU NM-B W/G Wire
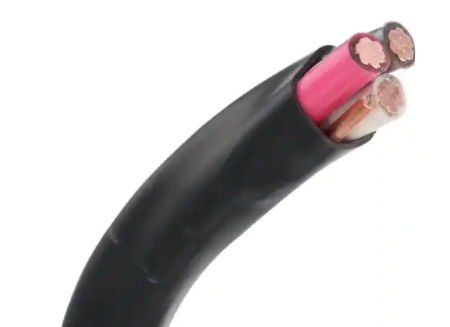
The “6/3” identifier means this cable is 6 gauge and has 3 conductor wires and 1 ground wire for a total of 4 wires. The max amperage that this cable supports is 55 amps as indicated in the chart below.

Find the right kind that fits your circuit breaker box. My breaker box brand is Challenger. From the time when Challenger went out of business in the 90s, they were bought by different companies until Eaton/Cutler-Hammer finally got a hold of them. So, in my case, I can buy Eaton BR/C breakers.
The amperage of the circuit breaker must be less than or equal to the max amperage of the cable connected to it to prevent the cable from melting and causing a fire.

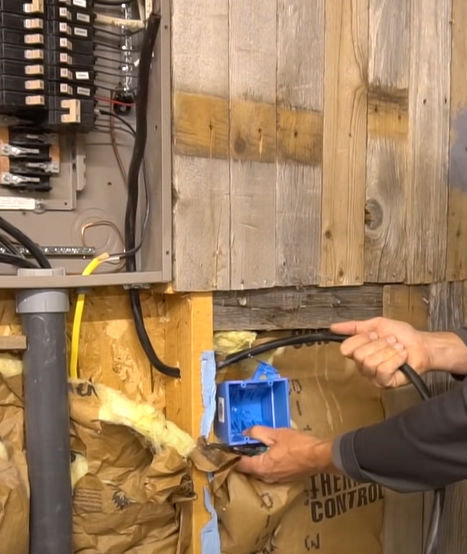
2-Gang 4 in. Square New Work Electrical Wall Box
Buy a deep box to accommodate the depth of the receptacle and have space for the 4 wires.
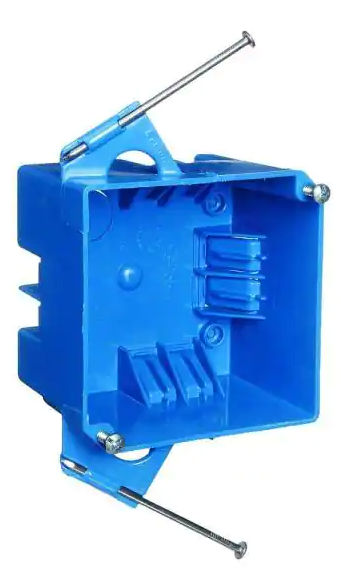
The outlet will go in the middle of the electrical box.
Leviton White 2-Gang Single Outlet Wall Plate (1-Pack)
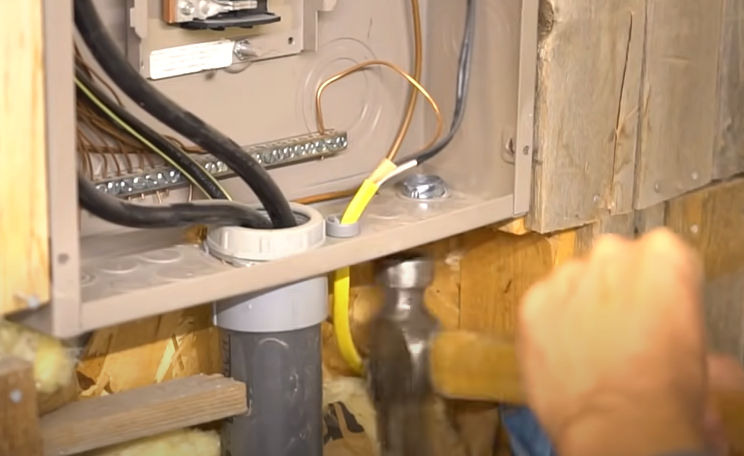
Decide where you want the new cable to come into the breaker box and punch out a hole at that location.

You can use a hammer to push the cable clamp into the hole you just made.
If you will run your cable behind the wall, make a hole in each stud using a ¾” spade bit for the cable to go through.
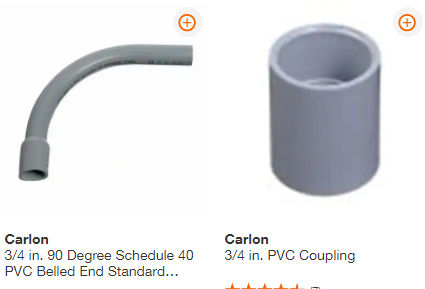
If you will run your cable on the wall, you can run it through metallic or non-metallic PVC rigid electrical conduit.
JM eagle 3/4 in. x 10 ft. PVC Schedule 40 Conduit

You can also buy flexible conduit like this one.
Southwire 3/4 in. x 6 ft. Ultratite Liquidtight Flexible Non-Metallic PVC Conduit Whip

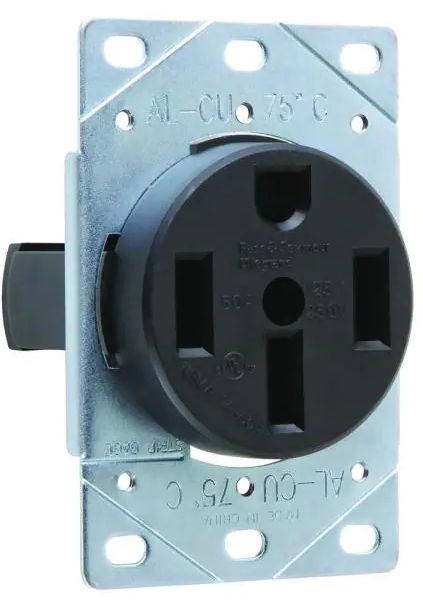
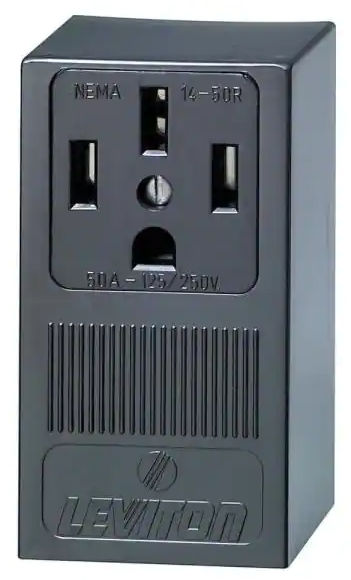
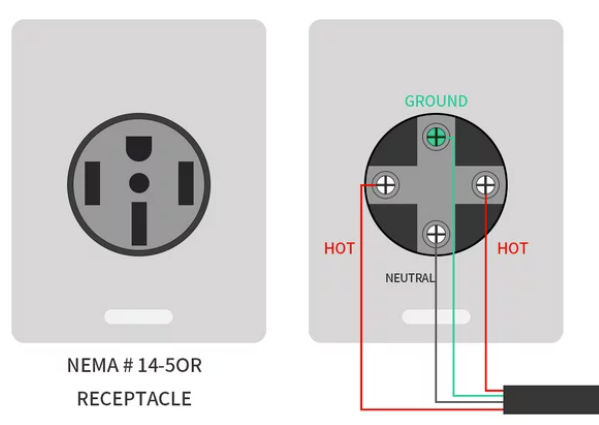
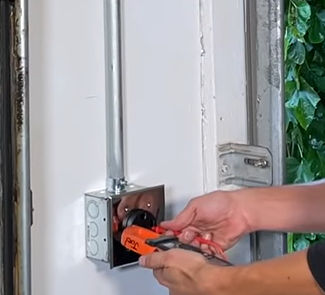
You can then connect the cable to a surface-mount NEMA 14-50R power outlet.
Leviton 50 Amp Single Surface Mounted Single Outlet, Black
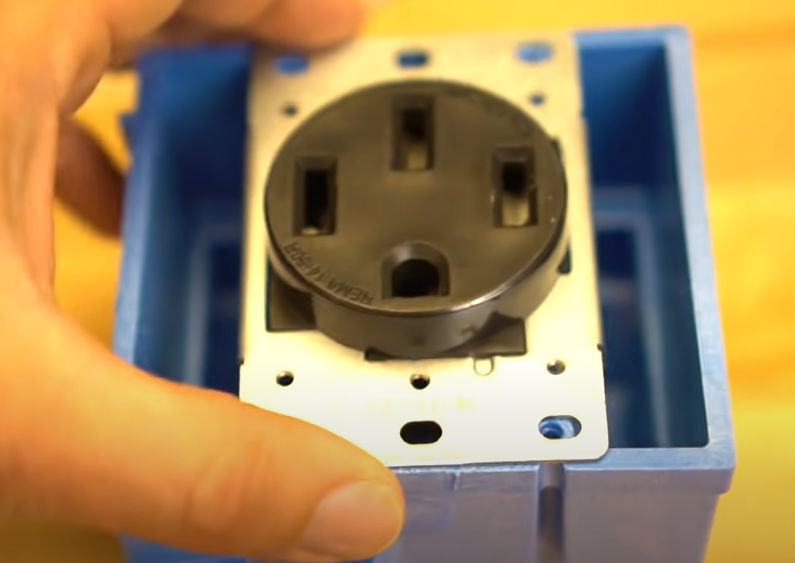
or make your own surface-mount outlet using
4 in. 30.3 cu. in. Metallic Square Box

When you knock out a hole, make sure you knock out a 3/4″ center hole in one of the sides, not a smaller 1/2″ hole. If you accidentally knock out a 1/2″ hole, you can seal it with one of these:
Halex 1/2 in. Knock-Out Seals (4-Pack)

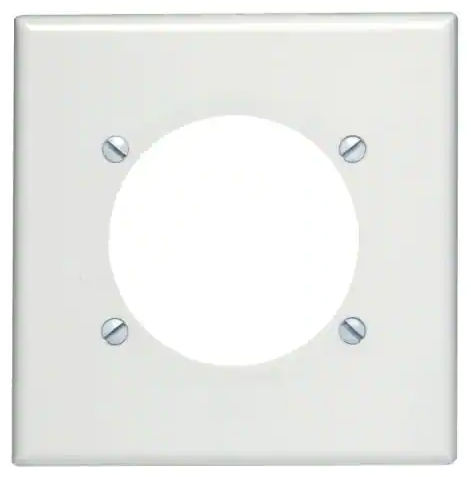
4 in. Square Box Cover for 30 or 50 Amp Receptacle

Note: The cable is very thick and difficult to bend. Using the Leviton outlet is MUCH easier than making your own outlet because with the Leviton, you don’t need to bend the cable at all.
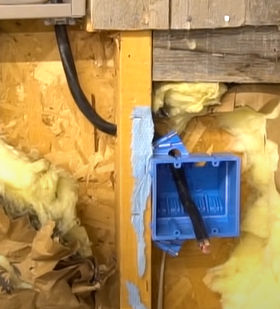
Run the cable through the stud and into the breaker box.
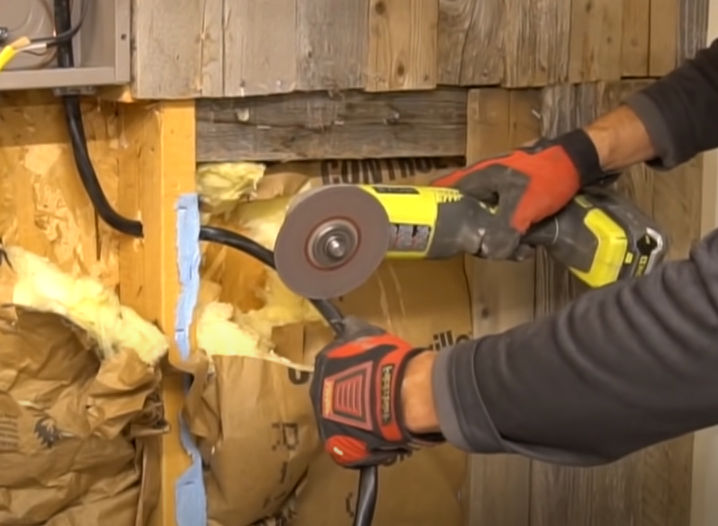
The cable can be hard to cut. If you can’t cut it with scissors or snips, you can use an angle grinder.
For ease of work, feed the thick wire into the electrical box before attaching box to stud.
Strip the wires in the cable. First, slit the exterior jacket / sheathing lengthwise using a sharp utility knife. Then, use a wire stripper to cut just the sheathing layer using the flat blade part. You can’t use the various round blades because the cable is too thick.

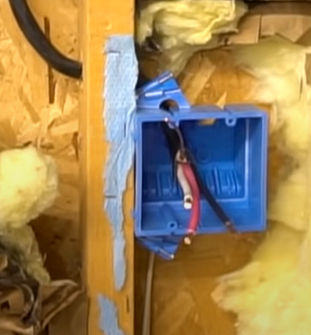
Attach the wires to the outlet.
- The red and black (hot) wires are interchangeable and connect to the gold screw terminals.
- The white (neutral) wire goes to the silver screw terminal.
- The bare copper (ground) wire goes to the white screw terminal.
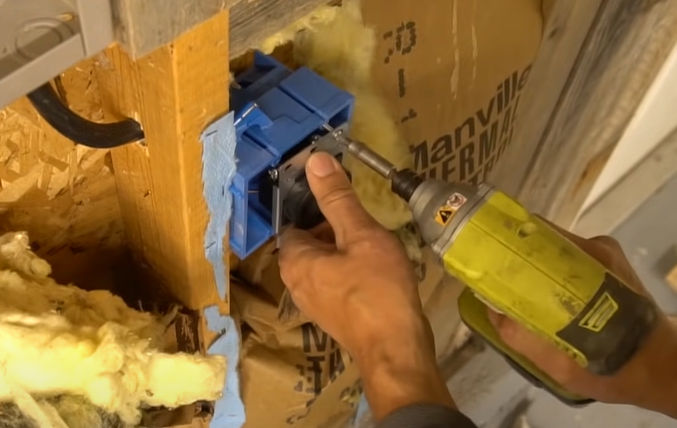
Screw the outlet to the box.
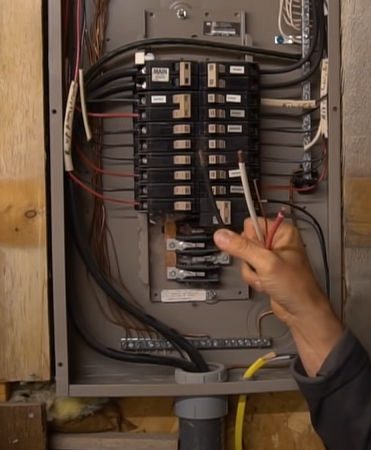
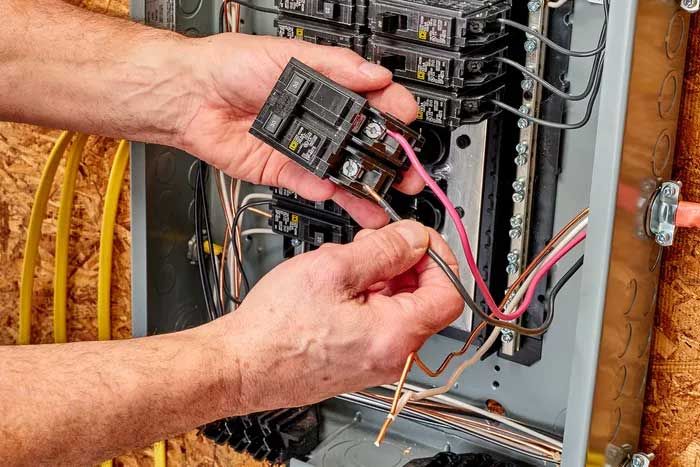
Strip the wires on the other end of the cable. Make sure the main circuit breaker is off.
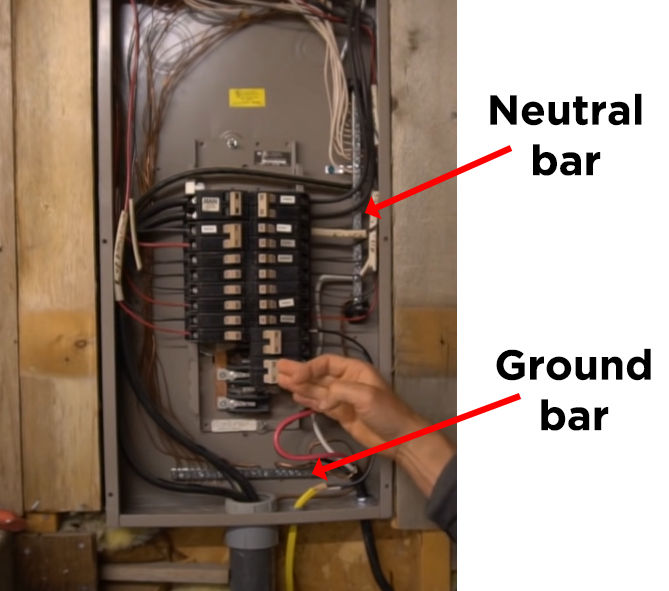
- Connect the white (neutral) wire to the neutral bar.
- Connect the bare copper (ground) wire to the ground bar.
- Connect the two red and black (hot) wires to the 240V circuit breaker.
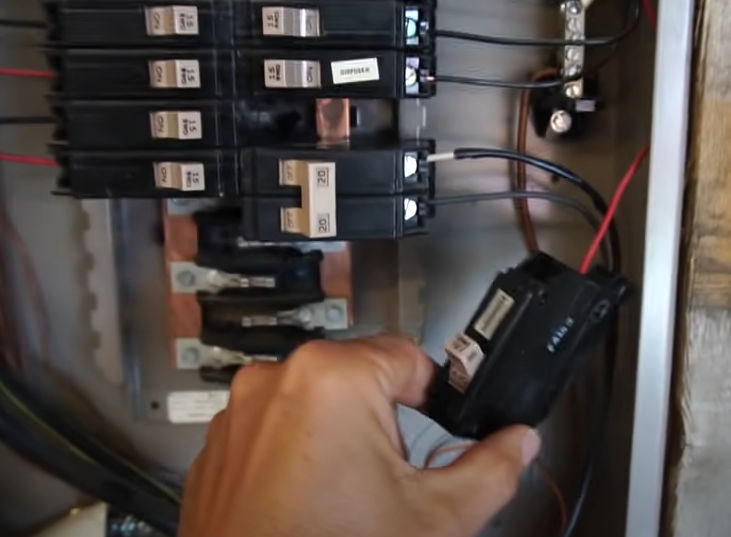
- Insert the circuit breaker.
- Turn on the main breaker and then turn on the new 240 V circuit breaker.
- Test voltage
- Hot (red) to hot (black) should be about 240 V.

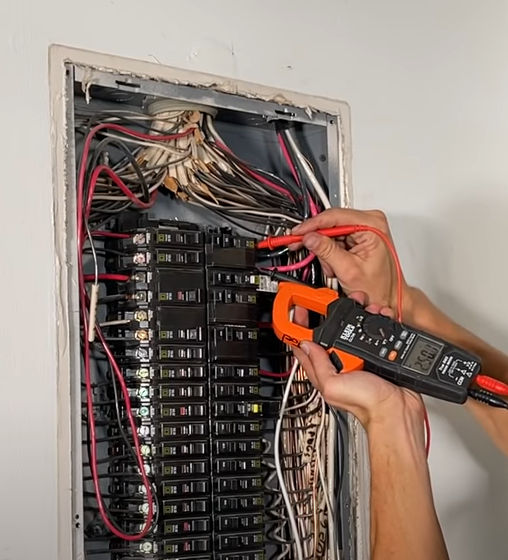
- Hot (red) to neutral should be about 120 V.
- Hot (black) to neutral should also be about 120 V.
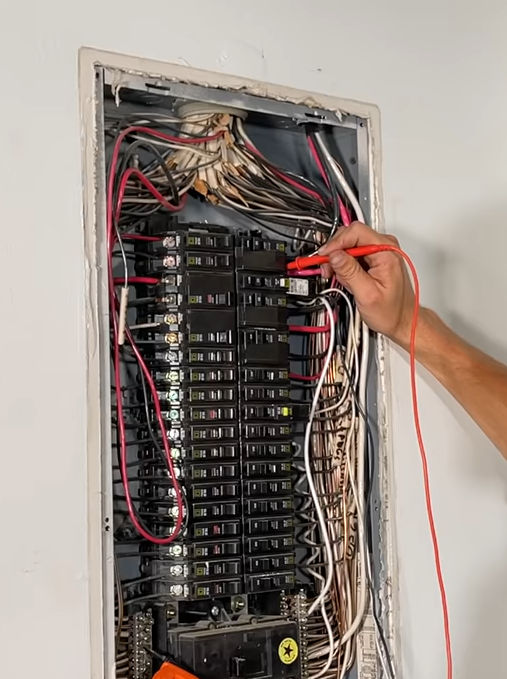
Do the same voltage test at the receptacle.
Here’s how mine came out.


It would have been more expensive and a hassle to put the outlet by the garage door, so I just put it next to the circuit breaker panel. I’ll just use an extension cord to reach the garage door.

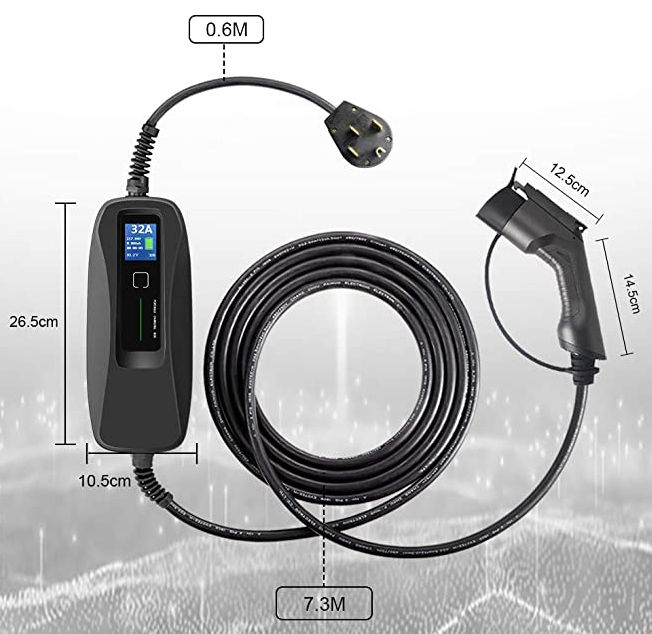
You can buy this EV charger cable on Amazon for $330.