


I recently added a slab of concrete in the backyard of one of my rentals. Unfortunately, I made some mistakes along the way. Specifically,
- I removed too much dirt from the area where the slab would go
- I could have paid less for a contractor to do the concrete work
- I should have verified the quality of the contractor’s work
Preparing the Foundation
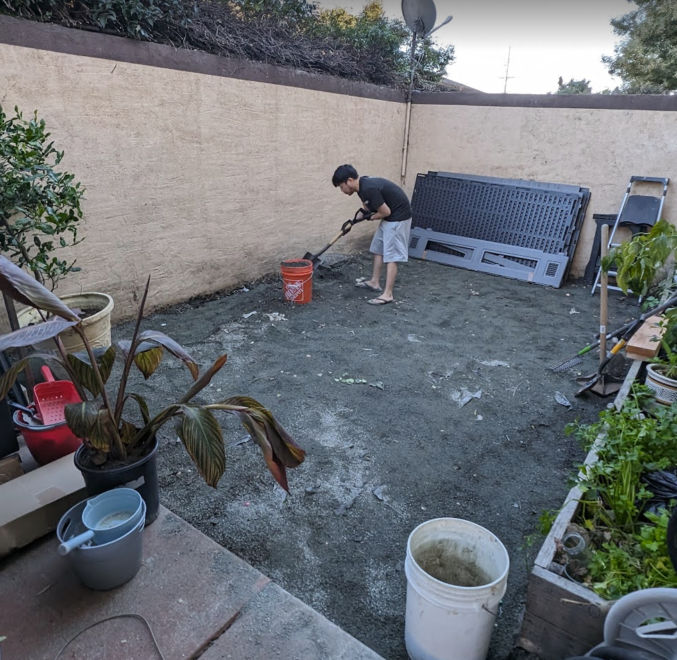
We first removed a lot of dirt and gravel by scooping it into some buckets. We did this so the 3.5″-thick concrete slab would be level with the existing concrete slab.
I rented a pick-up truck from U-haul and put tarp on the truck bed to protect it. This also made cleanup easier because I could pull the tarp off the truck along with any remaining dirt on it.

Driving with a full load of dirt made the truck swerve slightly at higher speeds so we took local roads to go to the city dump.

At the dump, we just shoveled the dirt onto the ground. The problem was the cost to dump dirt and gravel. If I had paid by weight, the cost would have been about $500. The clerk instead calculated the cost by volume, which lowered the cost to $372.

After making one trip, I regrettably thought I needed to remove more dirt and gravel. So, we made another trip and I spent another $372. After creating the wood form for the concrete slab, we realized that we had removed too much dirt, which meant I needed 2.5 times the amount of concrete I should have needed.
Getting Quotes
I called around to get quotes from concrete contractors. The slab dimensions would be 9′ x 15.5′ (140 sq ft). The first contractor quoted me $2000, but then lowered it to $1700. He quoted me without seeing the work area.
The second contractor came to see the work area and then quoted me $1500. That meant his rate was $1500/140 = $10.71 / sqft. According to one source, the cost in the California Bay Area to install a concrete slab including materials and delivery is between $8 to $14 / sqft. Therefore, I went and chose the 2nd contractor and paid $10.71 / sq ft.
Creating the Concrete Slab Form
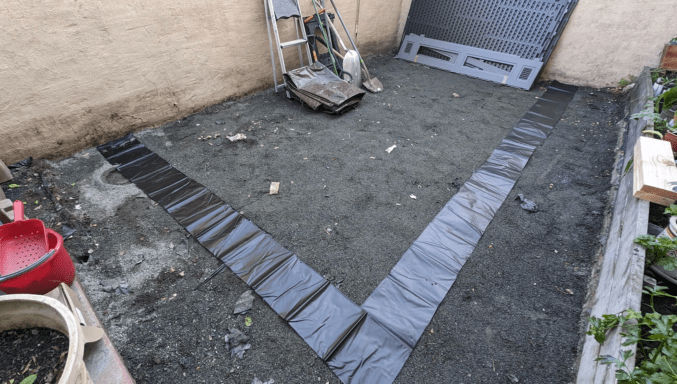
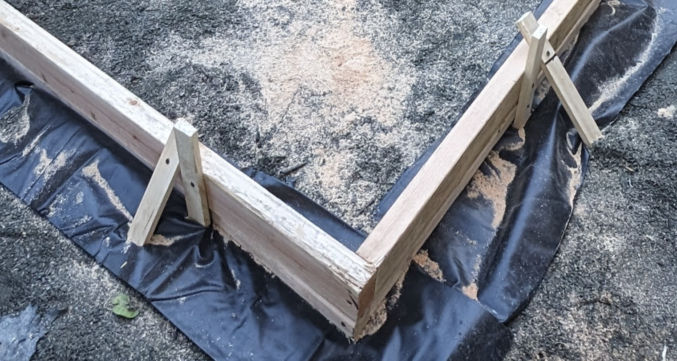
The contractor came and created the wood form. I first compacted the soil using a hand tamper and put down some pond liner where the edge of the concrete would be. Half of the pond liner would be under the concrete. The other half would be under rocks or mulch. The reason for doing this is so that weeds don’t grow along the edge. I left a 30″ gap between the old concrete slab and the new one for rainwater to drain into the ground.
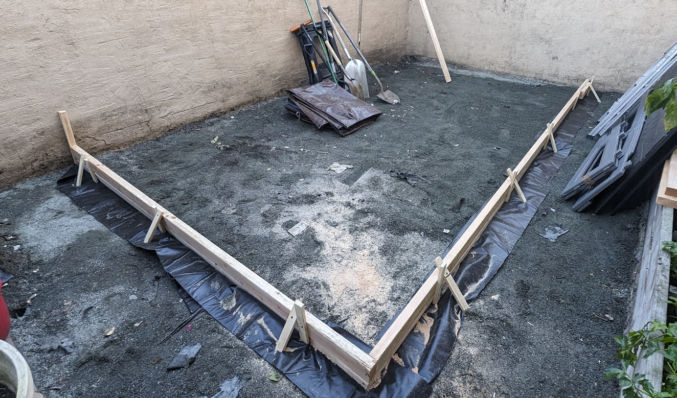
This is when I realized that I had removed too much dirt and gravel. I wanted the top of the new concrete slab to be level with the existing concrete slab in the backyard. Using a level, the contractor drove a wood stake into the ground and marked on it where the top of the 2×4 wood form would go. Screws were screwed through the vertical stakes into the 2x4s. Wood stakes were also used at an angle. This was necessary because without them, the weight of the concrete could push the vertical stakes and cause a deformity in the form. As you can see in the photo below, too much dirt and gravel had been removed, so the contractor had to put another 2×4 below the first set of 2x4s. This resulted in a slab thickness that was approximately 3.5″ x 2 = 7″ (one 2×4 is actually 1.5″ x 3.5″). That’s twice as much as is needed for a standard slab and therefore twice the amount of concrete would be needed.
Furthermore, I wanted the slab to slightly slope towards the long edge so that rainwater could flow into the ground rather than puddle on the slab and weaken it (concrete is porous). To determine the slope, the contractor used a level on the 2×4 and tilted it slightly before screwing it into the wood stakes. Then, he used a red chalk string to snap a line on the wall, marking the desired height of the slab along the wall. Since the red chalk wasn’t clear, he went over parts of it with a black marker as shown below.

Lay Rebar
To reinforce the concrete, the contractor added rebar. He cut the rebar with a reciprocating saw and metal blade.

They then tied the rebar together in what appeared to be plastic-coated wires or electrical (romex) cable.


Pour Concrete
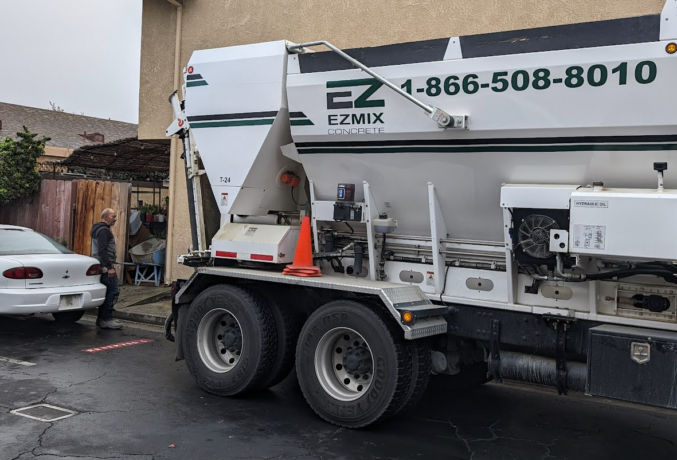
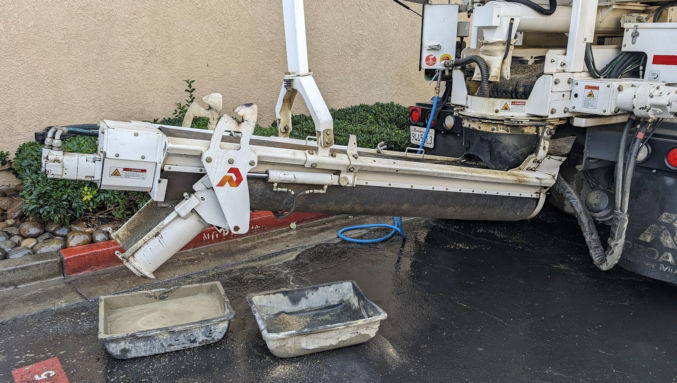
Instead of buying a bunch of bags of concrete and mixing them with water, the contractor ordered a truck to come and deliver premixed concrete.
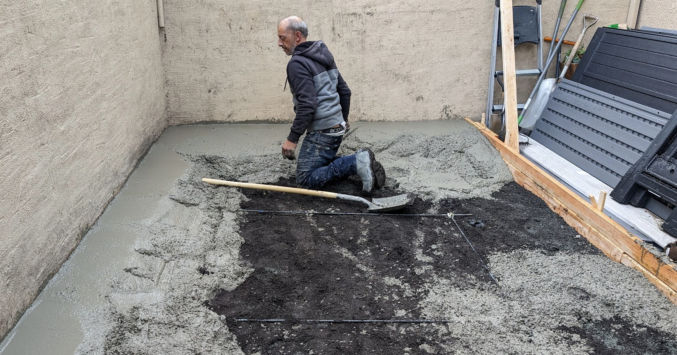
The premixed concrete flowed down a channel into a wheelbarrow.

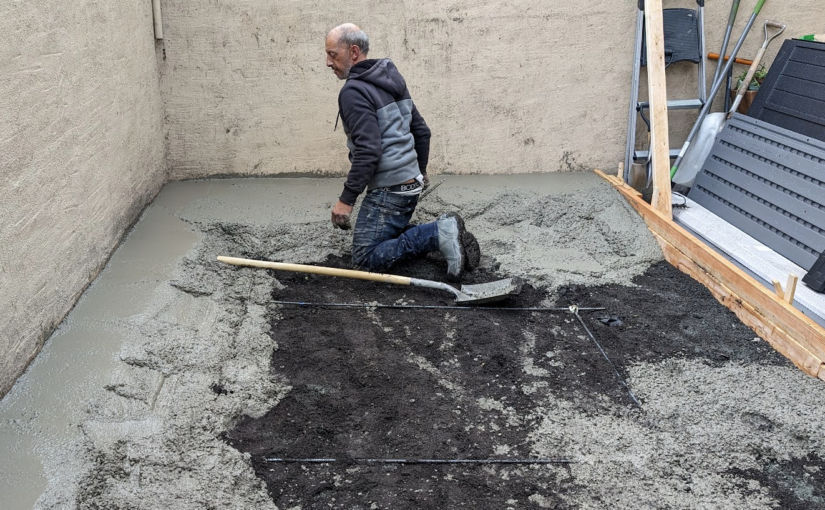
One person transferred the concrete to the work area while the other used a trowel to trowel the concrete.


Occasionally, they’d pull the rebar up so that it would settle in the middle of the slab rather than at the bottom.

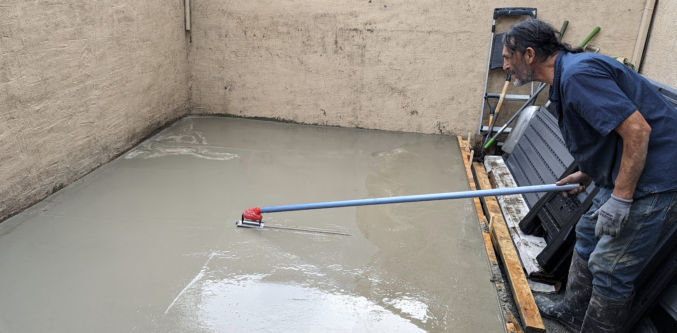
After pouring all the concrete and moving it into place using a hand trowel, this is how it looked.
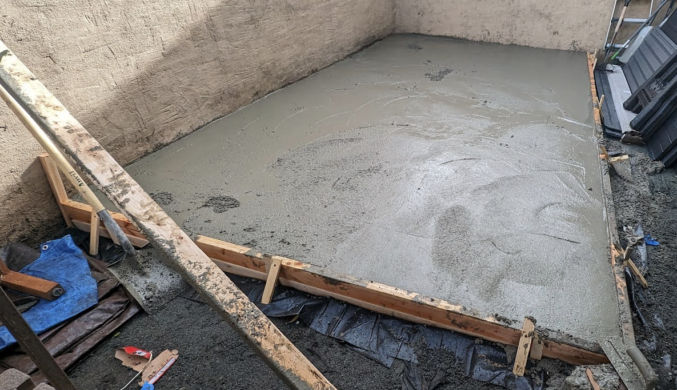
The contractor then used a float attached to a pole to create a smooth surface. If necessary, he would spray a mist of water to soften the concrete.

On the truck, the concrete supplier could see how much concrete was supplied. As you can see below, I needed a total volume of 2.66 cubic yards. People in the business would just say “yards”, which makes no sense since that’s a measure of length rather than volume. What they really mean is cubic yards.
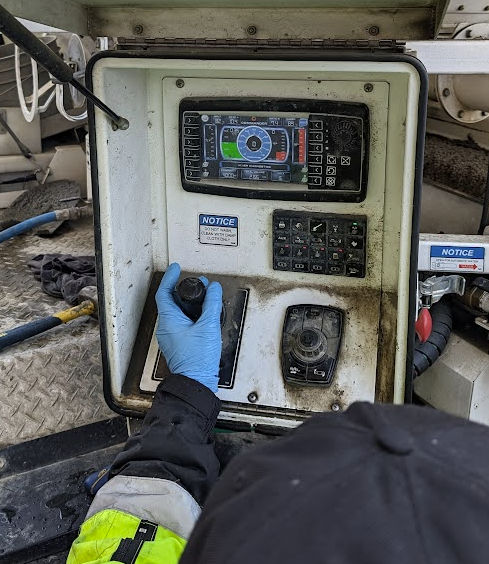

The unit cost of concrete is $169 / cu yd (cubic yard). Fortunately, the concrete supplier put down 2.5 cu yds rather than 2.66 cu yds to save me a little money. Had I not removed so much dirt and gravel, I could have only needed 1 cu yd for a 3.5″ thick slab. Instead, the resulting slab is now 6 to 6.5″ thick.
For small loads, the concrete supplier charges an extra $80 for 1 to 2.75 cu yds or $60 for 3 to 4.75 cu yds. Again, the supplier gave me a small discount by only charging me an extra $60 instead of $80. Then, there’s the delivery fee, which costs $80. The total cost for just the concrete was $607.91.

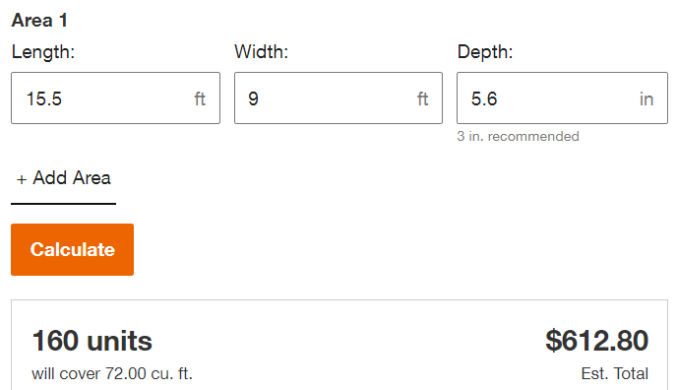
For comparison, if you buy bags of concrete at Home Depot, transport it yourself, and mix it with water, you’d pay $612.80 + 10% tax = $674 for the same 2.66 cu yds (72 cu feet) of concrete.
The concrete supplier cleaned his truck and washed the surrounding area.
The contractor then used an edging trowel to create a rounded edge.

He also used a special tool to create a control joint line.
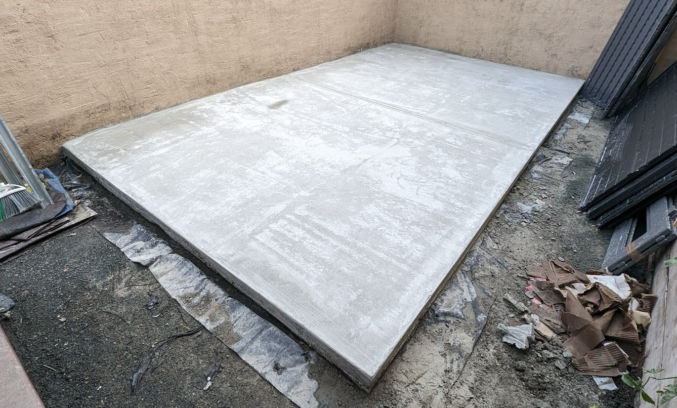
Once the concrete dries a bit, he’ll give the concrete surface a brushed texture so it’s not slippery smooth. Then, tomorrow, he’ll remove the wood form.
Smoothen Uneven Spots
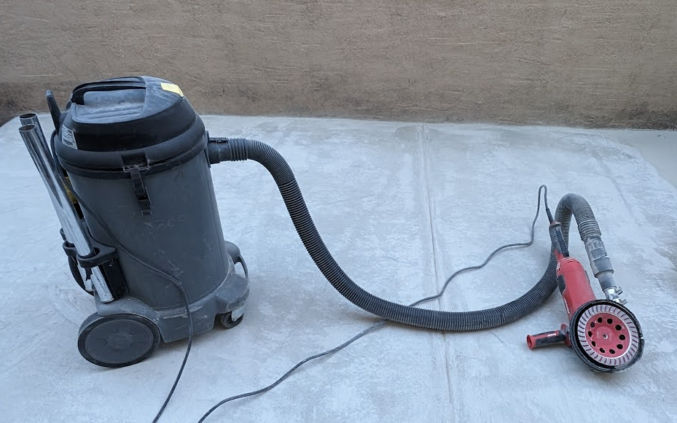
Unfortunately, the contractor didn’t do a good job. There were some uneven areas that drove me crazy. To fix this, I used a 7″ concrete grinder.
- 7″ Angle Grinder
I bought the BAUER 15 Amp 7 in. Trigger Grip Angle Grinder with 180° Rotating Body from Harbor Freight. It’s cheaper than other 7″ grinders and it has a trigger lock. - 7″ Dust Shroud
I bought the Dustless Technologies 7 in. Universal Dust Shroud Pro for Angle Grinders from Home Depot. It’s a bit expensive, but it works better than others I’ve tried. - Diamond Cup Wheel
I bought the BAUER 7 in. Diamond Turbo Cup Wheel from Harbor Freight. It works well. - Shop Vac
For a 7″ grinder, you need at least a 175 CFM shop vac. You can rent one from the Home Depot or buy this RIDGID 14-Gallon 6.0 Peak HP, 165 CFM NXT Wet/Dry Shop Vacuum. Or, you can buy this CENTRAL MACHINERY 13-gallon 1 HP High-Flow, 660 CFM Dust Collector and Dust Collector Accessory Kit from Harbor Freight and this 4 in. to 2-1/2 in. Tapered Adapter. - Dust Bag
If you don’t use a dust bag, your shop vac’s filter will quickly get clogged and lose suction. This one at Home Depot fits 12-16 gallon vacs. - Cyclonic Dust Separator
A cyclonic dust separator will separate most of the dust before it enters the shop vac. This will further prolong the life of the expensive shop vac filter. I bought the Dustopper PRO High-Efficiency Cyclonic Dust Separator from Home Depot. Or, you can buy this BAUER Cyclone Dust Separator Kit for 5 Gallon Buckets from Harbor Freight. - N95 Face Mask and/or Neck Gaiter and/or Balaclava
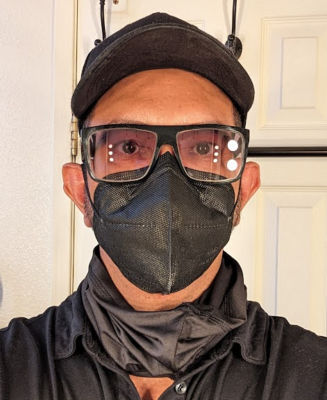
Despite using a powerful shop vac, some dust will still escape. Wear an N95 face mask like this one coupled with a neck gaiter or a balaclava. - Rubber Strip and Hose Clamps
To prevent the shop vac hose from detaching from the angle grinder, I wrapped a 2″-wide rubber strip around the connection and clamped it using two hose clamps. - Knee pads
You will be on your knees when grinding concrete. Wear knee pads. I like this one on Amazon.
IMPORTANT: concrete dust is very dangerous if inhaled! Always wear protection.


When grinding concrete, move relatively quickly and in a circular motion to avoid creating uneven spots.
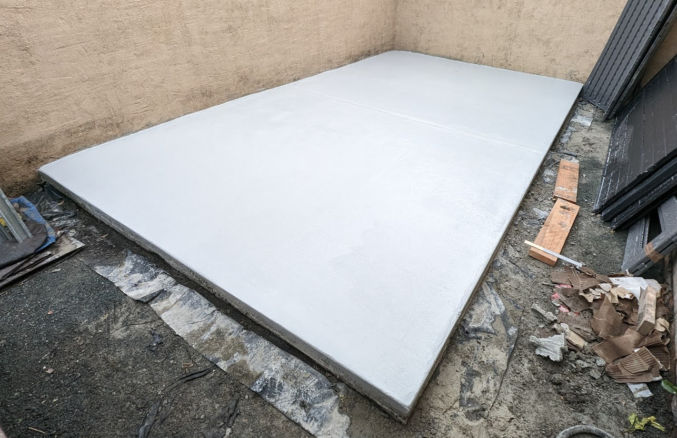
Etch the Surface
Raw concrete doesn’t look that great. To beautify it, I’ll apply some epoxy to it. In order for the epoxy to stick, the smooth surface needs to be etched. The easiest way to do this is by renting a flooring tool with the Diamabrush concrete prep attachment. In my case, the surface wasn’t smooth, so I was able to skip this step.
Apply Epoxy
Since cars will not go on my slab, I’ll apply some 1-part epoxy. I like this one in silver gray:
It’s very easy to apply. Just roll it on using an epoxy roller. To prevent slipping, add anti-slip floor additive to the epoxy.
Lessons Learned
- For some reason, it costs more to dispose of dirt and gravel at the dump than it is to be supplied the same amount of premixed concrete, including delivery.
- Before removing dirt, create the wood form first so you’ll know how much dirt to remove. The concrete slab need only be 3.5″ thick.
- Since I paid $608 for the concrete, assuming the other materials (2×4 lumber and wood stakes) cost $42 (conservative estimate), then that means I paid the contractors (2 people) $1500 – $608 – $42 = $850 for pretty much one day of actual work. So, each contractor got $425 a day or $425 / 5 hours = $85 an hour. That’s a high hourly rate. However, all concrete contractors charge a high rate even though the number of hours worked is low. Next time I’ll ask for a quote for the labor only since now I know the costs for the materials.
- The quality of the contractor’s work was poor. There were uneven spots and the concrete was mostly level rather than slightly sloping in one direction for water runoff. There was also one lower area where water would puddle. Next time, verify the quality of the contractor’s work.