This article explains how to remove a green background in a video using Corel VideoStudio Ultimate 2018 and the NewBlueFX Chroma Key.
When applying a chroma key to a video in VideoStudio, you have two options:
- using Corel VideoStudio’s native chroma key feature
- using the NewBlueFX Chroma Key filter
Native Corel VideoStudio Chroma Key Feature
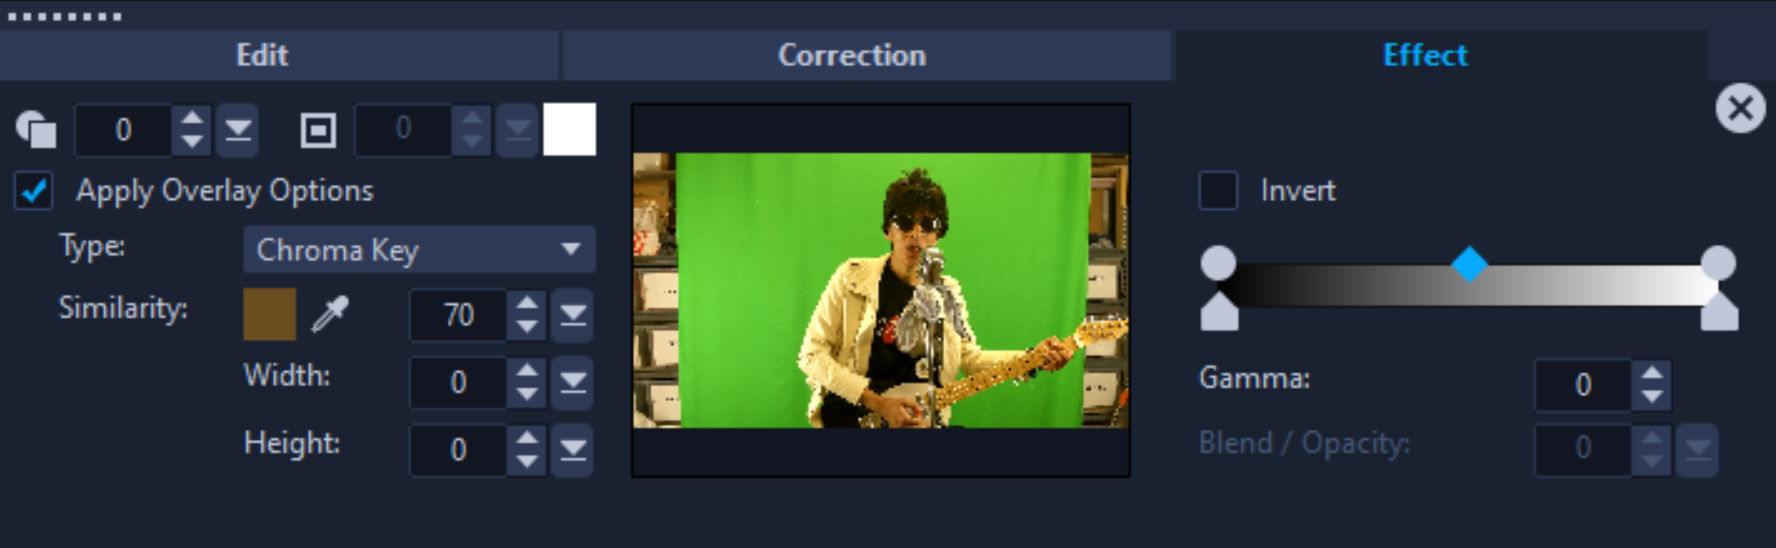
To use VideoStudio’s native chroma key feature,
- select a video on the timeline,
- open the Options panel,
- click the Effect tab,
- check the “Apply Overlay Options” checkbox, and
- adjust the settings.
From my experience, this feature doesn’t work well for imperfectly lit backgrounds. Unless you are filming in a professional studio, the chroma key results will likely be poor.
NewBlueFX Chroma Key Filter
For better chroma key results, you can use the NewBlueFX Chroma Key filter. Disable the native VideoStudio chroma key by unchecking the “Apply Overlay Options” checkbox described in the previous steps. This will minimize confusion due to the application of multiple chroma keys. To use the NewBlueFX Chroma Key, do this:
- crop your video to remove any areas outside of the green screen. If you don’t, the background will be gray instead of transparent.
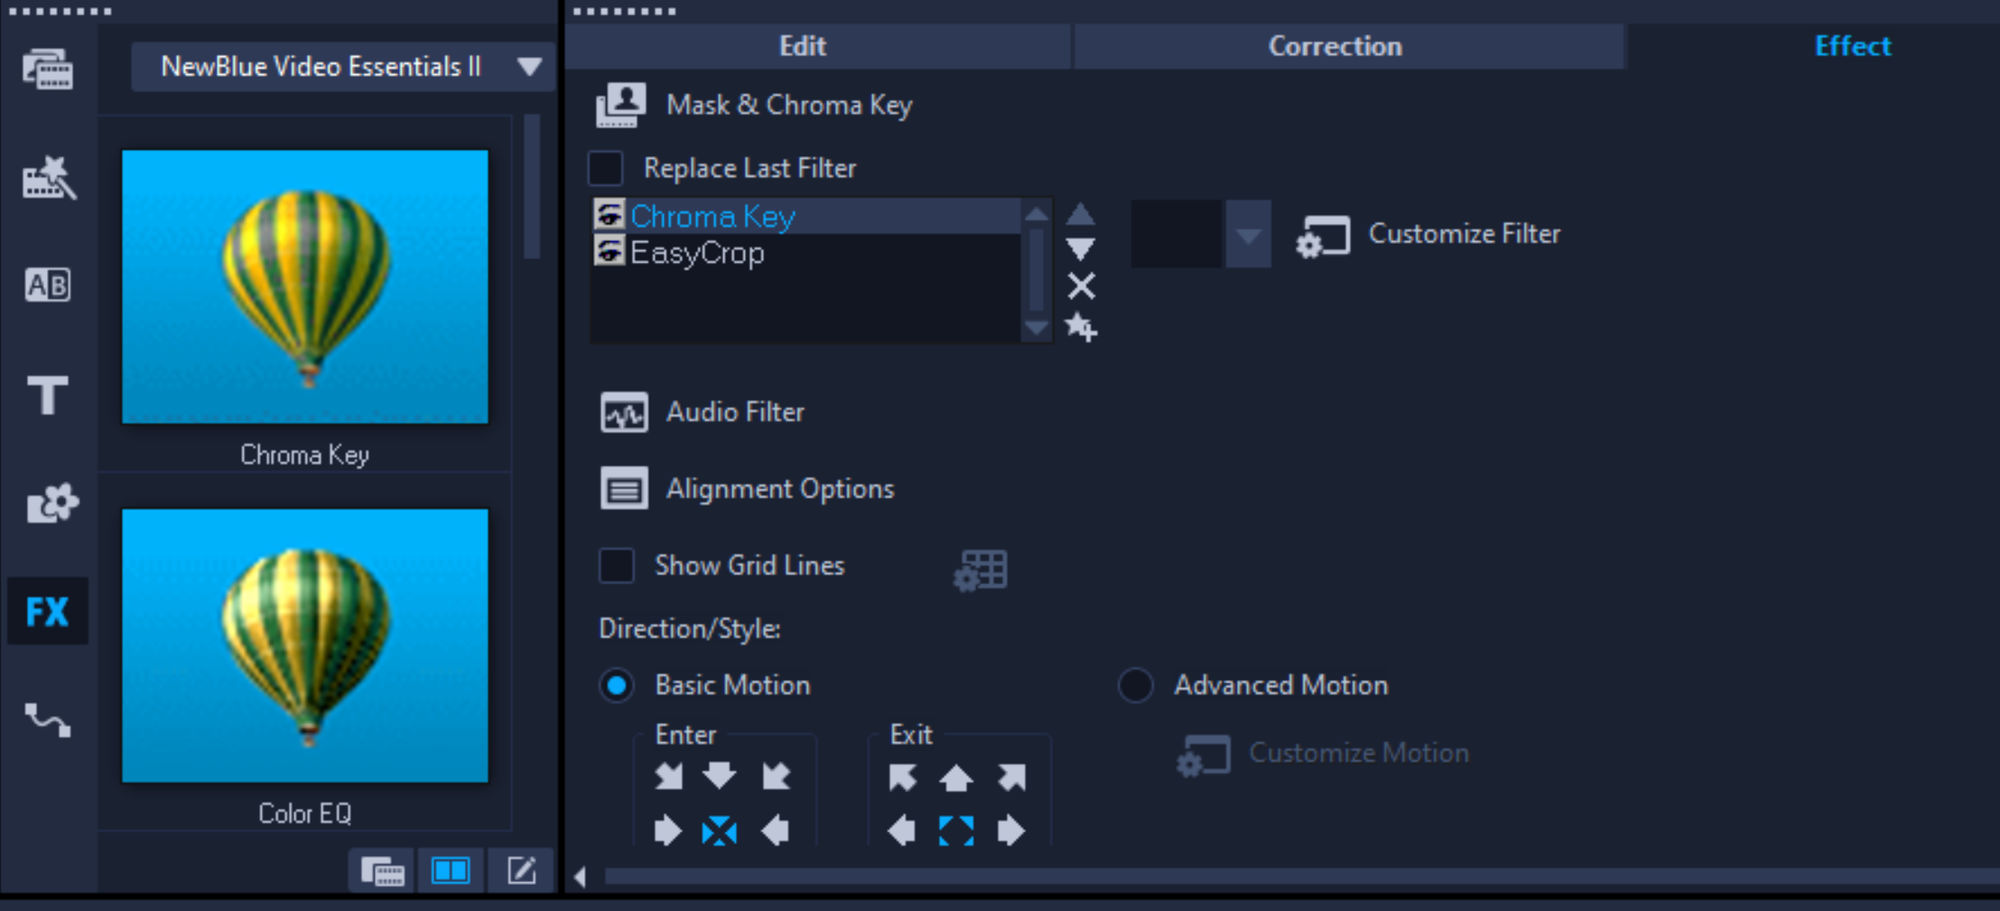
- click on the FX Filter button
- select NewBlue Video Essentials II in the filter dropdown
- drag the Chroma Key filter to the video in the timeline
- if the native VideoStudio chroma key panel is visible, close it by clicking the x button in the top right corner of the panel
- select the “Chroma Key” filter and then click the “Customize Filter” button
The NewBlue Chroma Key control panel will appear.
- Uncheck “Show in preview window” to improve performance
- Uncheck “Use keyframes” to apply the same chroma key settings for the entire video. Unless you need to apply different settings for different sections of the video, you don’t need to use keyframes.
- If your background is green, leave the “Default – Green” button selected.
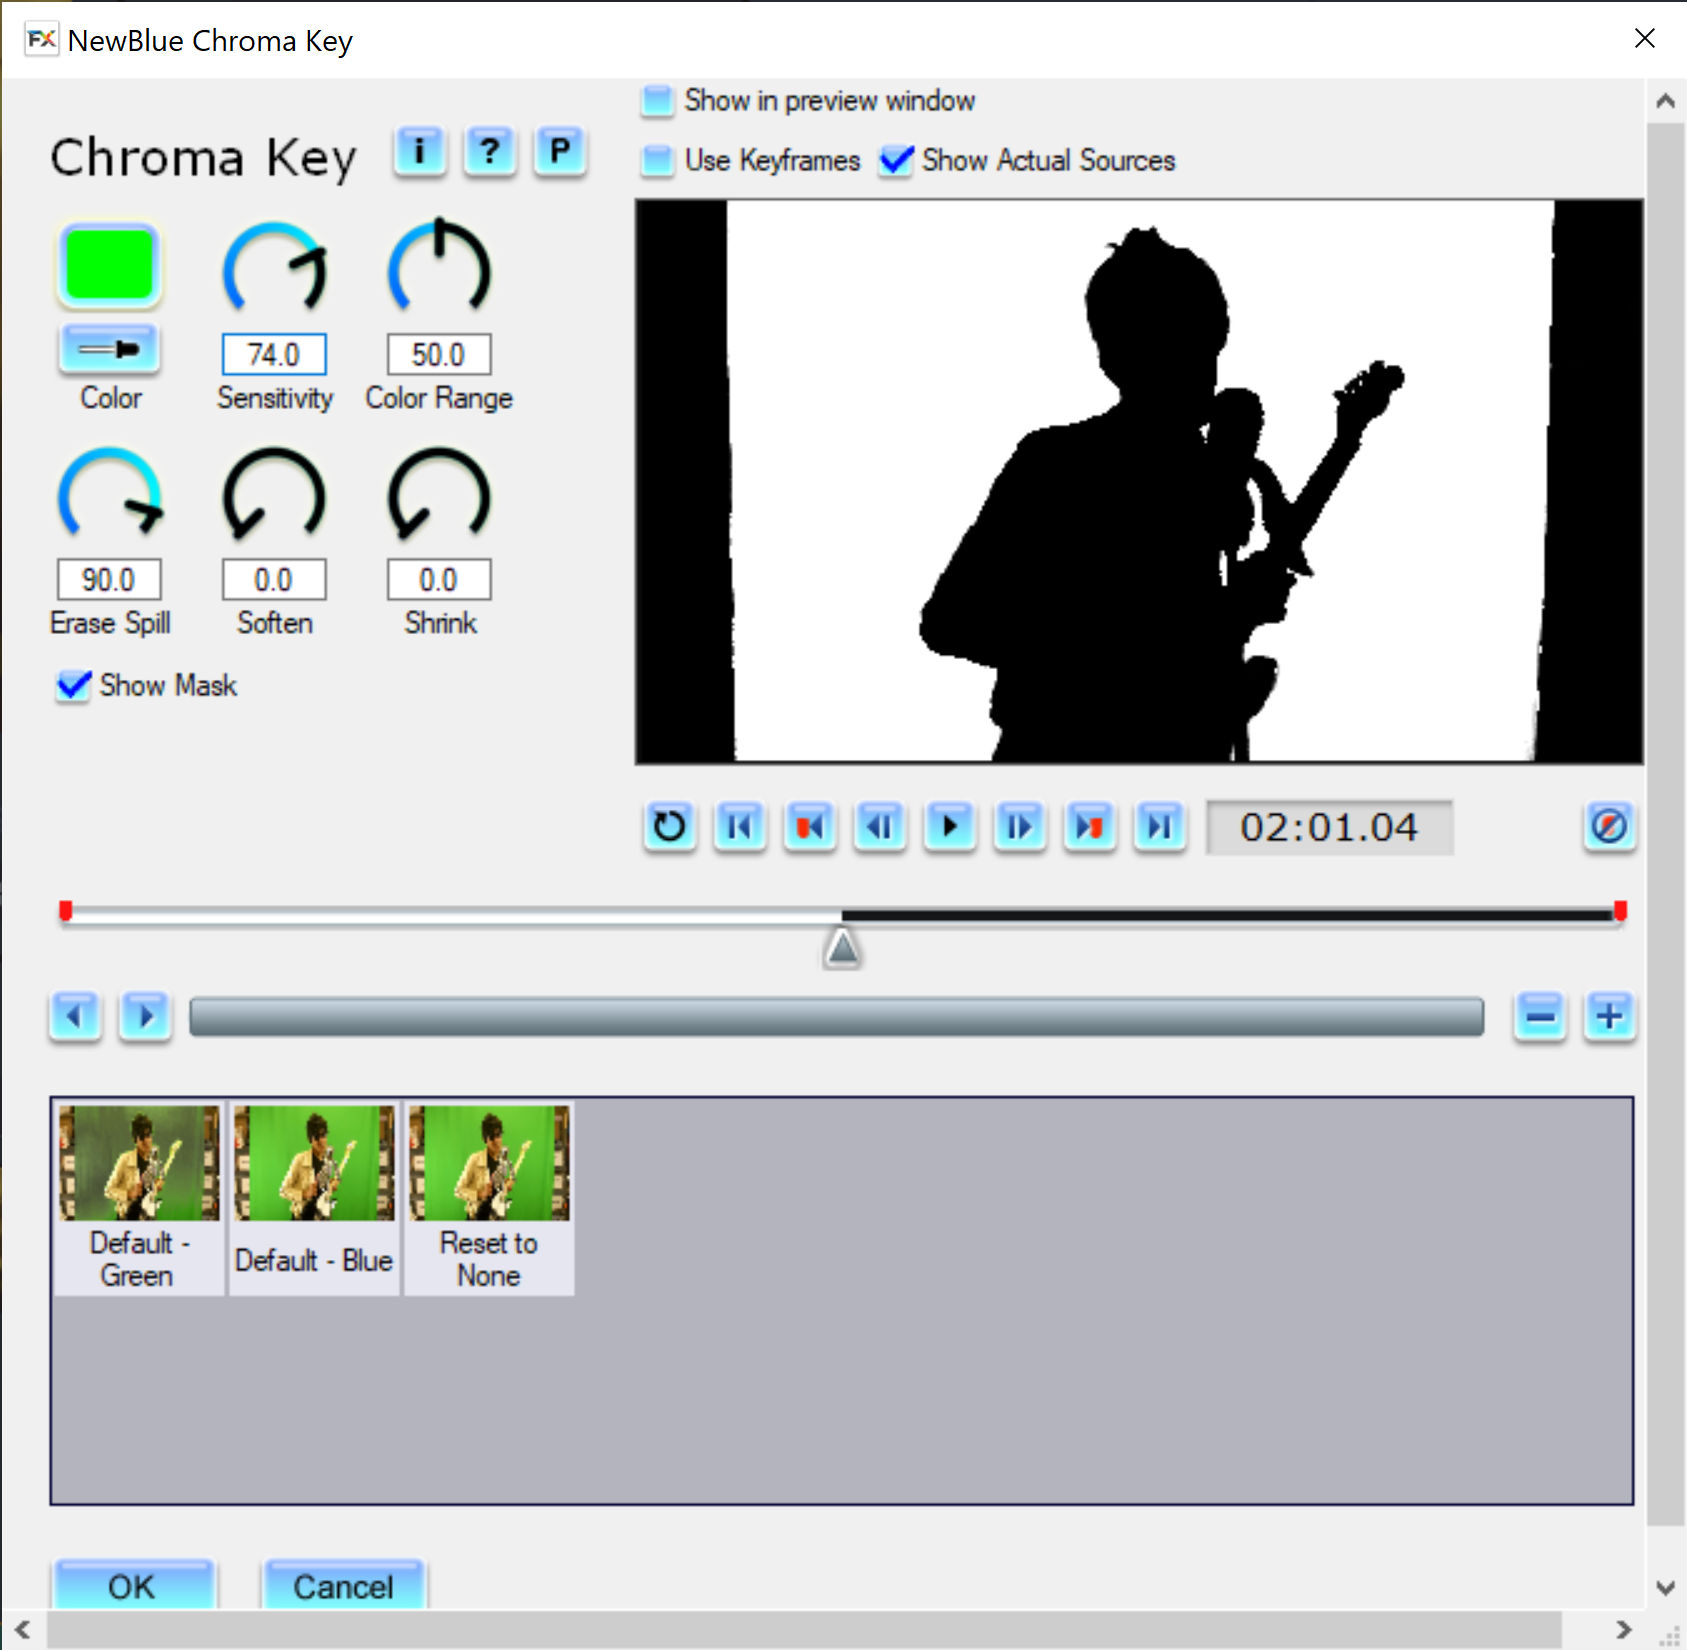
- Check the “Show Mask” checkbox to show a black mask for any color in the video other than green
- Adjust the Sensitivity value until the subject is completely black and the background is completely white. If it’s difficult to use the radial slider, just enter numeric values.
- Drag the slider to scrub through the video to see if any section of the video shows a partially gray background or white subject. If it does, further increase the sensitivity setting.
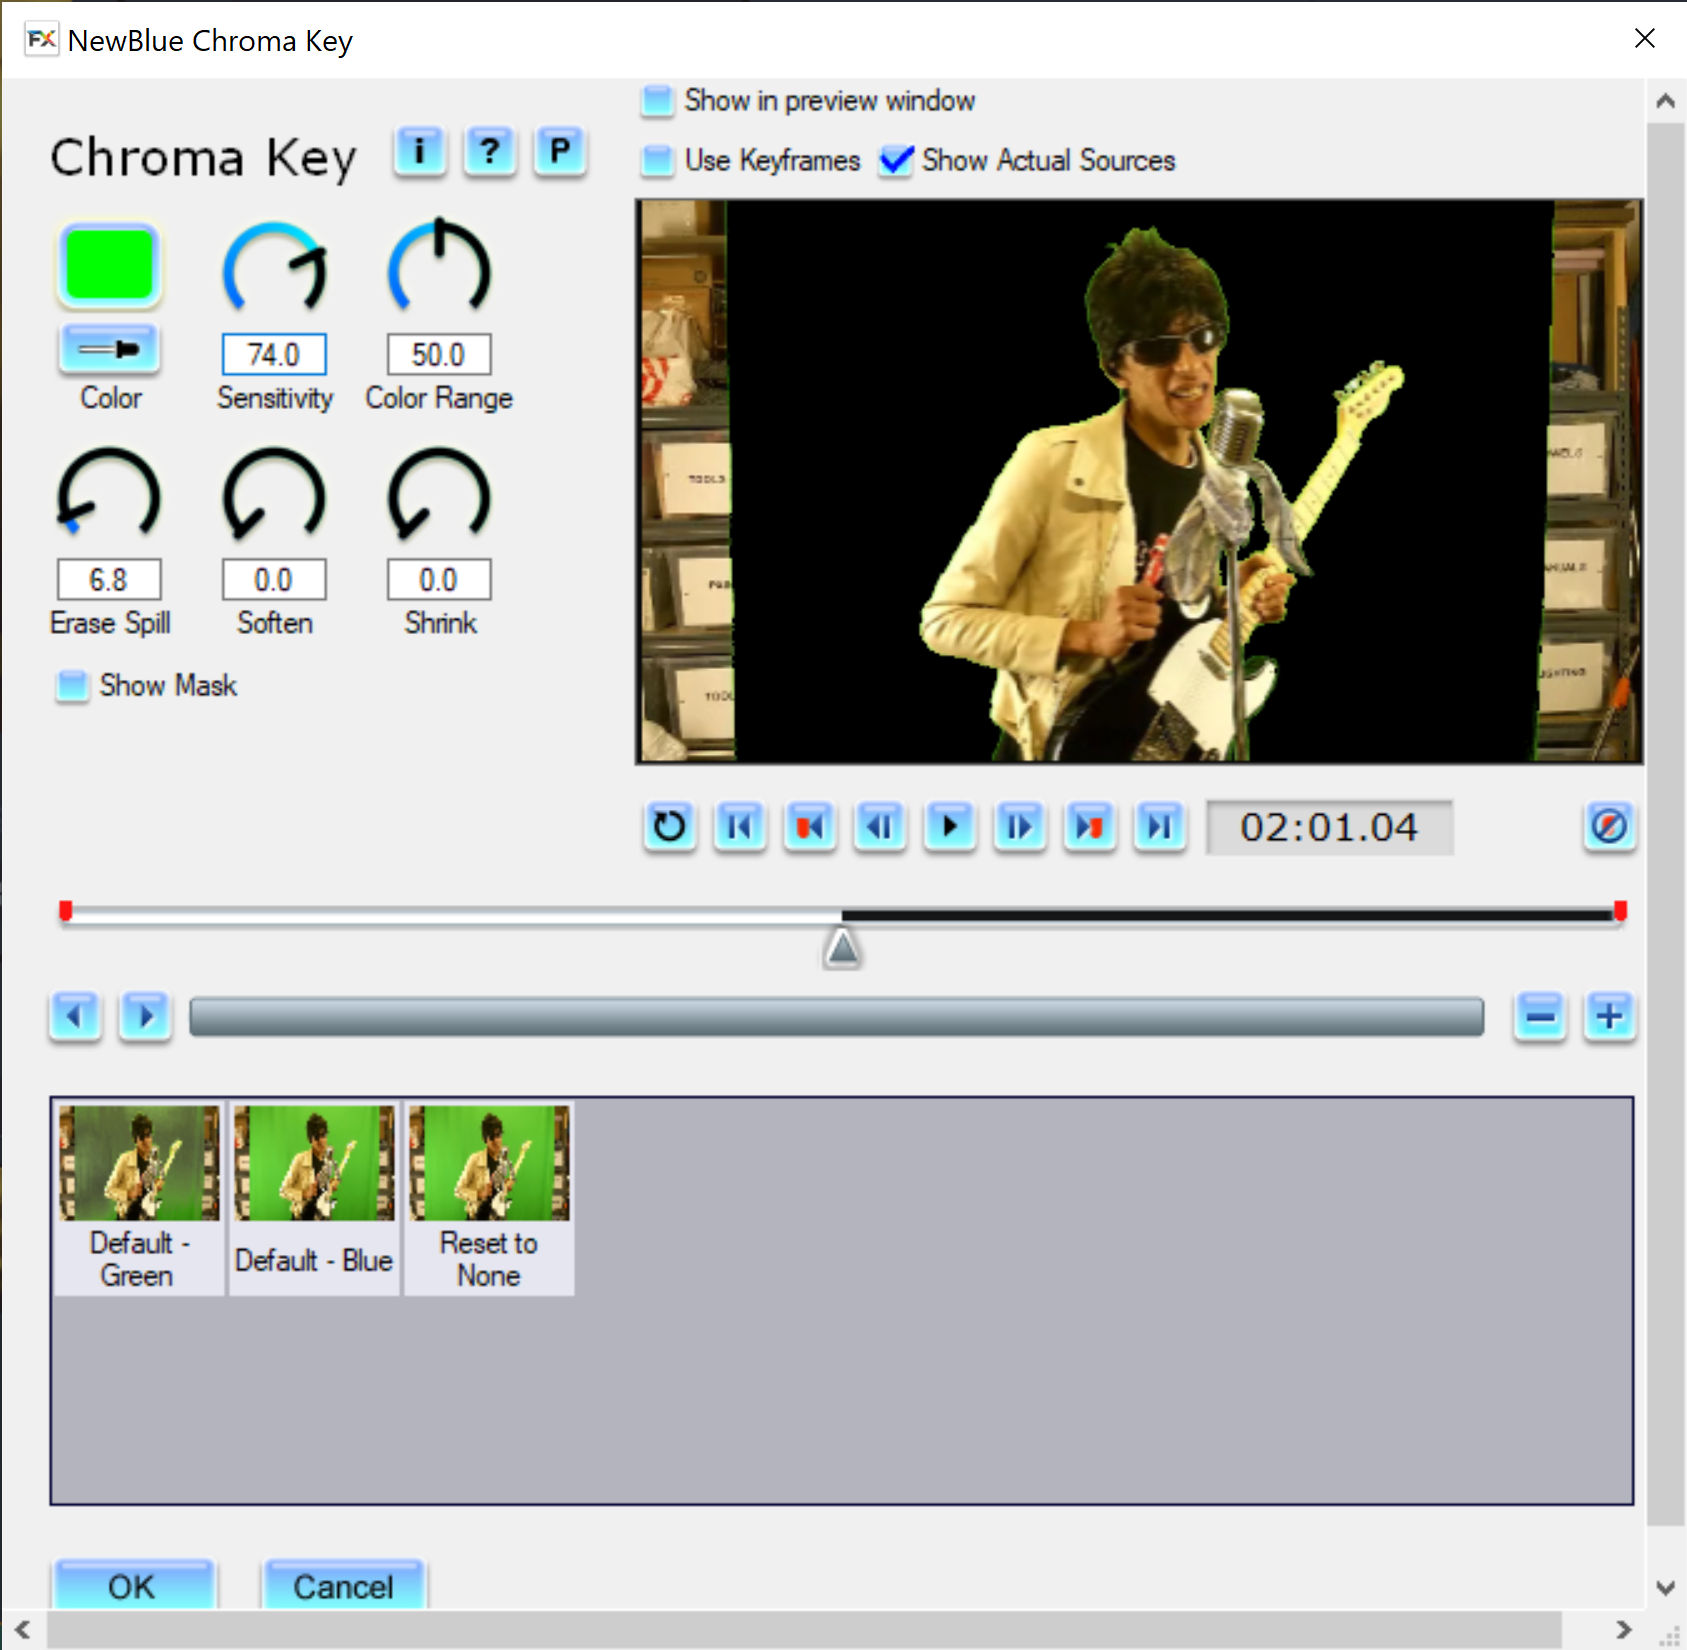
- Uncheck the “Show Mask” checkbox to remove the mask and to see the video in color. If you see some of the green background spilling over on the subject (usually around a person’s hair), adjust the “Erase Spill” value.
- Click OK to save and exit the Chroma Key panel.