


In this tutorial, I’ll explain how you can easily create a website using pre-made components.

Note that the following is just one of many ways you can do this.
1. Install Parcel
Parcel in a simple, zero-configuration build tool. Here are some of its features.
- It works with static HTML files, but it can also work with React and many other file types.
- Parcel includes a development server out of the box with auto-reload.
- Clear error messages and diagnostics
- Fast build times
- HTML, CSS, JS modification and compression using Gzip and Brotli
- Image optimization (although I prefer an image CDN like ImageKit for that)
- Parcel automatically includes content hashes in the names of all output files. This enables long-term browser caching.
2. Install Tailwind CSS
Tailwind CSS is a utility-first CSS framework.
Instructions on how to install both Parcel and Tailwind CSS.
If you will have CSS files separate from Tailwind CSS, in your tailwind.config.js file, make sure to add “css” as a file option.

3. Update Configs, Set Up Git, and Test Locally
Add a source and scripts to your package.json by copying the source and scripts to it so that it looks like below. Remove the “main”: “index.js” if it exists. Note that we’re using the glob ./src/**/*/index.html to tell Parcel to build all HTML files in all directories.

Run npm run build to test building the pages.

Run npm start to start a local dev server.

Open a browser and go to the server URL provided to verify the test page loads. Make a change to the HTML and Tailwind CSS classes to verify that changes are processed and the page auto-refreshes in the browser.
4. Set Up Git and Push to GitHub
- Run
git initto initialize a new local git repo. - Create a .gitignore file with the following contents
node_modules
.parcel-cache
.env
dist- Create a repo in GitHub and push your local changes to it, e.g.
git add *
git commit -m "first commit"
git branch -M main
git remote add origin [email protected]:javanigus/test-tailwind-site.git
git push -u origin main
All files in your GitHub repo should be there except for the ones in the .gitignore file.
5. Set Up Deployments to GitHub Pages
Install the gh-pages package by running npm install gh-pages --save-dev.
Add the following scripts to your package.json file:
"predeploy": "rm -rf dist .parcel-cache && parcel './src/**/*.html' build --public-url ./",
"deploy": "gh-pages -d dist"
The predeploy script will run the npm run build command before deploying to ensure that the latest production-ready files are used. You need to clear the cache by deleting the .parcel-cache folder first. Also, since GitHub Pages publishes your website in a folder below the root domain, you need to add a “public-url” flag to tell Parcel to remove the slash (/) for relative dependencies like CSS and JS files to avoid getting a 404 error.
Run npm run predeploy
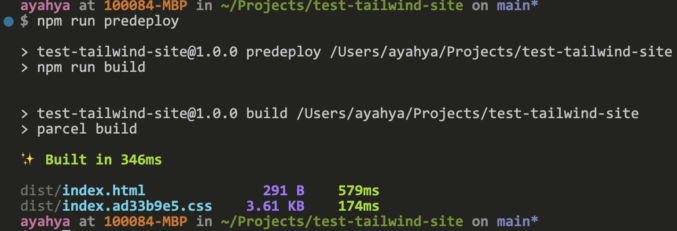
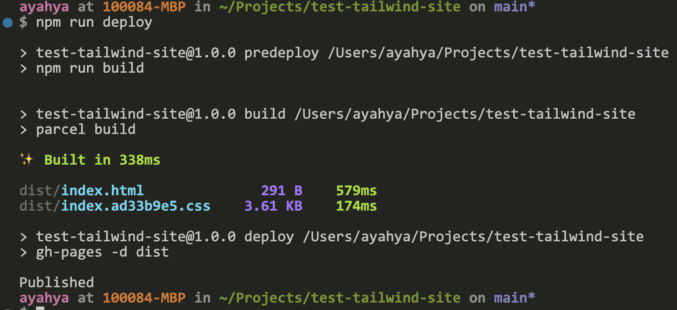
The deploy script will use the gh-pages package to deploy the contents of the dist directory to the gh-pages branch of your GitHub repository.
Run npm run deploy
View your site at https://<username>.github.io/<repository>/. In my case, that’s https://javanigus.github.io/test-tailwind-ui-site/.
In GitHub, if you go to Settings > Pages, you’ll see that the commands above configure GitHub Pages for you.

6. Add Pre-made Sections to Your HTML Pages
You can use Tailwind UI to copy and paste a bunch of sections like header, footer, hero, contact us, etc.
https://tailwindui.com/components
You can also get Tailwind components from Flowbite.
7. Add Pre-made UI Elements to Your HTML Pages
You can use Material Tailwind to copy and paste a bunch of elements like buttons, cards, accordions, lists, tables, etc. You’ll first need to add the Material Tailwind CSS and JS to your HTML pages first.
Ripple Effect
<!-- from node_modules -->
<script src="node_modules/@material-tailwind/html@latest/scripts/ripple.js"></script>

<!-- from cdn -->
<script src="https://unpkg.com/@material-tailwind/html@latest/scripts/ripple.js"></script>
Icons
<!-- Material Icons Link -->
<link
  href="https://fonts.googleapis.com/icon?family=Material+Icons"
  rel="stylesheet"
/>

<!-- Font Awesome Link -->
<link
  rel="stylesheet"
  href="https://cdnjs.cloudflare.com/ajax/libs/font-awesome/5.15.2/css/all.min.css"
  integrity="sha512-HK5fgLBL+xu6dm/Ii3z4xhlSUyZgTT9tuc/hSrtw6uzJOvgRr2a9jyxxT1ely+B+xFAmJKVSTbpM/CuL7qxO8w=="
  crossorigin="anonymous"
/>
8. Add Icons
Easily add icons from FontAwesome or SVG Repo.
9. Add Fonts
Find and load fonts for free from Google Fonts.
10. Add Backgrounds
Your page sections will look boring if they are just plain white. Here are some background ideas:
- background photo
- background video
- background solid color
- background gradient
- background animation
For example, I use this gradient background animation for the announcement banner commonly found stuck to the top of websites. You can find free images at Unsplash. You can find SVG backgrounds from svgbackgrounds.com. I also used one of the button styles from here.
11. Add Animation
I like anime.js. The documentation is clear and integration is simple. Just add a reference to the animeJS library on a cdn like CDNJS. Then, add write some JavaScript that uses animeJS in your main JavaScript file. If you want your animations to run when users scroll to a particular section of your site, you can add the Waypoints library from a CDN as well. In my example website, I first hide all elements by setting their opacity to 0. Then, I use Waypoints + AnimeJS to animate different elements. Here’s my code. I ended up loading jQuery, animeJS and Waypoints along with my main JS file at the bottom of the <body> element.
<script src="https://cdnjs.cloudflare.com/ajax/libs/jquery/3.7.1/jquery.min.js" integrity="sha512-v2CJ7UaYy4JwqLDIrZUI/4hqeoQieOmAZNXBeQyjo21dadnwR+8ZaIJVT8EE2iyI61OV8e6M8PP2/4hpQINQ/g==" crossorigin="anonymous" referrerpolicy="no-referrer"></script>

<script src="https://cdnjs.cloudflare.com/ajax/libs/animejs/3.2.2/anime.min.js" integrity="sha512-aNMyYYxdIxIaot0Y1/PLuEu3eipGCmsEUBrUq+7aVyPGMFH8z0eTP0tkqAvv34fzN6z+201d3T8HPb1svWSKHQ==" crossorigin="anonymous" referrerpolicy="no-referrer"></script>

<script src="https://cdnjs.cloudflare.com/ajax/libs/waypoints/4.0.1/noframework.waypoints.min.js" integrity="sha512-fHXRw0CXruAoINU11+hgqYvY/PcsOWzmj0QmcSOtjlJcqITbPyypc8cYpidjPurWpCnlB8VKfRwx6PIpASCUkQ==" crossorigin="anonymous" referrerpolicy="no-referrer"></script>

<script src="main.js"></script>
12. Deploy
Whenever you’re done making a change, just run the following deployment commands.
npm run predeploy
npm run deploy
Here’s a test site I created. Not too bad for a day’s work.
https://javanigus.github.io/test-tailwind-ui-site
- The source code is in the main branch.
- The built website files are in the gh-pages branch.
Next steps: