If you’re a non-technical person who is part of a marketing team working for a company that depends a lot on a website, chances are you will often need to ask a team of web developers to make website updates for you. Your particular website may not be easily updated using a content management system (CMS), and even if it could, many non-technical people would rather just send an email to request their website changes. Asking developers to update a website is fine, but only if the update requests are clear. Otherwise, the requestors risk wasting their time and other people’s as well. Unfortunately, the reality is most people don’t know how to clearly communicate their change requests. There are many website annotation tools that claim to be able to simplify the communication process, but in real-world situations, I haven’t found any that were good enough. Plus, adding a new tool requires learning something new, which many people are unwilling to do or don’t have time for.
In this post, I’ll share one approach that non-technical people can use to easily and clearly communicate website change requests to minimize misunderstandings, delays, and lots of back-and-forth messages. And since most people already know and are comfortable using MS Word or Google Docs, this approach only requires a word processor.
Website Sections
Most websites contain a vertical series of sections. For example, Adobe has a product page for its video editing software, Adobe Premier. This web page can easily be divided into a bunch of sections.

Change Request Doc
Since a picture is worth a thousand words, it’ll be a lot easier to show a screenshot of a section of a web page rather than try to explain the section using words. And since you may want to move some sections around, it’s helpful to number each section. And since you may collaborate with other people in requesting website changes, we’ll use MS Word or Google Docs for our change requests. I’m going to use Google Docs because I find it easier to use.
- Create a new Google doc
- Give it a name like “Adobe Premier Product Page Changes”.
- Change the page margins to 0.25″ on all sides
- Under View, uncheck “Show print layout” if it is checked.
- At the top of the doc, put the URL to the page, e.g. https://www.adobe.com/products/premiere.html
- Insert a table containing 3 columns and 20 rows.
- In row 1, cell 1, enter “#”
- In row 1, cell 2, enter “SECTION”
- In row 1, cell 3, enter “CHANGES”
- In the first column, enter a consecutive number in each cell starting from 1 and make it narrow enough just for the numbers
- Take a screenshot of each section and paste them in the middle column
- In the right column, describe your change request.
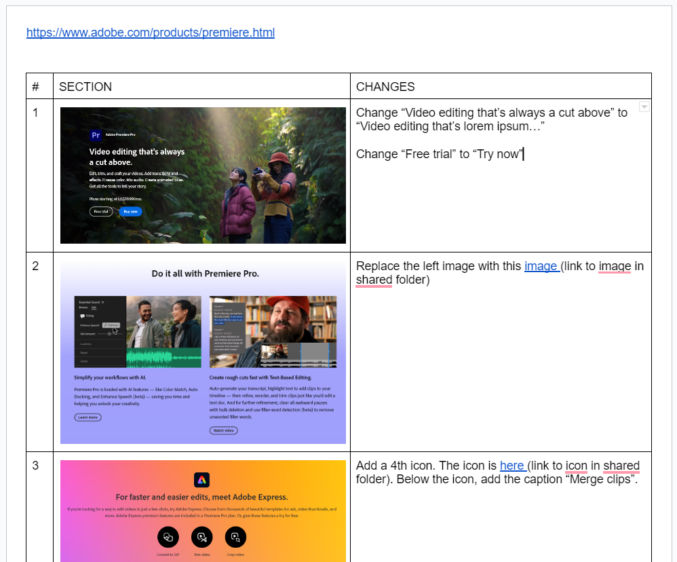
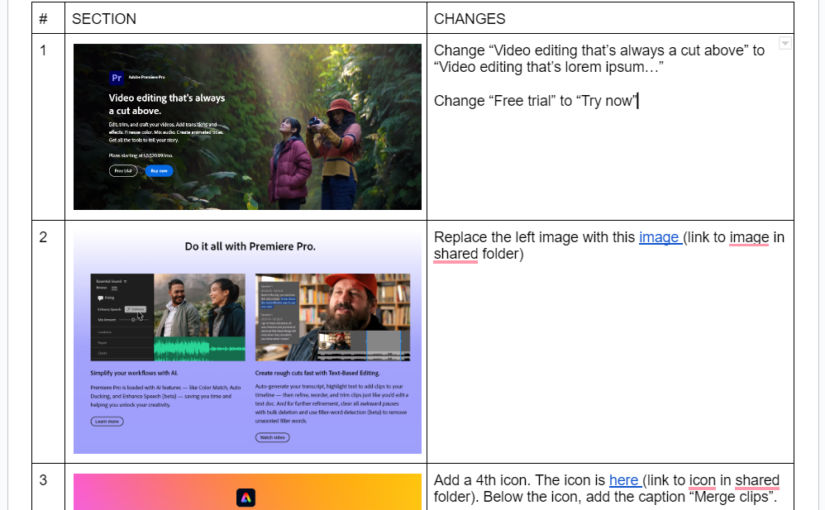
Here’s an example.