


Making a music video often requires transitioning between multiple video clips. Many video editing programs have many effects for transitioning between video clips. The most common transition effect is the cross fade. In Corel VideoStudio, you can apply this transition by dragging it over the two video clips where they meet. Since this is a cross fade, the duration of the two clips necessarily becomes smaller. If you have a separate audio track and you want the video track to be in sync with the audio track, the crossfade transition will cause the video to become out of sync with the audio track. To maintain synchronousness and for transitioning many video clips, use the track transparency feature. The instructions below are for making a music video with multiple video tracks and a separate audio track.
1. Record Video Footage
You can do this using your phone. Just remember to record in landscape. If you want to show a different background behind the subject, make sure to film against a green screen.
2. Add Assets to Corel VideoStudio
The assets are things like each source video, music files, background images and videos, etc. Make sure you name each file something descriptive to make it easy to identify them when working with many tracks.

3. Drag the Background Image / Video to the Video Track
The first track in the list of tracks is the video track. Unlike the Video Overlay tracks, the Video track must start at time 0. If the background video is abstract and can be looped but is too short, you can duplicate it back to back as shown below.
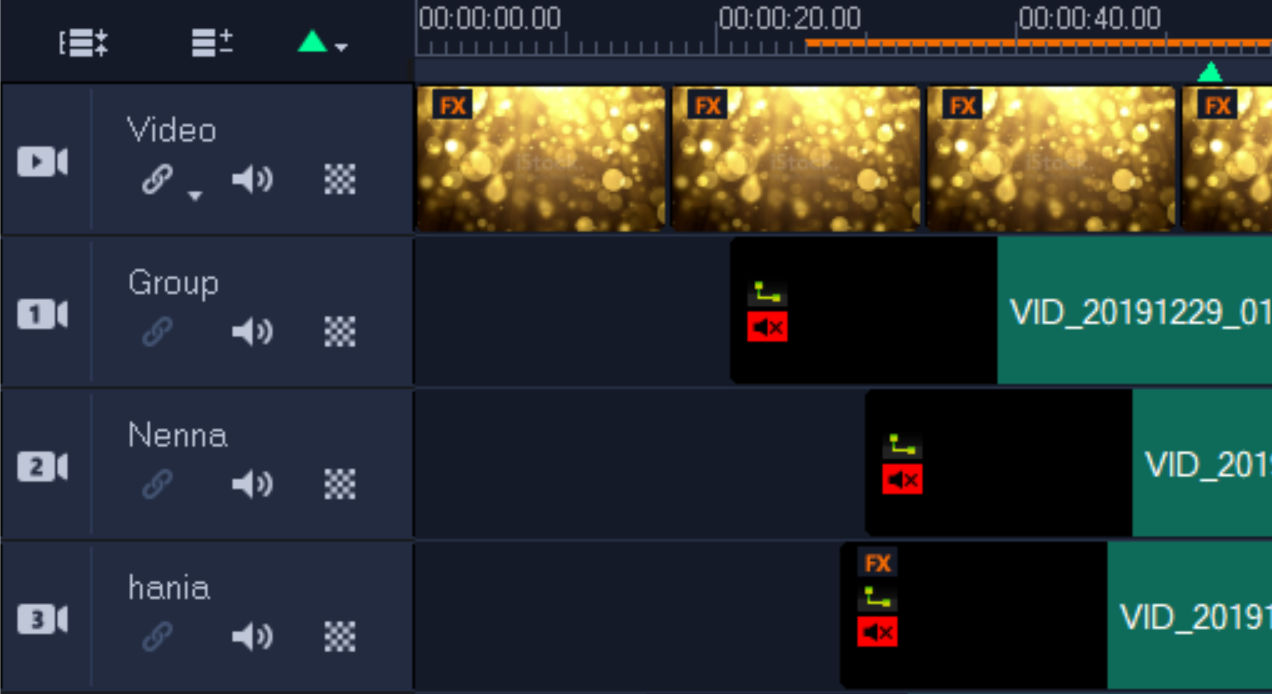
4. Drag Each Video to a Separate Video Overlay Track
To start, each video can be positioned at time 0. Later, we’ll adjust the start time of each video so they are in sync with the music track. You can also mute each video track’s audio so the only audio heard comes from the music track.
5. Create Proxy Files
This will make VideoStudio use a smaller version of each file to improve performance. See how to set up proxy files.
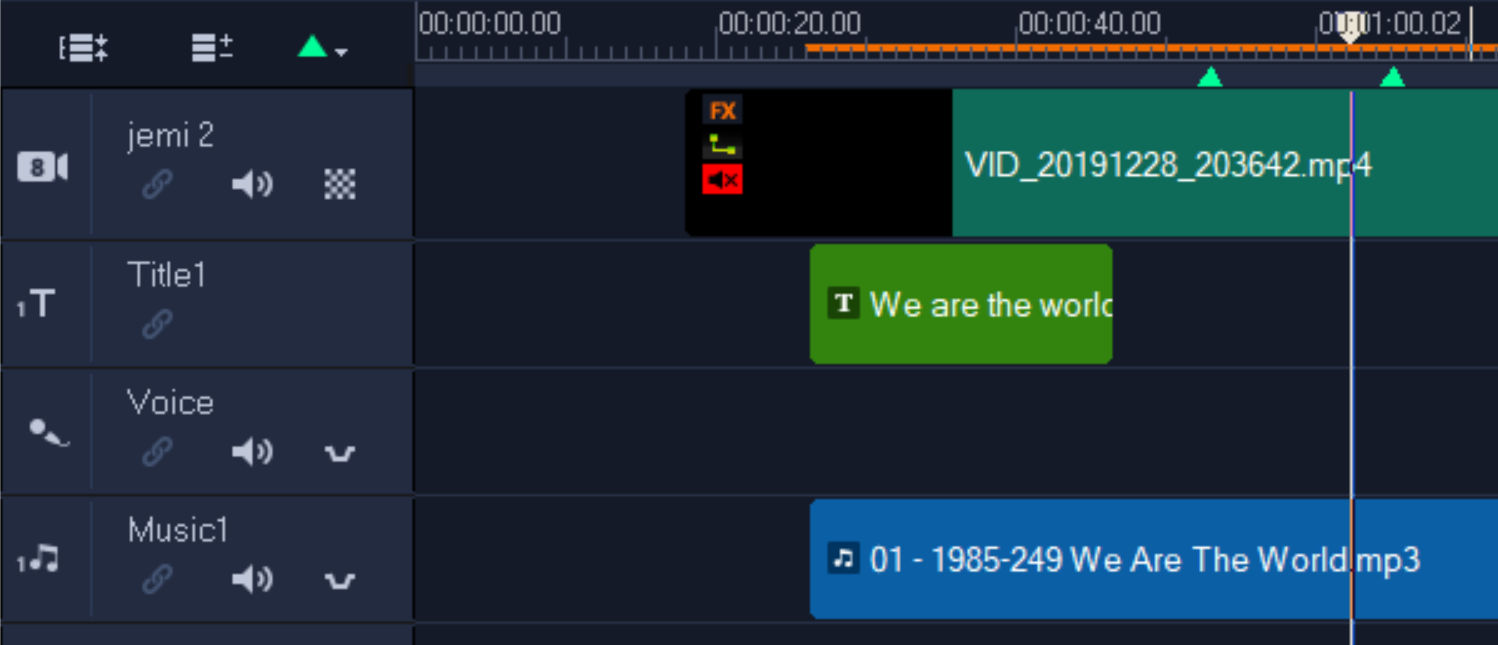
6. Drag the Audio Asset to the Music Track
In this example, I positioned the start time of the music to 20 seconds to accommodate video clips that have a long but useless intro.
6. Sync Each Video Track with the Audio Track
To do this, read this post.
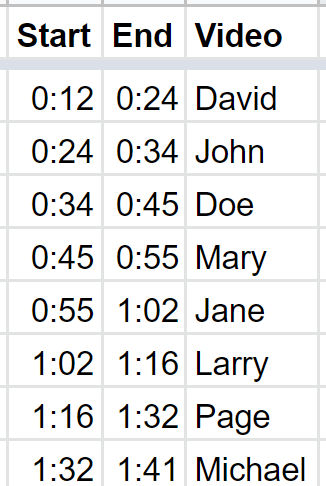
7. Determine Visibility Times for Each Video Track
Let’s say you want to make a music video containing 5 different singers each singing a different part of the song. You’ll have at least 5 video tracks to work with. You’ll need to listen to the song and determine what times throughout the song to show different videos. You can do this by creating a spreadsheet like below.
8. Set Cues / Markers on the Timeline
To make it easy to see start and end times for each video track, add a cue / marker (little green triangles below the timeline bar) on the timeline for each start time.
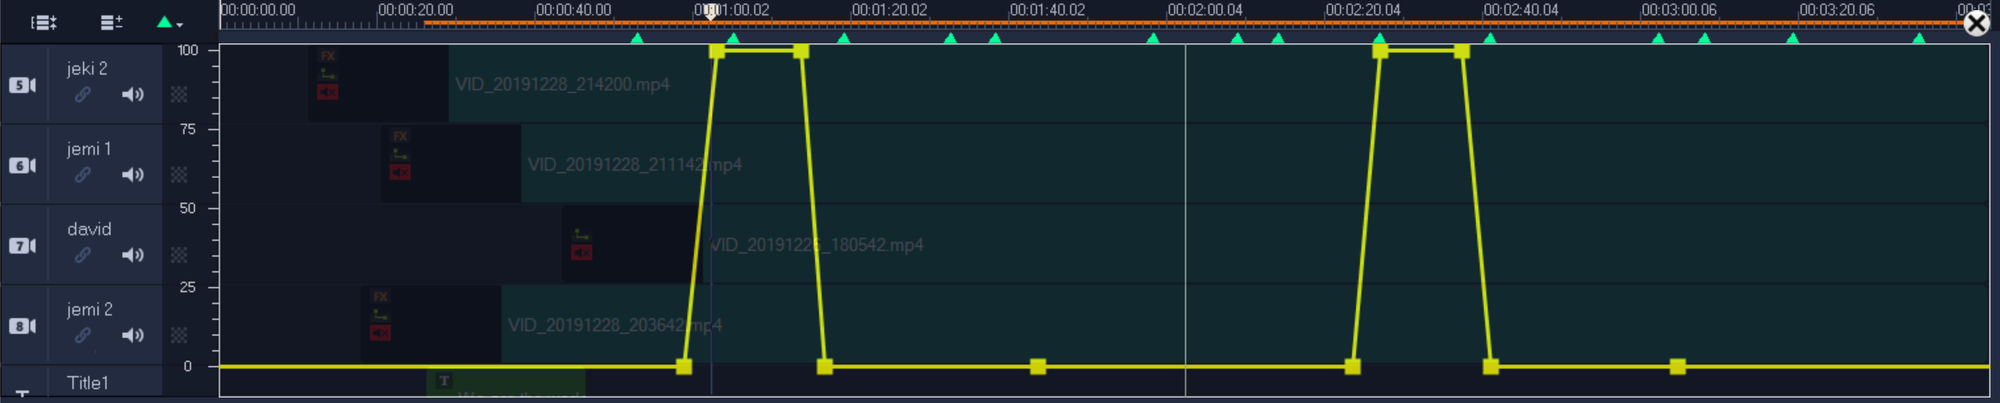
8. Create a Transition Between Each Video
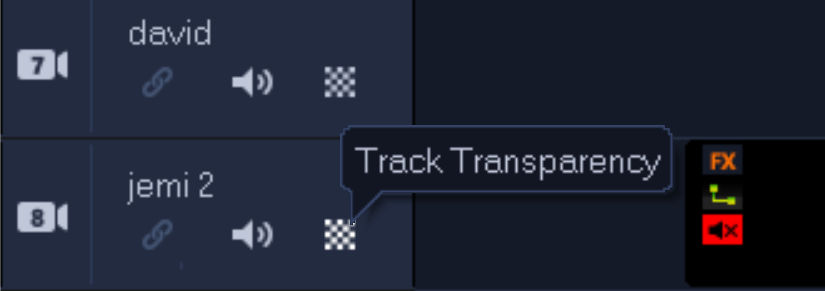
To do this, we’ll be adjusting each video track’s transparency. In order for this to work, you can’t cut any of the video clips in the timeline.
For each track, click on the Track Transparency button to reveal the transparency controls.
In the screenshot below. you see multiple video tracks but only the transparency track for one of them. The vertical position of the yellow line indicates the video’s transparency at any given time. When the line is at the bottom (0), the video is completely transparent (0% opaque). When the line is at the top, the video is completely visible (100% opaque). You create a fade by adding keyframes to the yellow line and dragging them.
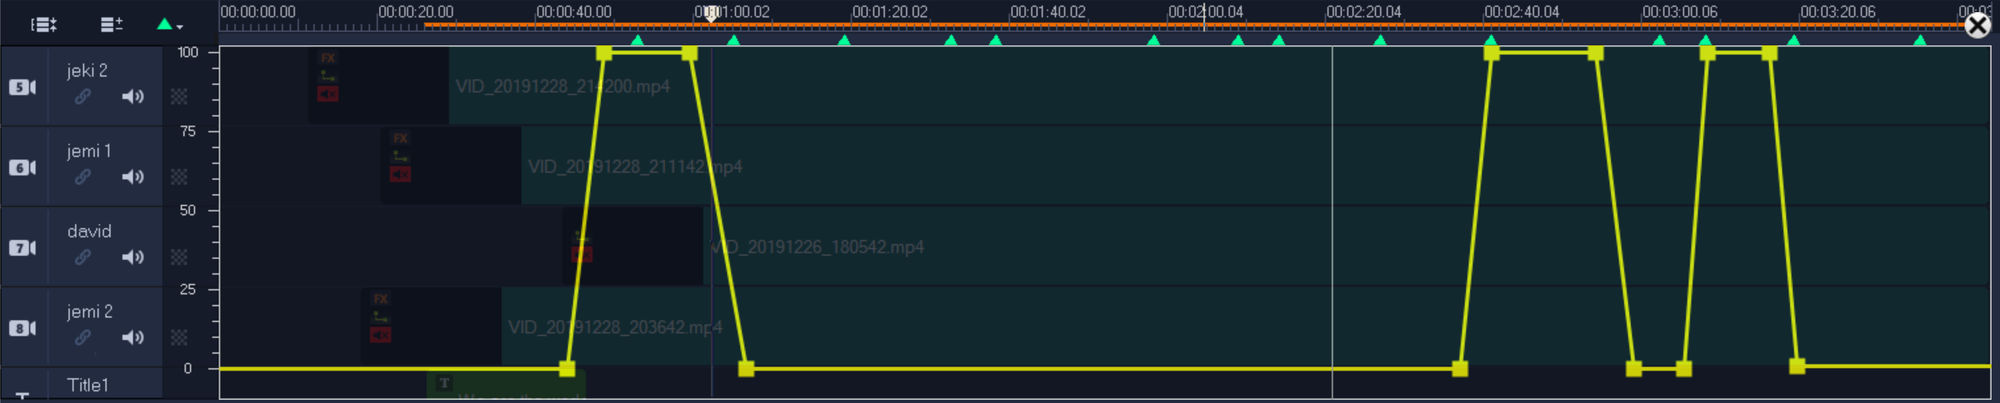
Below is a screenshot for a different video track. Notice how the transparency graph both of these video tracks are such that one video will fade out when the other fades in.