


Svelte is a JavaScript framework similar to React, Vue, etc, but with some fundamental differences that I think make it better. It’s also much more intuitive to understand as the web component structure of the code is dead simple. When building an app using Svelte, you’re encouraged to use Sveltekit, the official Svelte application framework. But, if you just want a simple frontend-only site/app, then you can just use Svelte (without Kit). In doing so, you can then easily take the built CSS and JS files and include them in any existing web page. Then, you just add a simple div
<div id="app"></div>in your existing HTML file where you want the app go to.
Here’s an example.
Create a Vite Project
Vite is a front-end build tool and dev server. It includes Rollup to bundle and optimize assets. Run npm init vite and follow the prompts. As you can see in the screenshot below, I chose the default project name of “vite-project”.
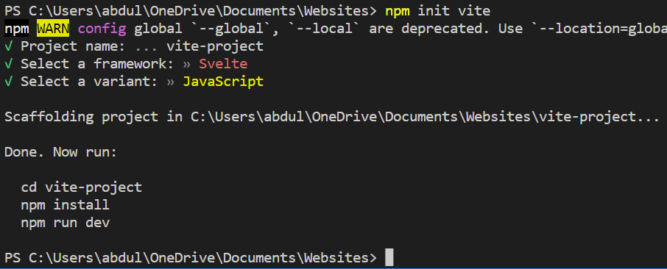
This will create a folder named after your project and create some files and folders within it.
Then, as the instructions say, run the commands
cd vite-project
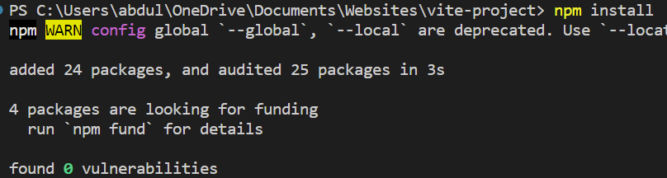
npm install
npm run devnpm install will download the node packages specified in the package.json file into the node_modules folder.
Start Dev Server
npm run dev will launch a dev server. Running the dev script starts a program called Vite. Vite’s job is to take your application’s source files, pass them to other programs (including Svelte, in our case) and convert them into the code that will actually run when you open the application in a browser.
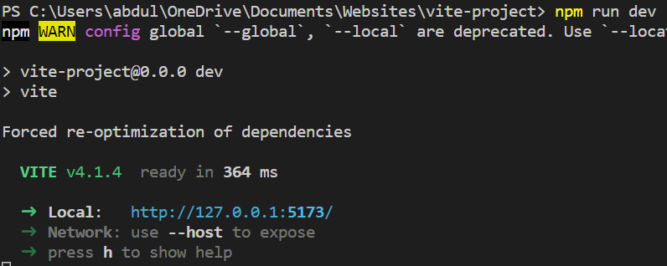
If you go to the local URL http://127.0.0.1:5173/, you will see the starter Svelte app that was created automatically.
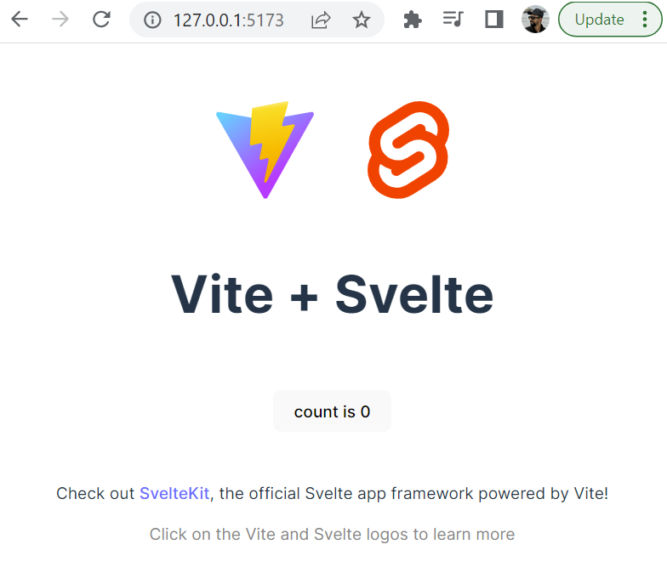
The app includes a simple interactive counter. When you click the button, the counter increments.
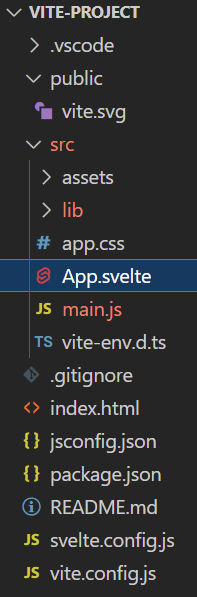
src Folder
If you look at the src folder, you’ll see a few files:
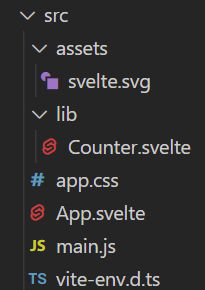
- The
assetsfolder contains static assets, like images - The
libfolder contains Svelte components. In this case, there’s the counter component. app.cssis a global CSS file for the entire appApp.svelteis your main app code. In this case, it imports the svelte.svg logo and the Counter component.
<script>
  import svelteLogo from './assets/svelte.svg'
  import Counter from './lib/Counter.svelte'
</script>main.jsis the main JavaScript file. It loads your app’s CSS (app.css) and your app’s main code (App.svelte). It will also load the app in the HTML element with IDapp.
import './app.css'
import App from './App.svelte'

const app = new App({
  target: document.getElementById('app'),
})

export default app
Build the App for Production
When you’re done developing your app (creating components, etc), you can run a build. This will bundle all CSS and JS files into a single CSS and JS file, optimize the bundle (e.g. minify it), and output the production files in the dist (distribution) folder. Run a build with the following command.
npm run build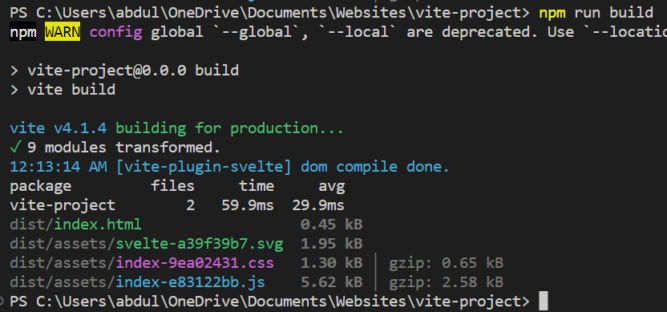
You’ll see a dist folder created. In this case, with the following files:
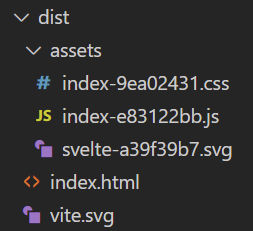
If you open index.html, you’ll see it references the two bundled CSS and JS files along with a div element with ID app where the app will be injected.
<!DOCTYPE html>
<html lang="en">
  <head>
    <meta charset="UTF-8" />
    <link rel="icon" type="image/svg+xml" href="/vite.svg" />
    <meta name="viewport" content="width=device-width, initial-scale=1.0" />
    <title>Vite + Svelte</title>
    <script type="module" crossorigin src="/assets/index-e83122bb.js"></script>
    <link rel="stylesheet" href="/assets/index-9ea02431.css">
  </head>
  <body>
    <div id="app"></div>

  </body>
</html>
Preview Built App
To preview the app from the built files, run
npm run previewThis will run a local server loading the built files.