


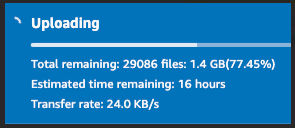
I recently had to move 35,000+ website images from Git to AWS S3. The images were in many subfolders. First, I had to separate the images from all other files. Then, when I tried dragging and dropping the parent folder containing all images to the AWS S3 web interface, I had to wait 9 to 17 hours.
When I woke up in the morning, I found the upload completed with errors:
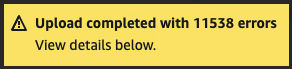
Here’s how I easily separated the images from all other files and successfully uploaded all 35,000+ images.
Separate images from other files
First, I wanted to see a list of all unique file extensions so I could know what image file extensions were being used.
find . -type f | sed 's|.*.||' | sort -uThis returned a list like the one below.
JPG
PNG
ali
bmp
brs
cnd
CSS
...
Then, I copied the website root folder and made a new sibling folder called website-images where I’d just have the images.
Then, I deleted all images from the “website” folder using the following command.
find . -type f ( -name 'gif' -or -name 'jpg' -or -name '.JPG' -or -name '.png' -or -name '.PNG' -or -name '.bmp' ) -deleteThen, I deleted all non-image files from the “website-images” folder using the following command.
find . -type f -not ( -name 'gif' -or -name 'jpg' -or -name '.JPG' -or -name '.png' -or -name '.PNG' -or -name '.bmp' ) -deleteThe last command resulted in a bunch of empty folders. I deleted the empty folders using this command.
find . -empty -type d -deleteI then wrote and ran a NodeJS script to walk through each HTML file and convert each relative path to a path relative to the website root folder, e.g.
../assets/images/images/home_page_banner.pngto
/public/en/csam/latest/assets/images/images/home_page_banner.pngUpload all images to S3
As mentioned earlier, uploading 35000 images to S3 using the web interface took a long time and kept completing with errors. What ended up working was uploading the images using the AWS CLI. Here’s how I did it.
Install AWS CLI
Here’s the documentation. I ran the command line installer.
curl "https://awscli.amazonaws.com/AWSCLIV2.pkg" -o "AWSCLIV2.pkg"
sudo installer -pkg AWSCLIV2.pkg -target /
Create an access key
I had to create an access key to authenticate. I created a new Identity and Access Management (IAM) user and then clicked the “Create access key” button to generate a new key.

I ended up with 2 keys similar to the ones below:
- Access key: AKIAIOSFODNN7EXAMPLE
- Secret access key: wJalrXUtnFEMI/K7MDENG/bPxRfiCYEXAMPLEKEY
Set access key as environment variables
I then saved those key values as environment variables. Here are the instructions. I basically ran the following commands in the terminal, replacing the values with my actual values.
export AWS_ACCESS_KEY_ID=AKIAIOSFODNN7EXAMPLE
export AWS_SECRET_ACCESS_KEY=wJalrXUtnFEMI/K7MDENG/bPxRfiCYEXAMPLEKEY
export AWS_DEFAULT_REGION=us-west-2
For the default region, I chose the region for my S3 bucket.
Upload (sync) files
I then uploaded (synced) files from my local to my remote S3 bucket. Here’s the documentation for the S3 sync command. Since I had already uploaded some files, I was hoping to find a flag to skip uploading files that exist at the destination. It turns out that the “sync” command does this by default. I ran the following command in dry-run mode to verify the output was correct.
aws s3 sync . s3://q-website-images/docs/ --dryrunThen, I reran the command without the dry-run flag.
aws s3 sync . s3://q-website-images/docs/ The command output a list of the files it uploaded.
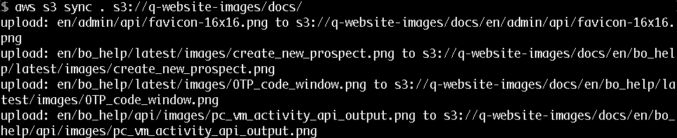
When it was done, I tried rerunning the command only to find that it completed with no output, indicating that all source files already existed in the destination. That was a sign that the sync was complete. Looking at the number of files in the S3 web console, I could see the correct number of files listed there.
Now that the images are in S3, I’ll use S3 as the origin for an image CDN (ImageKit). ImageKit will auto-optimize the images.