If you want to create a video of an animated character that moves its head and lips as you move your head and speak, you can do so easily using Adobe Character Animator. Here’s how.
For this example, I’m using a character / puppet called Roger from AnimationGuides.com.
1. Import the puppet
In Adobe Character Animator, click File > Import and select the puppet file.

2. Import a green screen
Since we’ll want to overlay the exported character animation on other elements in a video editing program, we’ll want to add a green screen so we can key it out. Create a solid green image (RGB = 0,255,0) the size of the scene, e.g. 1920 x 1080. Then, import it and drag the imported item to the lowest layer it the Timeline panel.

3. Enable Puppet Track Behaviors
We can tell Adobe Character Animator which parts of our face and body to track as we move and talk in the camera. Click on the puppet layer to reveal the Puppet Track Behaviors panel.
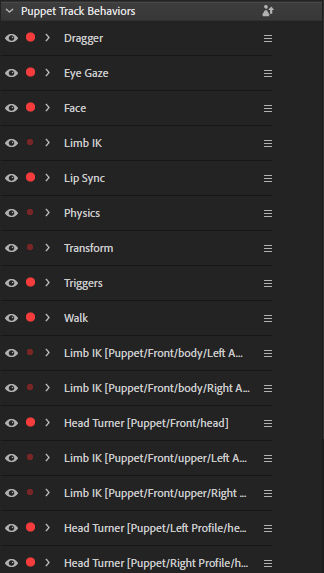
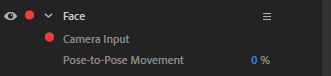
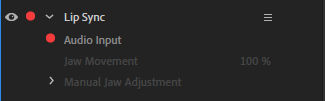
The red button indicates that the particular item will be tracked when you move in front of the camera. For example, the Face item, when expanded, will show a red dot by “Camera Input” meaning if move your face in front of the camera, your facial gestures will be tracked and the puppet’s face will move accordingly.
For the lip sync item, the red dot is by “Audio Input” so if you speak, the microphone will capture your voice and convert it into lip movements on your puppet.
Body tracking is currently available in beta.
https://pages.adobe.com/character/en/body-tracker
4. Enable camera and microphone
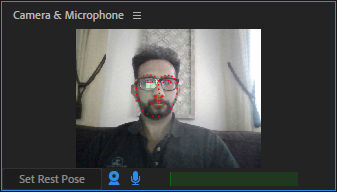
For Adobe Character Animator to track your head and lip movements, you need to enable your camera and microphone. You’ll see a circle where your face should be centered in your resting position. Once centered, click the “Set Rest Pose”. You’ll then see a bunch of red dots on your face indicating points where Adobe Character Animator will track your facial gestures.
5. Start recording
Click the red record button. A 3 second countdown timer will begin. Start talking naturally and when you are done, click the red button again to stop recording.

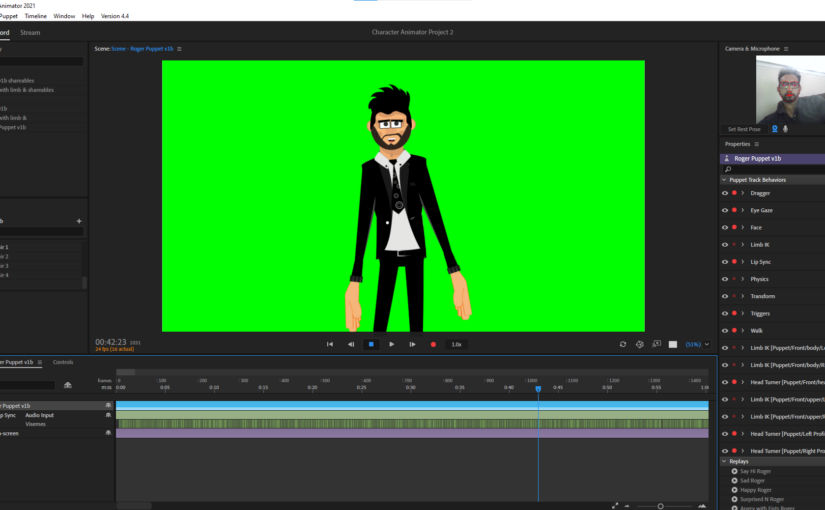
You’ll then see some layers added to the timeline including your voice audio layer.
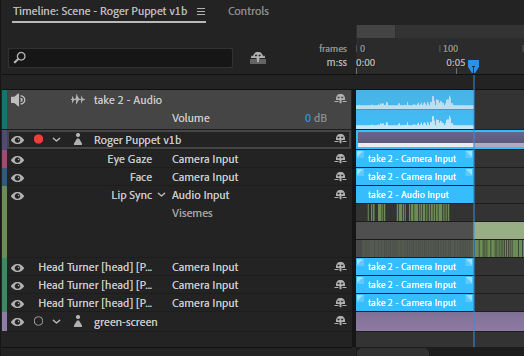
If some of the layers are longer than the audio layer, e.g. the puppet, Visemes and green screen layers in the screenshot above, trim the scene so the duration of the scene is the duration of the audio. Drag the right end of the gray Work Area bar to the right end of the audio track. Then, right click on that bar and click on “Trim Scene to Work Area”.
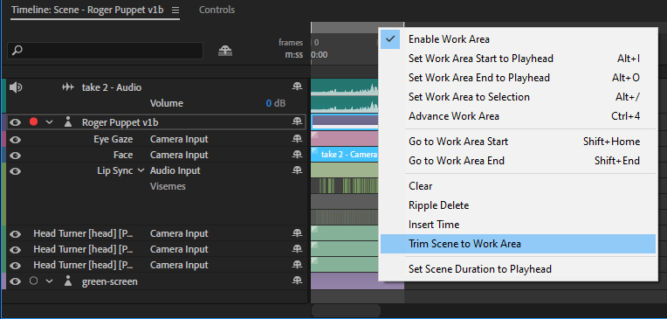
Now, your scene duration will just be the duration of the Work Area, in this case 5:20.

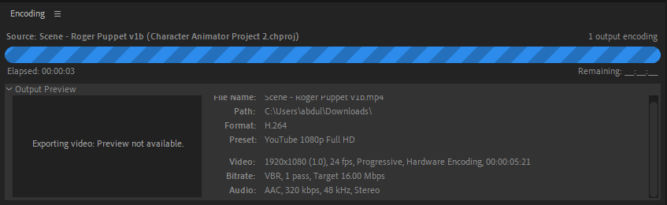
6. Preview and export the result
Click the play button to preview the recording. If you are happy with it. you can export it by clicking File > Export > Video via Adobe Media Encoder. This will open Adobe Media Encoder. In the Queue panel, choose a format (h.264) and preset (Match Source – High bitrate or YouTube 1080p Full HD). Then, click the green play button to start encoding.

You will see the encoding progress in the Encoding panel. You’ll also see the video duration as 5:21 seconds as that is the length of the scene in this example.