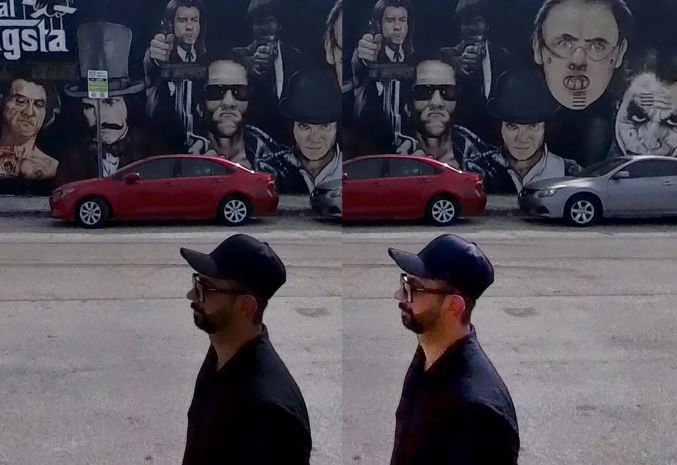
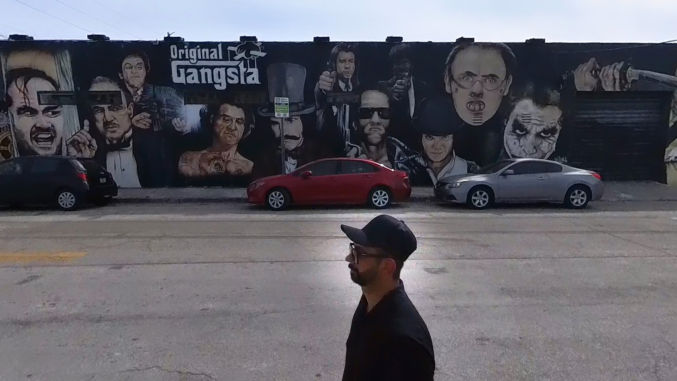
Chances are you’ve taken photos where the faces are too dark. This can be due to a low-quality camera and/or incorrect camera settings. Fortunately, there is a way to easily fix this using Photoshop. As an example, I’ll use this photo of me in the Wynwood district of Miami (below). Notice how my face lacks detail because it’s underexposed (too dark).

Levels
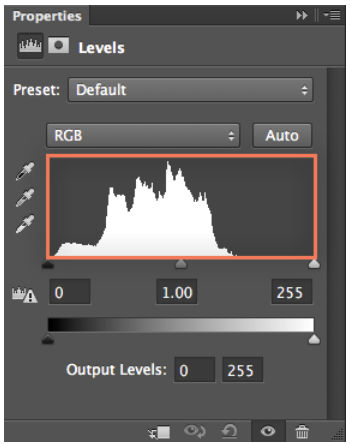
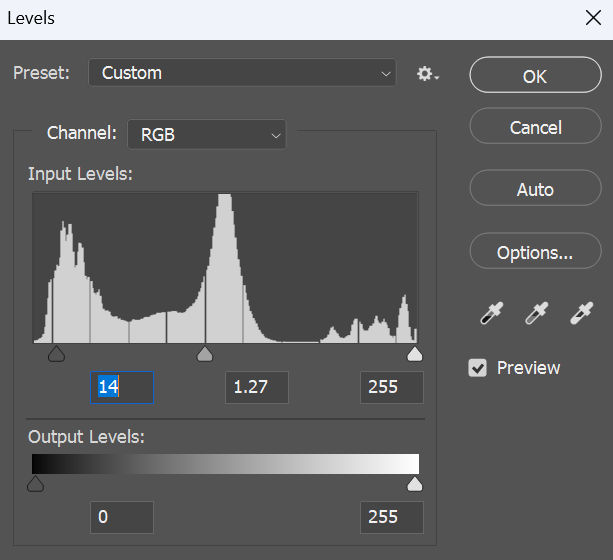
First, I like to check and adjust the levels for the image. Go to Image > Adjustments > Levels. You’ll see a histogram like this
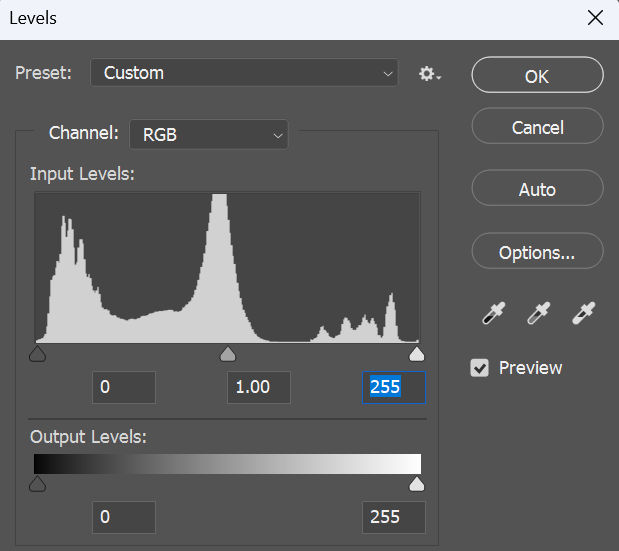
In the input levels, there are 3 markers from left to right
- black marker (left) = shadows
- gray marker (middle) = midtones
- white marker (right) = highlights
The left and right markers should touch the left and right edges of the histogram. In this case, there is a small gap between the right marker and the right edge of the histogram, meaning the image is a little underexposed. If we move the right marker to the right edge of the histogram, the image will become a little brighter.
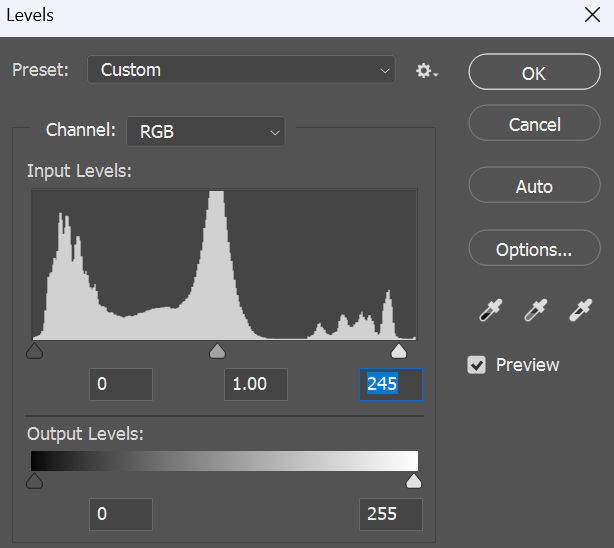
In this particular example, this adjustment isn’t significant. But, if there’s a big gap in the histogram like this
then adjusting the levels will make a big improvement to your image.
Exposure
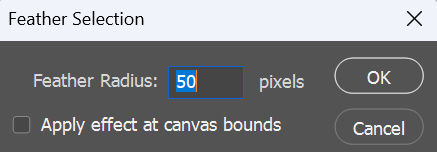
If adjusting the levels doesn’t brighten your subject’s face enough, you can adjust the exposure of just the face. First, make a circular selection around a face.

Then, add a feather to it. Select > Modify > Feather. For a 1920 x 1080 image, I create a 50-pixel feather.
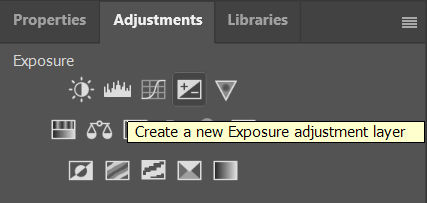
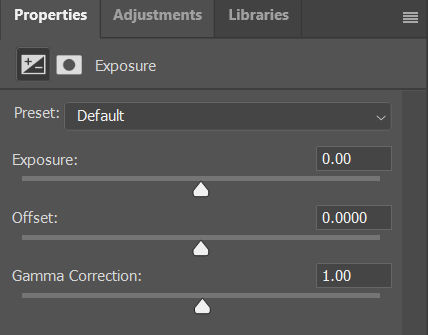
Then, adjust the exposure by going to Adjustments > Exposure
You will see a slider for Exposure. Drag it to the right to increase the exposure.
Notice how the face is brighter.
If I increase the exposure too much, the face will look nice and bright, but it won’t look natural against the darker surroundings.
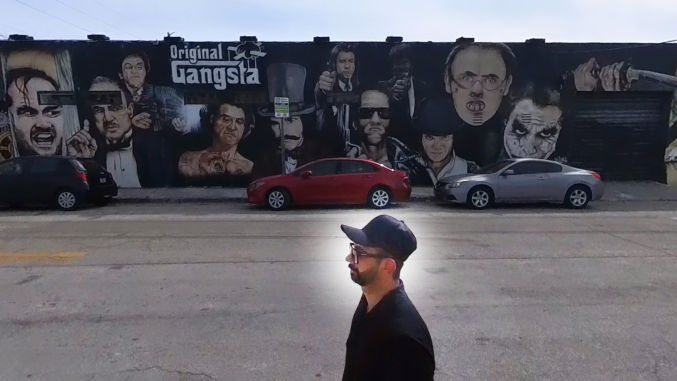
The problem is there appears to be a white glow around the face. In this case, I can select just the subject or the subject’s face to limit the exposure adjustment area. In this case, no feather is needed.
Now, only the subject is brightened.
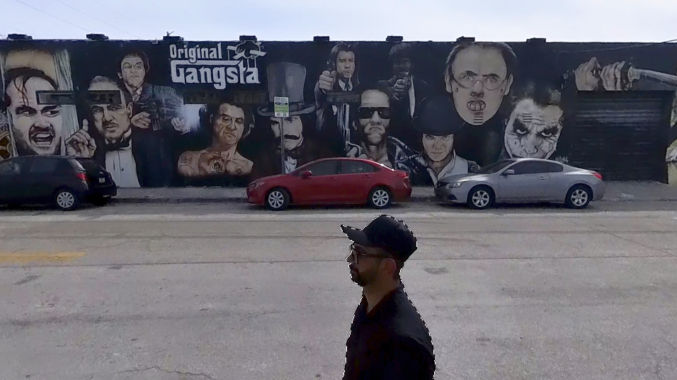
I can also tweak the levels by adjusting the shadows and the midtones so that the subject doesn’t look unnaturally bright against a darker background.
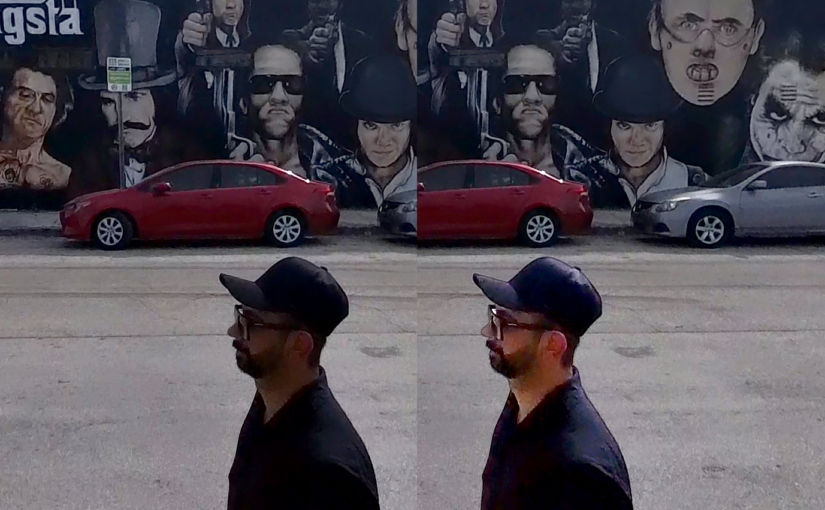
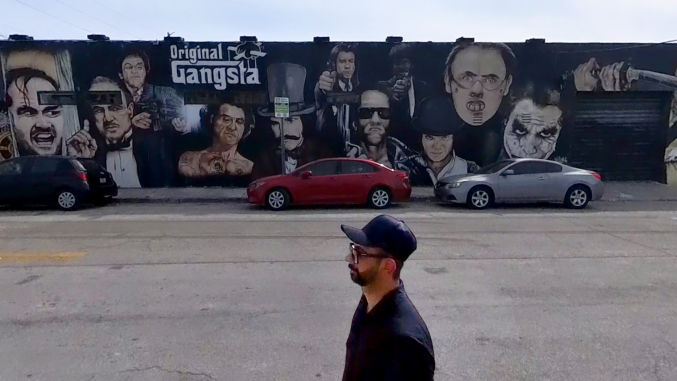
Before and After
As you can see in the before and after image below, my face looks much brighter while still appearing natural.