Web Page Animation Options

If you want to add animation to a website, you can many options. Here are a few I recommend.

CSS transitions

For simple animations, you can just use CSS transitions. Or, just use this CSS animation library.

Greensock JavaScript Animation Library

For fancy animations where you still write JavaScript to control the animation, the Greensock JS library is great.

svgator (free trial)

For even fancier animations that allow you to design the animations using a timeline, svgator is an online tool that can do that.

Adobe After Effects (free trial), BodyMovin and Lottie

For super fancy animation, design your animation in Adobe After Effects. Then, download and install the BodyMovin plugin for After Effects. Then, export the animation from After Effects using the BodyMovin plugin. The exported files will contain the animation data as JSON object. It may also include image files as a PNG which, if possible, you should manually export each one as a SVG and replace the PNGs with the SVGs. Then, load the lottie library in your page, e.g. with

<script src="https://cdnjs.cloudflare.com/ajax/libs/bodymovin/5.4.3/lottie_svg.min.js" integrity="sha256-CVhGZIHAj+TzP6acM0j2ko94CaIqfcnqo/y79O+KOcg=" crossorigin="anonymous"></script>

and specify a class on the element where the animation should appear, e.g.

<div class="animation"></div>

Place any exported images in their appropriate folders and update their paths in the animation data JSON object.

Then, in your JavaScript, load the animation. Here’s example code.

See the Pen JavaScript Animation Using Lottie by Abdullah Yahya (@javanigus) on CodePen.

Easily Tighten a Rope Without a Knot

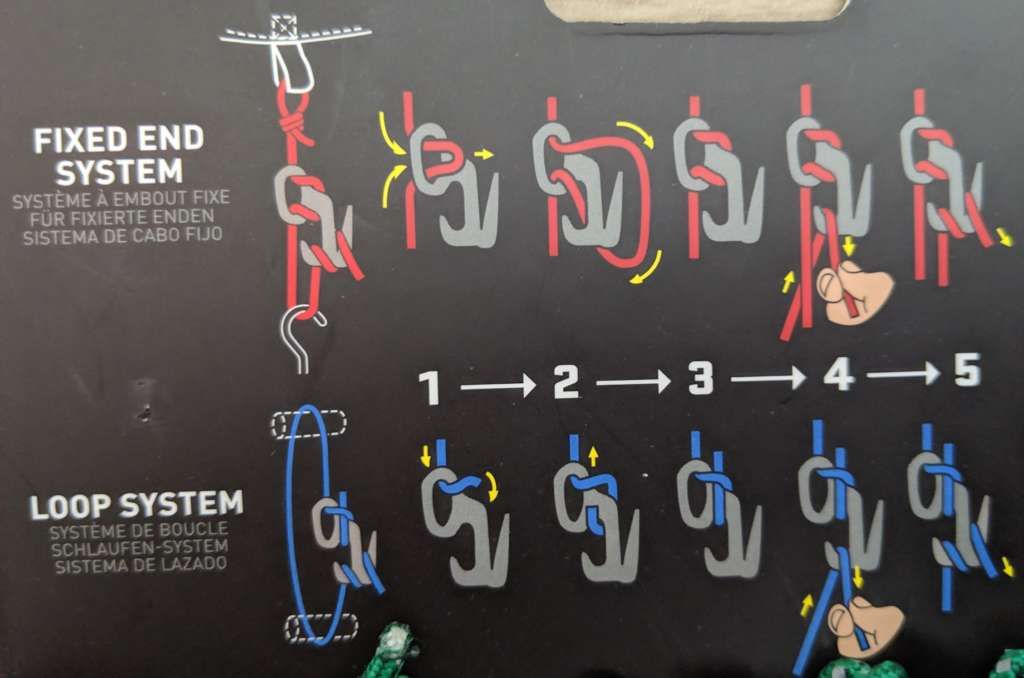
When you need to tighten a rope to hold something in place, e.g. a tent, cargo in a pickup truck, a leaning tree, bed sheets, etc, you might think you’ll need to tie a knot. Not only is it difficult to tie a knot without losing tension in the rope, it’s a hassle and often difficult untying the knot. Ratchet straps are easier to use but are overkill for non-heavy duty situations. A simpler solution is to use a figure 9.

Here, I used a figure 9 to hold a leaning tree in place.

You can purchase Figure 9s at REI. One brand is Nite-ize but there’s also generic ones on Amazon for less.

This are two ways to tighten a rope using a Figure 9.

How to Finish Wood With a Protective Coat

I recently worked on a project to replace my stair’s handrails. I bought the unfinished handrails at Home Depot and then stained them easily as follows.

Applying Wood Stain

  1. Using a brush, applied one coat of Minwax Pre-stain Conditioner
  2. Using a brush, applied one coat Minwax Stain (Gunstock color). While the stain was wet, I wiped it with a paper towel to prevent some areas to be thicker or darker than others. Though wiping with a towel lightens the stain, it is an important step. To achieve darker stains, just repeat the staining and wiping process.

Note: Applying anything wet, e.g. stain, to wood will cause the grain to rise resulting in bumps. If, after the first coat of stain, you notice bumpiness, then sand it down with 220 grit sandpaper until the bumps are gone and then restain the wood. This first coat following by the sanding process serves as a sort of “primer” to prepare the surface.

The tricky part was getting the protective finish coat on. I wanted a shiny, smooth, glossy handrail. After trying different products and processes, here’s my advice.

Lacquer vs Polyurethane

Lacquer is sticky and seemingly more toxic. My eyes felt weird even though none of it gone in them. A bit of lacquer got on my hands and cleaning my hands were a hassle and temporarily messed up my skin. The fumes were so strong I could smell some of it in other rooms of my house. Cleaning the brush used to apply the lacquer was impossible so it had to be thrown away.

Polyurethane is also toxic but the water based kind is easy to clean by simply rinsing with water and it doesn’t smell as much. I was able to easily rinse my brush so I could reuse it for additional coats.

Conclusion: Don’t even bother with lacquer. Just stick with polyurethane.

Continue reading How to Finish Wood With a Protective Coat

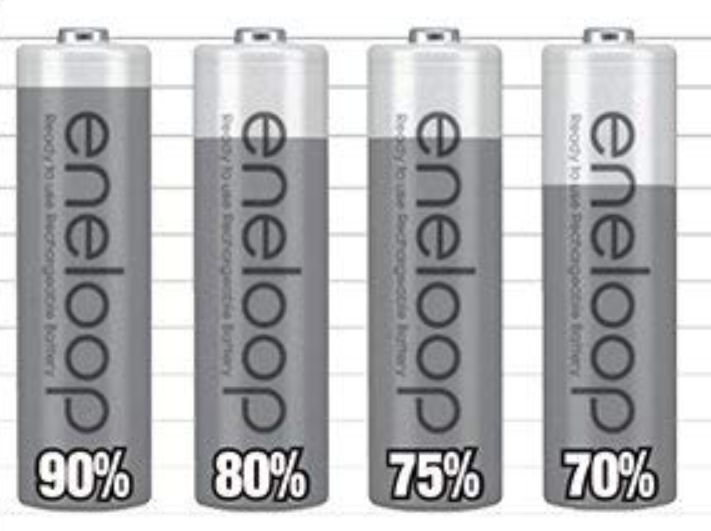
Battery Voltage and Capacity

Following are typical alkaline battery specs.

Battery TypeVoltageCapacity (mAh)Typical Drain (mA)Typical Battery Life (h)
D1.51300020013000/200 = 65 hours
C1.560001006000/100 = 60 hours
AA1.52400502400/50 = 48 hours
AAA1.51000101000/10 = 100 hours
9 Volt950015500/15 = 33 hours
6 Volt Lantern61100030011000/300 = 37 hours

Battery Capacity: the capacity of a battery, measured in mAh, is how much amps the battery can provide in one hour. The larger the capacity, longer the battery will last.

Continue reading Battery Voltage and Capacity

Picking a Security Camera

I don’t like monthly fees so when home security companies offered their services to me, I quickly said no. Instead, I bought a security camera. Now I have 3 brands of security cameras and they all have their pros and cons. If you’re in the market for a security camera, I think any one of the 3 below will do you well.

Nest Cam

https://nest.com/cameras

Pros:

  • Offers 24/7 cloud recording with the ability to easily scrub through the timeline
  • When browsing the timeline, you can easily find motion points indicated by markers
  • Ability to create a time lapse
  • Ability to create custom clips up to 1 hour long
  • The 4K models allow for zooming in on subjects
  • Once set up, you can leave it alone. No batteries to charge.
  • 1080p video resolution

Cons:

  • Expensive
  • Requires a power cable
  • The narrowest part of the power cable is 7/8″ in diameter so if you need to drill holes in walls, they’ll need to be at least 1″ in diameter.
  • Requires a monthly fee of at least $10
  • Some models only support 720p video resolution
Continue reading Picking a Security Camera

How to Enlarge a Hole in a Wall

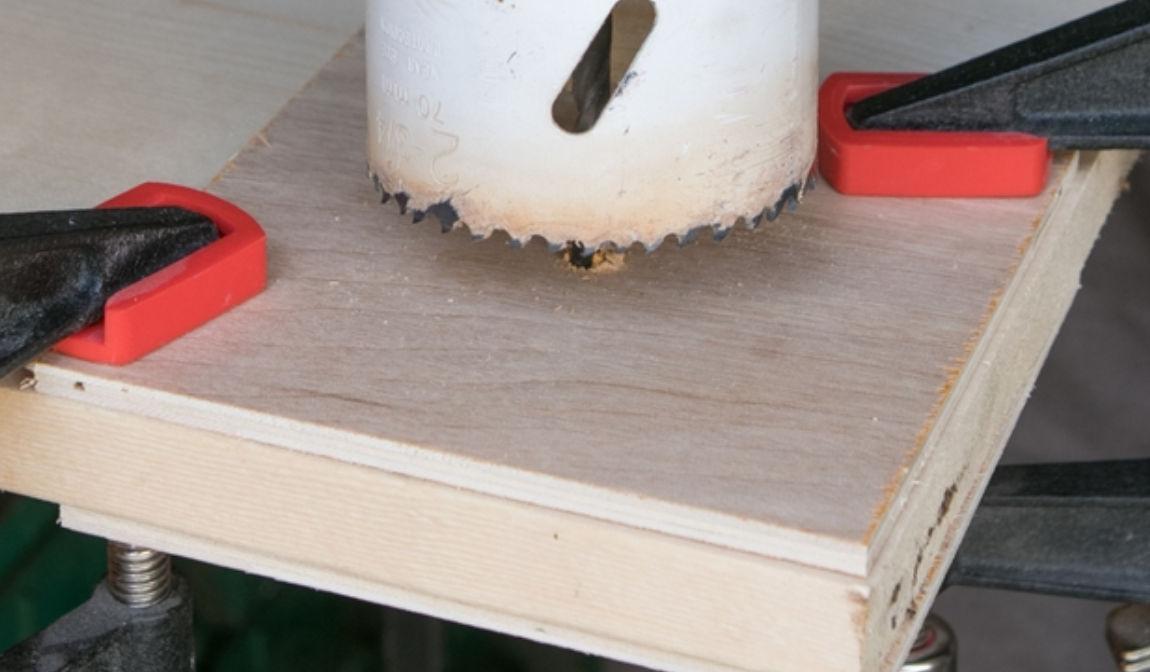
The other day I was drilling a hole in a wall to run a 3-prong extension cord through. I thought a 1 inch spade bit would do to create 1 inch diameter hole. Unfortunately, the plug end of the cord was still too big to fit through the hole. I couldn’t enlarge the hole using a hole saw bit

because that requires some material for the center shaft to bite in to. 

Continue reading How to Enlarge a Hole in a Wall

Quick ‘n Easy Morning Breakfast Sandwiches

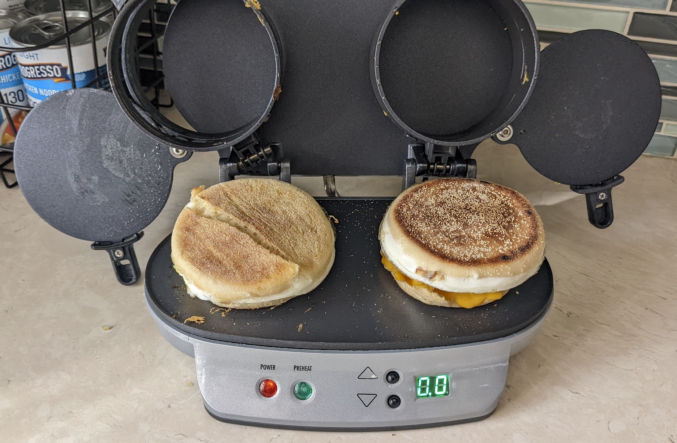
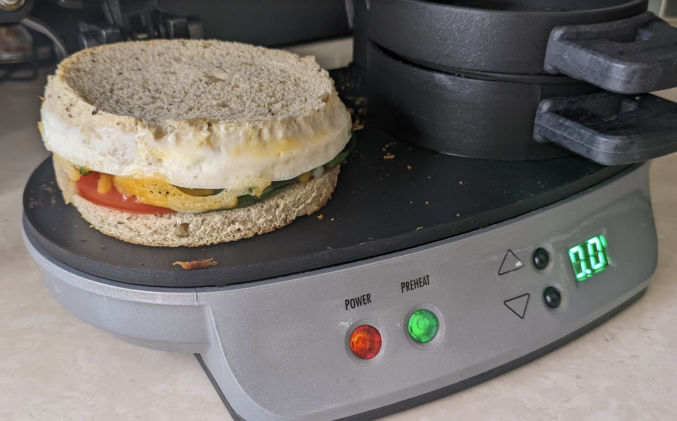
I discovered this new mini appliance by Hamilton Beach. It’s a dual sandwich maker and costs $40 on Amazon.

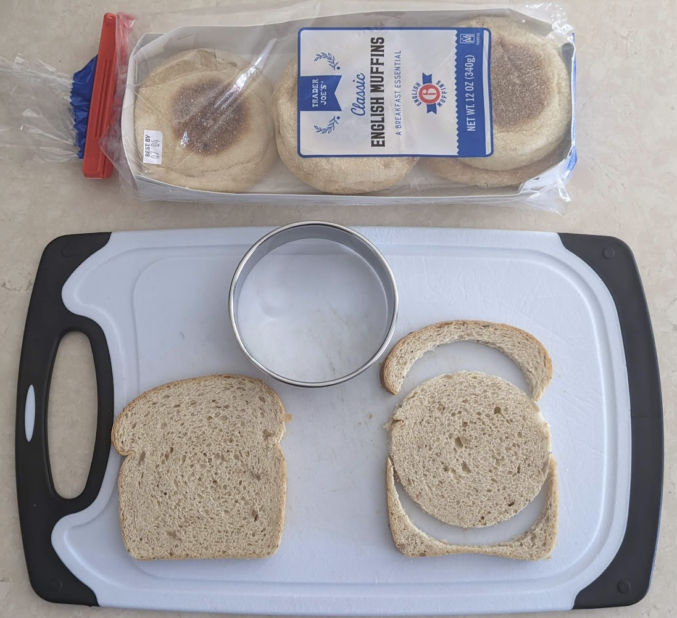
Here are some sandwiches you can make with it, all in an English muffin. The order of the ingredients are from bottom to top.

Note: all meat must be precooked.

  • Bottom bread, spinach, Colby cheese, egg, top bread, Hollandaise sauce (like Eggs Benedict)
  • Bottom bread, corned beef, cheddar cheese, egg, top bread
  • Bottom bread, tomato, spinach, cheese, egg, top bread
  • Bottom bread, cheese, steak-eze with roasted bell peppers and onions, egg, top bread
  • Bottom bread, cheddar cheese, caramelized (fried) onion, ground beef patty, egg, top bread (like a patty melt)
  • Bottom bread, sliced tomato, cheese, egg, top bread
  • Bottom bread, cheese, turkey sausage patty, egg, top bread
  • Bottom bread, hash browns, cheese, egg, top bread

Jimmy Dean Turkey Sausage Patties

Costco Kirkland Oven-Roasted Turkey Breast, Sliced

Tip

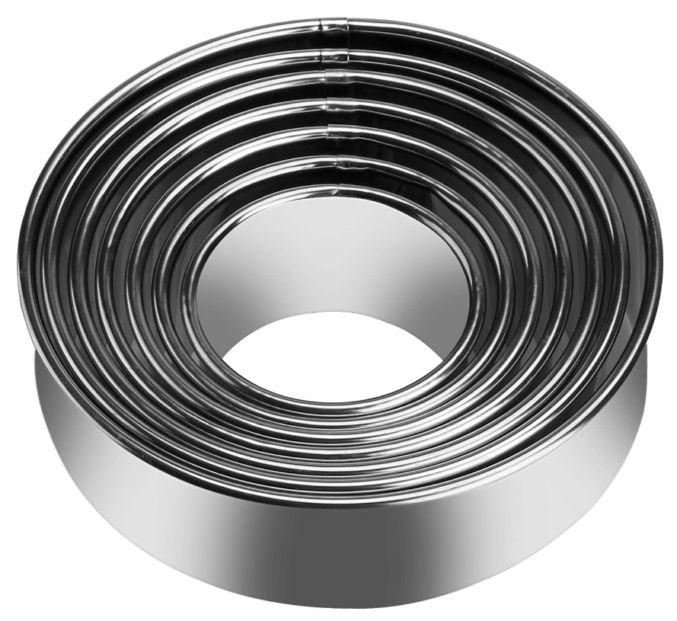
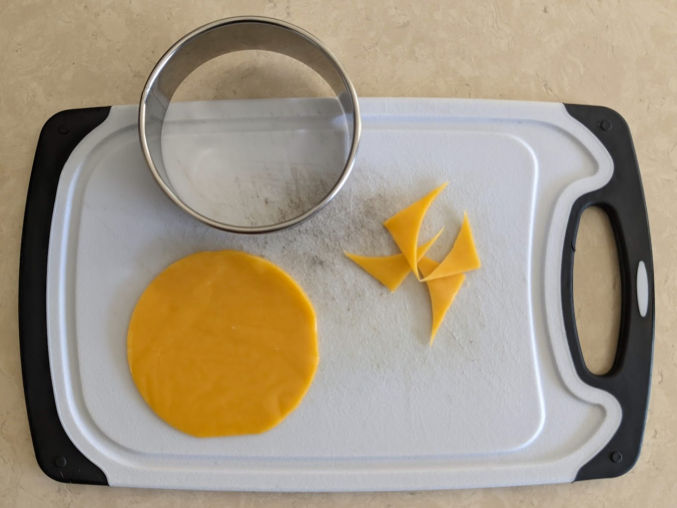
Most cheese slices come in squares that are too large to fit the 3.75-inch diameter sandwich maker. Use a round cookie cutter to cut the cheese slices so they fit.

Simple Trip Planner with Google Docs and Sheets

There are many tools that can help you plan a trip. Sometimes I’d even use Google Calendar. But when I want something that includes additional information such as a table of expenses, links to websites, and pictures, then I use Google Docs with an embedded Google Sheet.

The workflow goes like this:

  1. Create a new Google Doc (or clone the example below)
    In the Google Doc, I use tables to create a 2-column layout with times on the left and details on the right. This makes it easy to read and looks more like an itinerary or agenda view.
  2. Uncheck Print Layout
    If you’re like me, you probably don’t print on paper much anymore. And why would you, when you can just save a copy or view the original version of a doc on your various devices (phone, laptop, etc). Print layout is intended for print so you’ll see gaps between each sheet. This is annoying when you want to just see all of your content as you scroll without any large gaps. To eliminate these gaps, in the View menu, uncheck the “Print Layout” menu item.
  3. Add content
    When it comes to content, I find it helpful to add the following bits of information  
    1. Screenshots of Google Maps showing travel time and path
    2. Links to directions in Google Maps
    3. Photos of destinations, activities, and food
      Google Docs lets you paste images from the clipboard so you can simply take screenshots of pictures on your computer and paste them right into Google Docs
    4. Special notes about each activity
    5. etc
  4. Create a Google Sheet (or clone the example below)
    I use the Google Sheet to list all expenses and easily calculate the total using the sum function.
  5. Embed Google Sheet into Google Doc
    The nice thing about Google Docs and Sheets is you can embed a Google Sheet into your Google Doc and have it updated when you update the Google Sheet. In Google Sheets, you’ll have to hover over the embed and click the “Update” button. Nevertheless, it’s still super useful and may even auto-update if you want long enough, e.g. 5 minutes? To embed a table of costs from Google Sheets, select the table in Google Sheets and then paste it where you want it embedded in your Google Doc.
  6. Publish
    If you want to share your trip plan with others, you can share the Google Doc itself. Or, better yet, since who you share it with won’t need to edit anything, you can publish your Google Doc as a web page so your recipients can just see a clean, simple view of the trip plan.

Below is a hypothetical example.

Links above are viewable only, not editable. You can make a copy and edit your own copy.

Easily Remove Background From Photos

When building a website, you’ll often find yourself needing to remove backgrounds from photos of people. This can be especially difficult when a person’s hair is wispy and its color blends in with the background. Though not perfect, there’s a free, quick and pretty decent online tool to remove backgrounds from photos of people. No login is required. Just go to remove.bg and upload your photo.

Here’s an example of a subject that would be hard to remove the background from manually. As you can see, Remove.bg does a pretty good job but they’re also modifying the subject’s hair somewhat. This is most evident when you replace the background with a solid color of high contrast compared to the subject’s hair color.

Continue reading Easily Remove Background From Photos

Test and Debug Websites in Internet Explorer 11 on a Mac Using VirtualBox and Serveo

As of this posting, the global usage of IE 11 stands at 2.5% according to caniuse.com. If that percentage is still too high for you to ignore, then you’ll need to test your website in IE 11.

Many developers use Macs for web development. Though you can test websites in Chrome, Firefox and Safari on a Mac, you can’t install and therefore test IE 11 on a Mac. You can get a separate Windows machine for testing IE 11 but that’s a hassle and overkill. Here are some steps to test and debug websites in IE 11 on a Mac using VirtualBox and Serveo.

1. Set Up VirtualBox

  1. Go to https://www.virtualbox.org/wiki/Downloads and download VirtualBox for OS X hosts (Macs) and install it.
  2. Get Windows 8 Virtual Machine
    Go to https://developer.microsoft.com/en-us/microsoft-edge/tools/vms/ and download a precompiled VirtualBox for Windows 8 with IE 11

2. Open Website in Local Browser

On your Mac, open your website on your local web server in any local browser (e.g. Chrome, Firefox, or Safari) and not the URL. It may be localhost or localhost:8080 or localhost:3000, etc.

3. Set Up Tunnel Using Serveo

  1. Open Terminal
  2. Run the command ssh -R 80:localhost:3000 serveo.net using the correct local URL and port number
  3. You will see a response saying “Forwarding http traffic from https://abc.serveo.net” where abc may be different
  4. For more information, go to http://serveo.net. You can also use ngrok but Serveo is easier with nothing to install.

4. View Website in IE 11

  1. Run the virtual machine you just downloaded by double-clicking on it. Open IE 11 and enter the Serveo forwarding URL, e.g. https://abc.serveo.net
  2. Make changes to website files
  3. Reload IE 11 in VirtualBox to see the changes