Most people assume that all proteins are equal. You read the nutrition labels on foods, and you check how many grams of protein there is.
However, 3 grams of protein from one food source, like beef, is not the same as 3 grams of protein from another, like rice. That’s because not all amino acids that make up proteins can be absorbed as effectively as others.
Macronutrients
Macronutrients are nutrients that the body needs in large quantities to provide energy. The three main macronutrients are carbohydrates, proteins, and fats:
Fats: Help the body absorb vitamins A, D, E, and K, and are important for feeling full and balancing hormones.
Carbohydrates: Provide energy to the body and are found in foods like rice, pasta, bread, and starchy vegetables.
Proteins: Help repair and rebuild body tissues.
Protein
Proteins are essential nutrients found in the human body and are the major structural component of all cells, including muscle, body organs, hair, and skin health.
Amino acids
Amino acids are molecules that combine to form proteins. Amino acids and proteins are the building blocks of life. When proteins are digested or broken down, amino acids are the result. The human body then uses amino acids to make proteins to help the body:
Break down food
Grow
Repair body tissue
Perform many other body functions
Amino acids are classified into three groups:
Essential amino acids
Nonessential amino acids
Conditionally essential amino acids
Essential amino acids cannot be made by the body. They must come from food. Of the 20 amino acids that make up protein, 9 of them are essential.
Unlike fat and glucose, our bodies do not store proteins. If more amino acids are needed, protein will be taken from the breakdown of muscle fibers. This is why bodybuilders often consume lots of protein: to build muscle and avoid losing muscle.
Different protein food sources have different amounts of amino acids. During food processing and cooking, some of these amino acids are susceptible to damage, and so the amount of amino acids taken up by the body will vary.
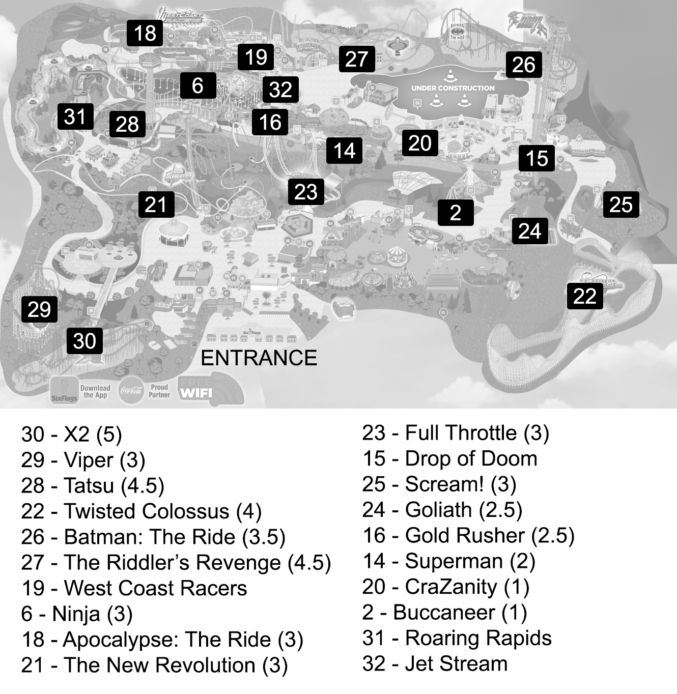
DIAAS
DIAAS stands for Digestible Indispensable Amino Acid Score and is a method of measuring protein quality. It evaluates the proportion of consumed amino acids absorbed and utilized by the body.
No protein quality claim – Score of <75%
Good protein quality – Score ranging from 75% to 99%
Excellent or High protein quality – Score of 100% or more
DIAAS scores of protein sources
Protein Source
DIAAS Score (%)
Protein Quality
Whole Milk Powder
143
High
Milk Protein Concentrate
118
High
Whole Milk
114
High
Egg – Hard Boiled
113
High
Beef
111
High
Whey Protein Isolate
109
High
Chicken Breast
108
High
Soy Protein Concentrate
98.5
Good
Whey Protein Concentrate
98.3
Good
Pea Protein
91.5
Good
Soy Protein
91.5
Good
Wheat
91.5
Good
Soy Protein Isolate
90
Good
Chickpeas
83
Good
Pea Protein Concentrate
82
Good
Mixed Diet: Wheat, Peas and Whole Milk Powder
82
Good
Peas – Cooked
58
Low
Rice – Cooked
59
Low
Rye
47.6
Low
Barley
47.2
Low
Wheat
40.2
Low
Almonds
40
Low
Rice Protein Concentrate
37
Low
Corn-based Cereal
10
Low
Notice in the table above that animal-derived protein is of high quality whereas plant-derived protein is mostly of low quality.
I’ve found the following works best for depending on the scenario.
Driving
If HDR is necessary and you only want to film in one direction, mount the Ace Pro on the windshield facing the front of the vehicle (FPV)
If you want to film both the vehicle occupants and the road, mount the Insta360 X3 on the windshield
Shoot either a regular video or a Timeshift video
Walking (Daytime)
Mount one Insta360 X3 on your chest (FPV). The Ace Pro isn’t a 360 camera, so it will not allow you to reframe later on to get subjects that are not directly in front of the camera.
Hold a second Insta360 X3 or X4 on an extended selfie stick such that the camera is at eye level to film yourself
Walking (Nighttime)
For good image quality, mount the Ace Pro either on your chest or on a selfie stick and use “Pure Video” mode to get good night shots.
If you use the Insta360 X3/X4, the image quality will be much worse.
Hotel Room Tour
Mount the Ace Pro on a selfie stick and film as FPV or film with the screen flipped up so you can film yourself (selfie)
Use “Pure Video” mode because you will be indoors and with unnatural (low) light.
I tried using my phone with a gimbal, but I preferred the simplicity and the results of using the Ace Pro.
Here’s a comparison of the picture quality from taking a snapshot of a video taken by both the X3 and the Ace Pro. As you can see, the Ace Pro picture quality is way better. Click on each image to open the original files.
Snapshot from 360-deg video on X3 – View enlarged imageSnapshot from 4K, 30 fps PureVideo using “Action” (wide) setting on Ace Pro – View enlarged image
Here’s another comparison.
X3 – 1080pAce Pro – 4K PureVideo
Eating
Use X3
Airplane Take-off and Landing
When filming a take-off/landing from a window seat of an airplane, the difficult is keeping the horizon level. Also, with HDR technology, the sky can look overexposed, white, and washed out. If you use a 360 camera, you can adjust the horizon in post, but that’s a hassle. Ideally, use a gimbal, like the one integrated with the DJI Osmo Pocket.
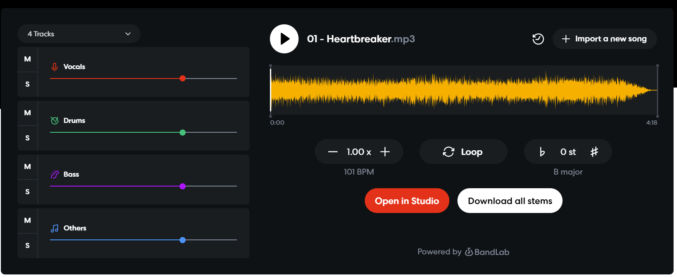
There may be times when you want to listen to a popular song, but you just want an instrumental version of it. There are many tools that use AI to remove vocals from a song, but unless you are making a track for karaoke, where you’d provide your own vocals, simply removing the vocals from a song will not result in music you’d care to listen to. For example, if you search YouTube for an instrumental version of a song, you’ll find many where the vocals were simply removed – and with poor quality at that. A better instrumental version of a song is one made by replacing vocals with instrument, e.g. piano, saxophone, etc. Compare the 3 audio clips below.
Audio clip with original vocals
Audio clip with vocals simply removed (somewhat imperfectly)
Audio clip with vocals replaced with Alto Saxophone instrument
Audio clip with vocals replaced with Chill Wave Synth instrument
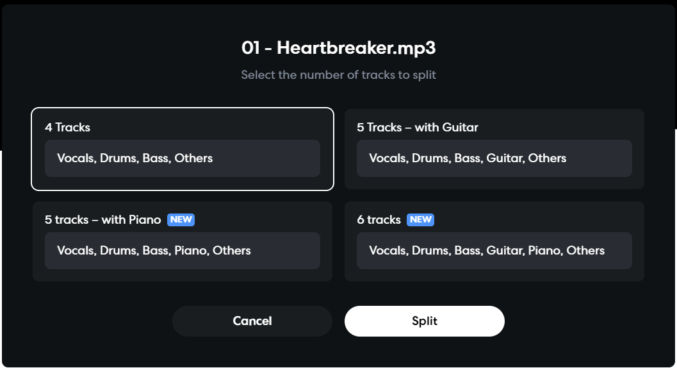
You will have to option to choose how many tracks to split the song into. Since we’re only interested in replacing the vocals, you can choose “4 Tracks”. Then, click the “Split” button.
BandLab will upload the song audio file and take a minute to split the audio.
When it’s done, click “Open in Studio”.
You will see the 4 tracks in the Studio.
4. Convert voice to MIDI
Right-click on the “Vocals” track and click “Audio to MIDI” > “Voice to MIDI”.
5. Change the MIDI track to one of 370+ instruments
You’ll see a new track below the “Vocals” track called “Audio-to-MIDI”.
On the “Vocals” track, click the “M” button to mute that track. The track’s soundwave will gray out.
6. Choose an instrument
Click on the “Audio-to-MIDI” track.
Click “Studio Grand” (the default instrument” to open the “Browse Instruments” dialog. Click on the play button to the left of an instrument to preview the sound. Search for an instrument by typing the instrument’s name in the search field. I will type “sax” and then click the “Alto Saxophone” instrument.
7. Preview the instrumentalized song
On the “Audio-to-MIDI” track, move the vertical playbar to the beginning of some signals in the track.
Click the Play button to preview the song.
Experiment with different instruments.
Optionally, lower the volume of the “Audio-to-MIDI” track if that produces a better result.
8. Tweak MIDI notes
Some of the MIDI notes probably won’t sound right. You’ll need to tweak them.
Click the “Audio-to-MIDI” track.
Click the “MIDI Editor” button at the bottom left.
Click on a MIDI note (a single blue bar to the right of the vertical piano keys) to hear the note.
Left-click and drag the MIDI note up or down to change the sound.
9. Export audio
When you’re satisfied with the preview, download the audio by clicking Project > Download > Mixdown As”
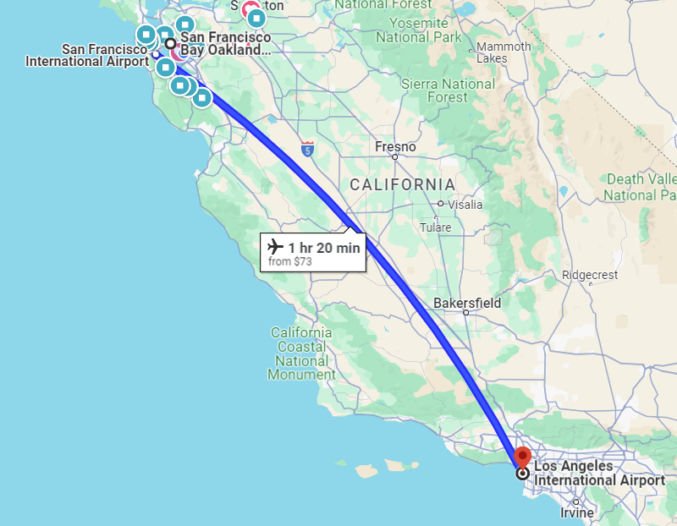
One of my rental properties is a triplex in Stockton, California. The roof uses standard residential shingles and has an area of about 4000 square feet. I got a roof replacement quote from a licensed contractor that specializes in roofing on May 10, 2023, for $28,270. Here are the details:
Tear off existing 1 layer of composition roofing
Any dry rot will be an extra charge to replace. Dry rot repair labor rate is $85.00 per hour per man plus material.
Roofing will be limited lifetime Certainteed Landmark Solaris cool shingle over one layer of Certainteed Roof Runner synthetic underlayment.
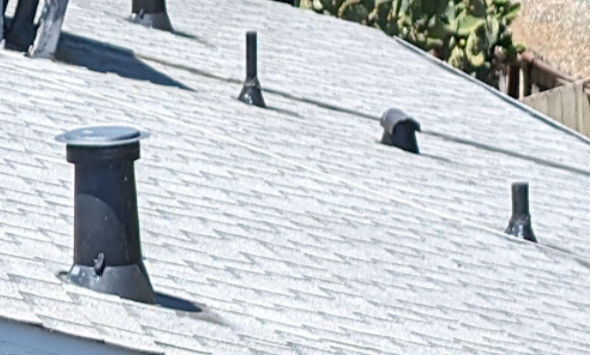
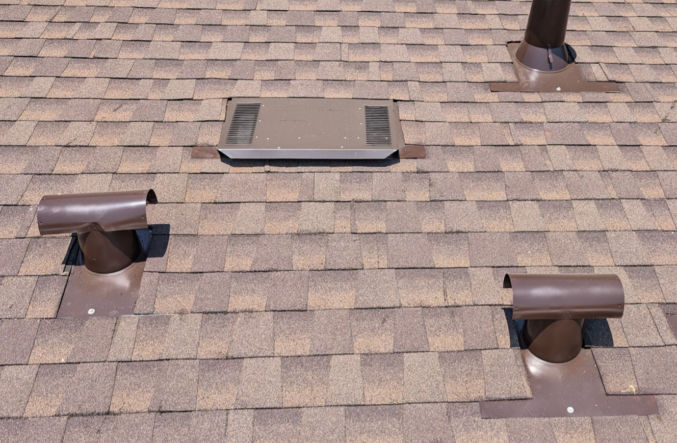
Venting per title 24 codes. 11 intake vents and 11 exhaust vents.
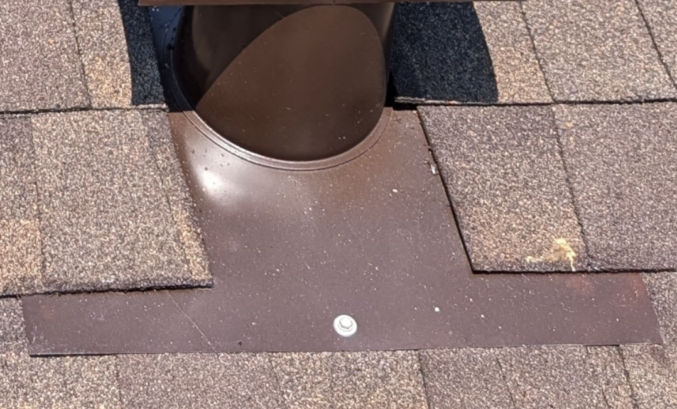
New pipe flashing painted to match roof color.
Certainteed Sure-Start 4 Star Warranty (10-yr. labor warranty % 50-year material warranty)
New TPO membrane roofing in dead valley
Includes building permit and dump fees.
New 5″ gutters with new down leaders an extra $3700
I got a quote from an all-purpose contractor who could do the job for $26,000. Here are the details:
Replace roof with California Cool shingles
Replace any dry rot
Underlayment would be felt paper, not synthetic underlayment
Since I think these quotes are outrageous, I decided to replace the roof myself with some friends, one of whom happens to be a roofer. Here’s how I did it.
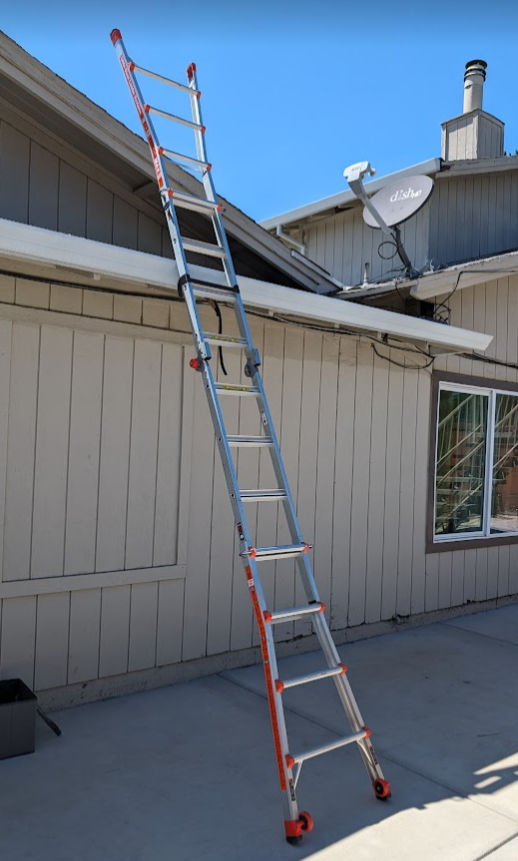
Set up a ladder
A ladder must be on the job site for the Building Inspector’s use. The ladder must be set up to meet the following minimum standards.
The ladder shall meet OSHA Standards and be rated a minimum of 250 lbs.
Find a level, hard, slip-resistant spot on the ground free of debris to set the ladder feet on.
The ladder shall extend no less than 36 inches above the edge of the roof at the point providing access and secured (tied off).
Place the feet of the ladder at a distance of 1⁄4 the height of the ladder away from the building. In other words, if the ladder is 8 feet tall, place the bottom of the ladder 2 feet away from the building. If the ladder is 12 feet tall, place the bottom 3 feet from the building.
If you have a gutter, slip a 2 x 4 into it to keep it from being crushed by the ladder.
Note: Inspectors will not walk on tile roof coverings or pitches exceeding 5/12. Ladders are still required for access to the roof edge for these inspections. If a ladder is not provided or if the ladder does not meet the minimum requirements listed above, the inspection will be canceled. If a second inspection request is canceled for lack of access, a reinspection fee will be issued.
To measure the roof area, I took a screenshot of the roof from a satellite view in Google Maps. I then annotated the roof with letters, printed out the image, and took it with me on the roof.
Tear Off: Yes You can have up to 2 layers of shingles. If you have one layer, you can add another layer on top of the first layer. If you have 2 layers, then you’ll need to tear off both layers. I had one layer, but I decided to just tear it off anyway.
Resheet: No Resheeting is to replace all plywood under the shingles.
Structure: Main Structure
Original Roofing Material: 30yr Laminated Dimensional Composition
New Roof Material Product Information: Cool Roof CRRC ID 0676-0133,
Area: 45 squares (1 square = 100 sqft)
Conditioned Space: No A conditioned space is a space between the roof and the ceiling that is air conditioned to be hot or cold.
Roof slope < 2:12 pitch? No Most residential roofs in California have between a 4/12 and 9/12 slope. Roofs with a pitch exceeding 9/12 are called steep slope roofs.
Reroof less than 50% of the entire roof area: No
Once you get your permit, you must post it on the building. The city inspector will look for it when they come to inspect the work.
Inspections
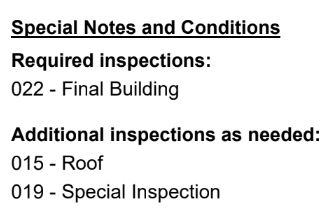
According to the permit, one inspection is required and some are depending on need.
On the permit, there will be a form for the inspection to fill out for each inspection type.
In my case, I don’t think the special inspection (019) is needed, but the other two are needed.
The permit also indicates that the following inspections are needed:
After removal of existing roofing for the plywood deck inspection.
After new plywood or OSB sheathing is installed for the nailing inspection.
After the project is complete for the final inspection
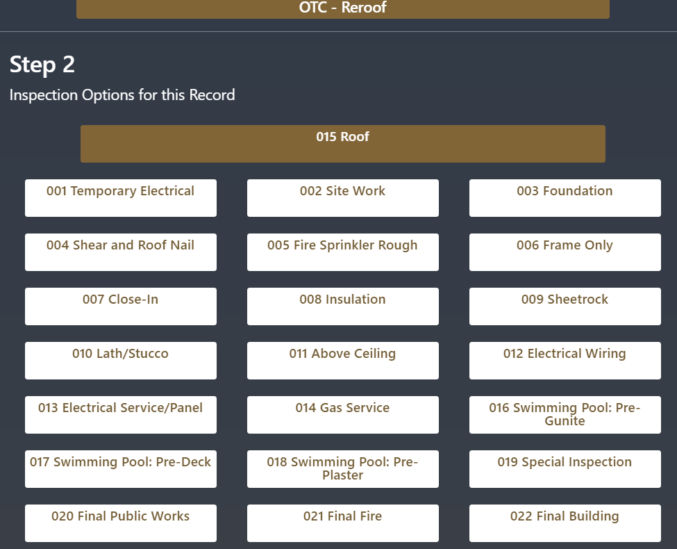
Inspections can be scheduled online at Stocktonca.gov/scheduleInspection. When you enter your permit ID, you’ll see some inspection options.
For the inspections, I would choose 015 Roof.
Inspections will occur between 7:30 AM and 4:00 PM. When you schedule an inspection, you can request an AM time window (7:30 AM to 12 PM) or a PM time window (12 – 4 PM) in the “Notes to inspector” field.
UPDATE: After scheduling the first inspection, the city inspector called and said that
he’d be at the site between 11 AM and 1 PM
the City of Stockton doesn’t require in-progress inspections, just final inspections.
So, I canceled the in-progress inspection and will just schedule one final inspection when the roof is complete.
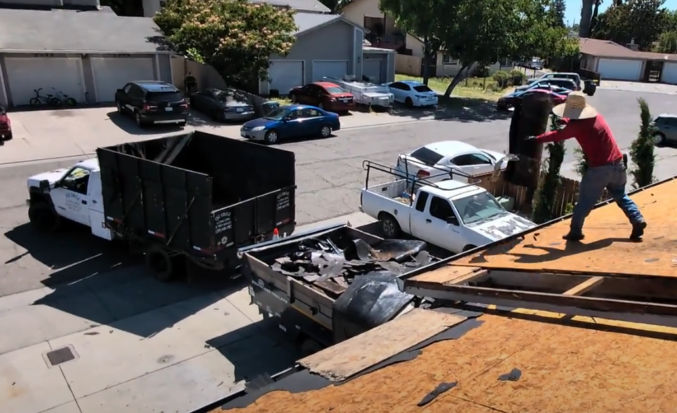
Remove old roof
You’ll need to remove the old shingles and the underlayment (tar paper or synthetic underlayment).
You may also need to remove old roofing materials in places like the dead valley. In my case, there was a metal sheet and old TPO material.
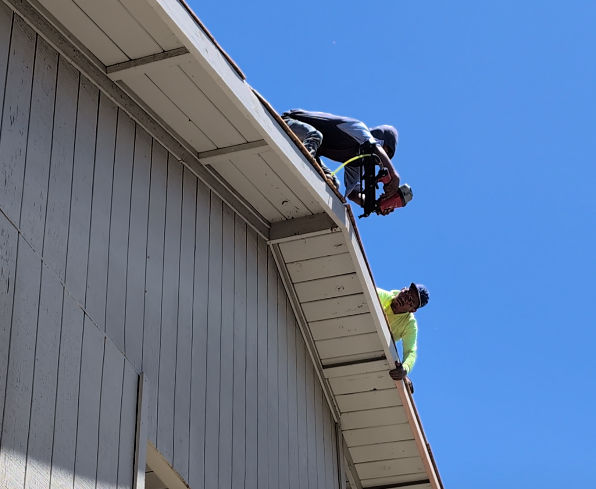
If the fascia boards are rotten, you should remove and replace them as well. Use a pry bar and a metal-cutting blade to cut nails holding the fascia board in place.
For long pieces of fascia board on the 2nd story, you’ll need multiple workers laying down on the roof and leaning over to pull the boards off.
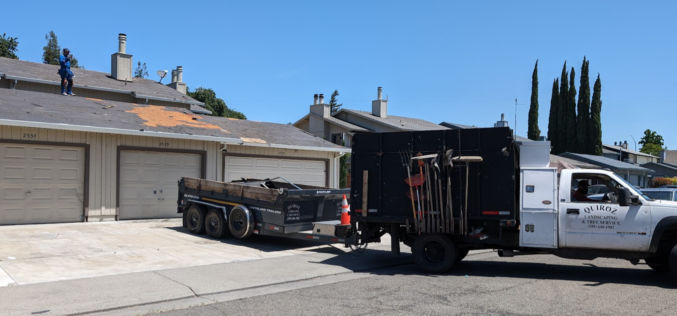
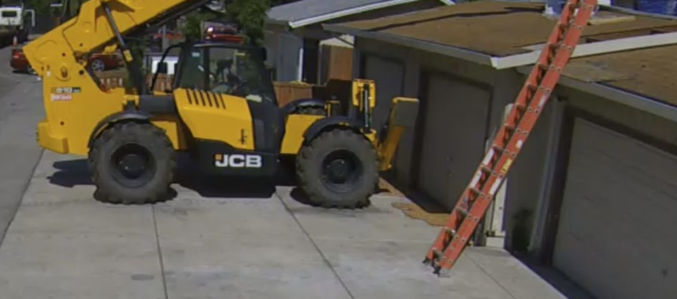
When disposing of the old roof, it’s easiest to park a dump truck in the driveway so you can throw the old roof materials from the roof into the truck. You can rent dump trailers from Home Depot, but then you need a truck to haul the trailer and you need a driver. Also, the trailers at Home Depot may not be available when you need them. In my case, I hired a guy who has a dump truck.
When you’re at the dump, you can just dump the garbage mechanically rather than by hand.
Buy new roof materials
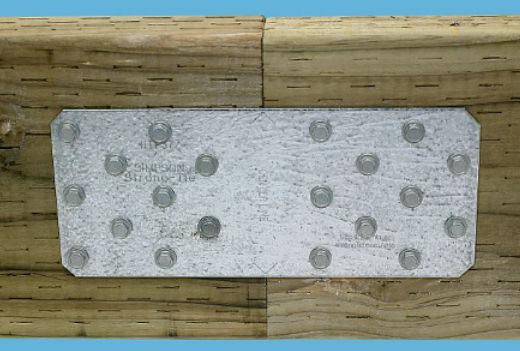
I bought 15 pieces of 2x6x16′ wood for the fascia. You can find boards as long as 20′. However, some edges are longer than 20′, so you’d still have to splice two pieces together, which can be done using a galvanized tie plate.
I also bought 9 sheets of 4×8 OSB plywood to replace any rotten parts of the roof deck.
Paint fascia boards
Make sure to paint the fascia boards before installing them, including the ends after making any cuts. Paint protects the wood and delays rotting.
Install fascia boards
Installing the fascia boards is also a multi-person job.
Nails are shot into the wood using a pneumatic nail gun.
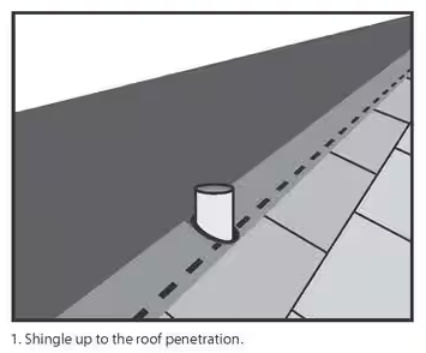
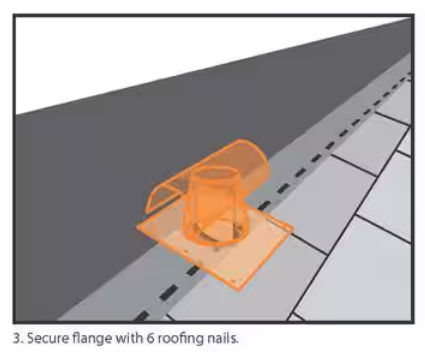
Static roof vents allow air to escape from the attic. Often multiple static roof vents are needed to adequately ventilate the attic. Roof vents should be evenly spaced across the roof and installed just below the peak of the roof where heated air will rise. Learn more.
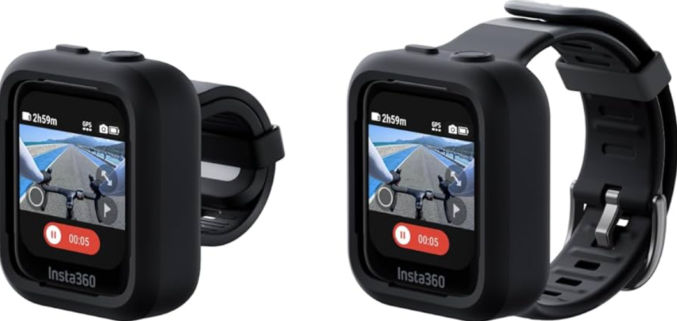
Use this magnetic chest mount for hands-free FPV (first-person view) filming. The camera should be positioned upside down to lay flat on your chest.
Daytime Video Recording
Choose “Freeframe video” mode.
Ratio: 4:3 (in the Studio app, change it to 16:9)
Active HDR: On
Resolution: 4K (this is the only option)
Frame Rate: 30 fps is good enough (this is the highest frame rate that supports HDR)
Horizon lock: choose 360-degree horizon lock
Slow Motion Video Recording
Choose “slow motion” mode to record a video with a high frame rate. Allows you to shoot in 240 frames per second in 1080P, or up to 120 frames per second in 4K.
Night Shots and Low-Light Scenes
Choose “Pure Video” mode.
FlowState Stabilization
There are 3 stabilization options: Off, Low, Standard, and High. Choose High for very shaky situations. Note that the high setting will result in more cropping.
Field of View (FOV)
Choose Dewarp to experience a wide FOV with minimal distortion. This is ideal for scenarios such as skiing and vlogging.
Quickly cancel a recording
You can quickly cancel a recording if you’ve messed up by long-holding the shutter button while recording.
Pause recording
If you have some downtime during a shot, for example, you’re waiting at an intersection or for something to happen, tap the screen while recording (at the bottom) to pause your recording. You can then tap to resume at any time.
Quick Capture
When the camera is off, press the shutter button to start shooting with QuickCapture. The camera will start shooting using the last-used shooting mode.
Pre-recording
Save 15 or 30 seconds of footage before you start recording. This can be handy if you want to catch something on film that is imminent.
Interval (long period)
Take a series of single photos over a long period of time. The photos can then be combined into a timelapse.
Burst (short period)
Take a series of photos in a short period of time (up to 10s). One use case is if you are alone and want to take a selfie or if you are with someone who is not good at taking photos. You can set the burst setting to 30p/10s, meaning 30 pictures in 10 seconds. Then, you can stand, smile, try different poses, etc, and later pick the best shots.
Timelapse (for static, fixed-position shots)
Create a timelapse video that condenses a long scene into a short video by taking a photo at a set interval. Use a tripod or fix the camera in one spot.
Shoot length: infinite, 3m, 5m, 10m, … 10h
Interval: 0.5s, 1s, 2s, … 120s
For example, let’s say you want to film yourself having dinner on an airplane. You expect you will take 30 minutes to eat, so you choose 30m for “shoot length”. Then, you can adjust the interval to see how long the timelapse video will be. For example,
interval = 0.5s, => timelapse duration = 2m
interval = 10s, => timelapse duration = 6s
The timelapse duration is shown on the screen.
Timeshift (for moving shots)
This is like a moving time-lapse.
Auto-stop Recording
If you want to shoot a video and have the camera auto-stop recording, you can set the duration to one of the preset values. The default is infinity (until the battery dies). Other options include 15s, 30s, … 3h, etc.
Inconspicuous shooting
If you want to film without people knowing that you’re filming, you can do the following to make people think that the camera is turned off.
Turn off the indicator light so there’s no flashing red light on the camera.
Turn off “Front Screen Display”
Use the GPS remote to start and stop shooting without touching the camera.
Disclaimer: I have not tested these methods yet, but theoretically they should work.
On Steering Handle
Use a U-bolt mount on the left handle grip. Use a selfie stick so you can see more of the driver in your shots. You can have the camera positioned in front of the driver or to the left or right of the driver.
If you have the selfie stick going over the steering unit, you may need to secure it in place using endless ratchet straps. You may need to loop the ratchet strap around the selfie stick once or twice to keep it from moving around.
If you have a life vest with straps, you can secure your camera with selfie stick between the vest and the straps.
However, if you want to extend the selfie stick to get a bird’s-eye-view shot, then you’ll need to do more. One way is by inserting the long selfie stick between your body next and the vest next to your shoulder. To prevent the bottom of the stick from moving around, wear a belt that has a stick holder. To prevent the stick from moving around near your shoulder, hold it against the vest using a reusable rubber twist tie. If you use the 10′-long Insta360 selfie stick, the bottom of the stick is too large to fit in the stick holder in the belt. As a workaround, you can connect the Insta360 tripod attachment to the selfie stick and then insert that attachment into the belt. Another option is to remove the stick holder in the belt and screw the selfie stick to the belt using a 1/4″ male-to-male camera screw.
On Arm
You can rig together a selfie stick mount on your arm as pictured below. The benefit of this is you can move the camera around hands-free. Learn more.
Other Spots
Depending on the jet ski, you may be able to use endless ratchet straps to secure a selfie stick to other areas like the front, where the rear-view mirrors are, and the rear passenger handle. You can also use a suction mount, as pictured below, but you may want to tether it to the jet ski using a lanyard in case the suction mount fails while riding.
Since I have the following cameras
two Insta360 X3 (360-degree action cameras)
one Insta360 Ace Pro (traditional, single-direction action camera)
I would use the following setup on a rented jet ski:
When speeding, keep the selfie stick retracted to avoid it breaking due to rough motion. You can get an FPV (first-person view) facing the direction of motion.
When not speeding, you can turn the camera on and then extend the stick upwards. This will allow you to get a bird’s eye view of everything around you.
Usage: Screw the U-bolt mount around the left handle. Screw the camera to the 10′-long selfie stick and screw the selfie stick to the U-bolt mount. Position the U-bolt mount so that the selfie stick lays over the right handle. Secure the stick to the steering unit using a ratchet strap. Wear the GPS action remote on your wrist and push the shutter button to start/stop shooting.
Views:
When speeding, don’t extend the stick fully to avoid it breaking due to rough motion. You can get a 3rd-person view of yourself and a partial view of the jet ski.
When not speeding, you can fully extend the stick and get a complete 3rd-person view of yourself and the jet ski.
Usage: Mount the suction mount somewhere on the front of the jet ski such that the camera can face you. Attach a lanyard to the camera and secure the lanyard to the jet ski so that you can retrieve the camera from the water in case it falls in. Wear the GPS action remote on your wrist and push the shutter button to start/stop shooting.
Views: Whether you are speeding or not, you can get a 3rd-person view facing you from the front of the jet ski. Since the Ace Pro is not a 360-degree camera, you can only film in the direction of the single lens.
Note: you can use one GPS Action Remote with both the X3 and the Ace Pro.
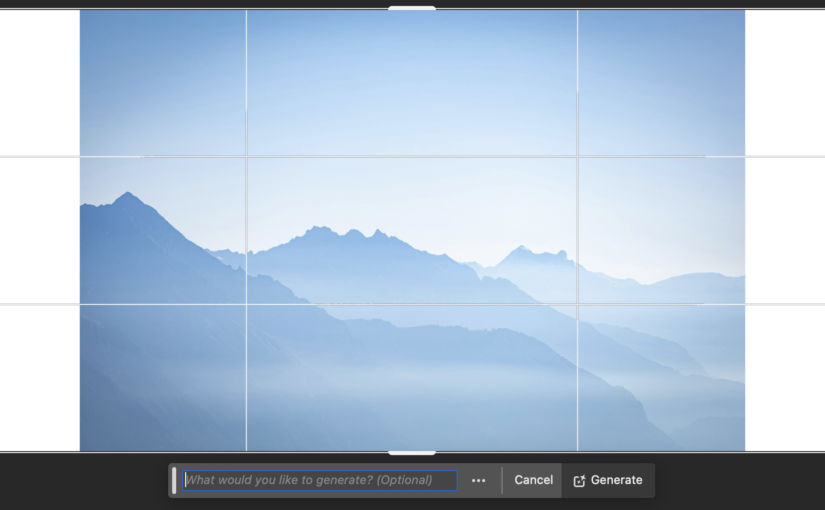
If you have a photo that is too small and you wish it were wider or taller, you can use Photoshop’s Generative Fill feature to fix that. Here’s an example.
Open the image in Photoshop
Enlarge the canvas
Let’s say I want to make the image wider. Using the Crop tool, enlarge the canvas.
When you do this, you’ll see a command prompt below the image.
Click Generate
If you just click Generate, Photoshop will fill in the empty parts to blend in with the original image.
Try custom commands
You can also tell Photoshop how you want to fill in the empty space. For example, if I write, “Fill the empty space with a jungle”
Like me, most people were trained to think that getting a high-paying job and working till social security kicks in was all we needed to live a good, comfortable life. Many of us spent a lot time and money getting a university degree or even a PhD. We then started working 5 days a week and tried to work our way up the corporate ladder, sometimes even maliciously. When we make more money, we tend to spend more money, e.g. to buy a bigger house, a fancier car, a $5000 home gym, expensive clothes and jewelry, tech gadgets, sound systems, and more. We also may even eat out more often. Since we’re busy working and we have enough money, we just continue on with that ever-more-expensive lifestyle and accept that we’ll just keep living like that until we can retire, which is when we’re 67 years old to receive full social security benefits. Of course, we’ll probably have some retirement investment accounts, like a 401K, which you can withdraw without penalty starting at age 59.5. With this lifestyle, we’d have to work most of our lives and maybe take 2 or 3 vacations a year, aside from holidays like Thanksgiving and Christmas.
The problem with the above lifestyle is
we’d have to work for a very long time (until we’re 67 years old!)
by the time we’re 67 and retired, we’ll have all the time in the world to enjoy life, but we may not be as healthy to do so as we are when we’re younger
if we lose our high-paying job, there’s no guarantee we’ll get another high-paying job, and if we do get another high-paying job, we may not even feel like doing that kind of work as we get older
our retirement income from social security is on average only 40% of our average monthly earnings over 35 years.
If you’re fine with the above, then carry on, but most people would rather retire early, like in their early 50s, but the only way to do that is by having assets that generate sufficient passive income to replace your day job. You can start a small business, like a pizza restaurant, and have employees do all the work, but that’s risky and not really passive since you’ll likely need to be more involved in day-to-day operations, say, 50% of the time. You could invest in the stock market, but unless you have a lot of money to invest, you won’t be getting sufficient returns to replace your day job. The safest and easiest alternative is to invest in real estate rental properties, like what this physician couple did. Before doing so, though they made a lot of money as doctors, they had no time to enjoy life and they would not have been able to retire early.
Whether you invest in real estate rental properties or have some other income-generating assets that you own (not a job), the key point is that having a high-paying job is not the goal; it should only be a temporary mechanism to create income-generating assets, like real estate rental properties.
While your co-workers are busy backstabbing each other to get a promotion and spending more and more money to live a more luxurious lifestyle, e.g. fancy cars and designer clothes, you really should focus on how you can spend your money on generating passive income, like real estate, so that by the time you are 50 years old, you can quit your day job and retire early. By that time,
your former coworkers may have job titles like Senior Director or Vice President whereas your job title would be something like “Retired Real Estate Investor With No Boss, No Commute, and No Stupid Meetings to Attend.”
your former coworkers may have a high salary, but you could be making the same amount or even more without having to work
your former coworkers may feel special because they have to travel the world to attend conferences and meetings, i.e. for work, whereas you could travel the world whenever your want for fun!
your former coworkers would have to commute to an office 3-5 days a week, do what their bosses say, attend boring/stupid meetings, have a quick breakfast, lunch, and/or dinner because they’re too busy, work some weekends and maybe in the early morning or at night if your coworkers are in a different time zone, and get frustrated with incompetent coworkers or office politics. On the other hand, you’d just wake up when you want, take your time sipping your morning coffee as you hear the birds chirping in your backyard, and decide what you feel like doing rather than doing what your job requires you to do.
your former coworkers would be driving fancy cars (depreciating assets) whereas you’d have more appreciating assets (e.g. more rental properties). You may have driven a simple car before retiring early, but once you replace the income from your day job, you can also just buy a fancy car if that makes you feel better.
Now, don’t get me wrong. Passive income from real estate isn’t 100% passive like income from selling stock. Depending on your situation, you’ll either need to be a property manager or you’ll have to hire a property manager. Either way, the amount of work is a mere fraction of a typical 9-to-5 job.
Conclusion
Having a job, whether it is high-paying or not, and working for someone else should never be the goal. The goal should always be to acquire income-generating assets to achieve financial freedom so that you can have the time and money to live how you want, that is, unless you want to keep working until your 67 years old!
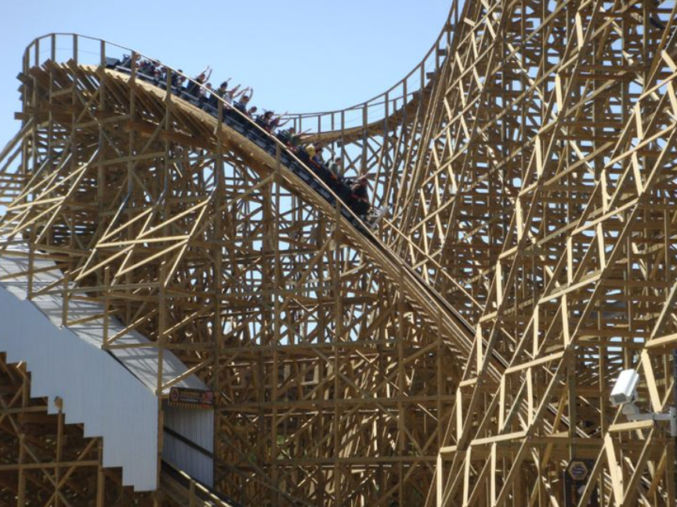
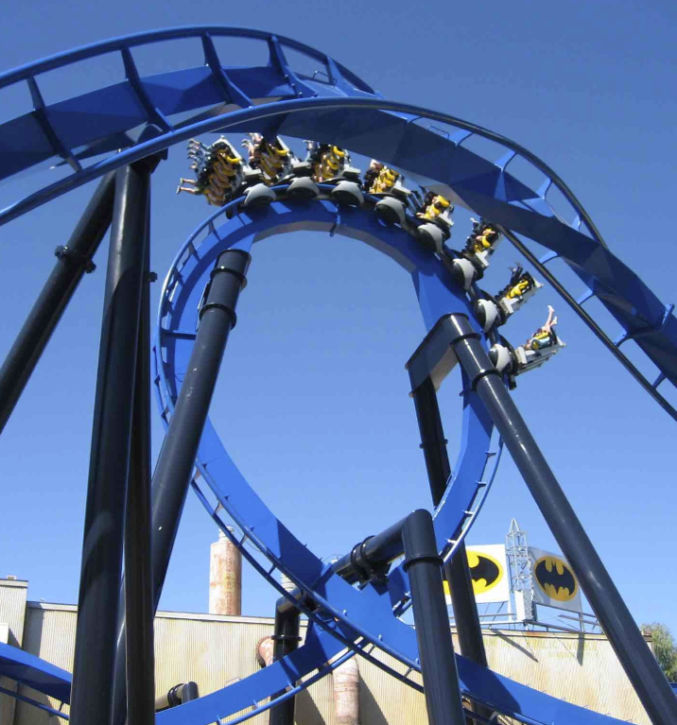
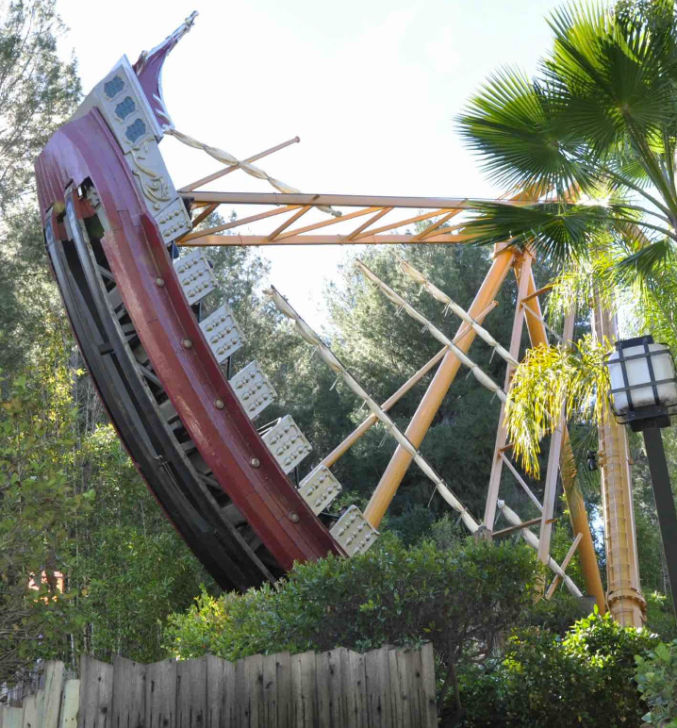
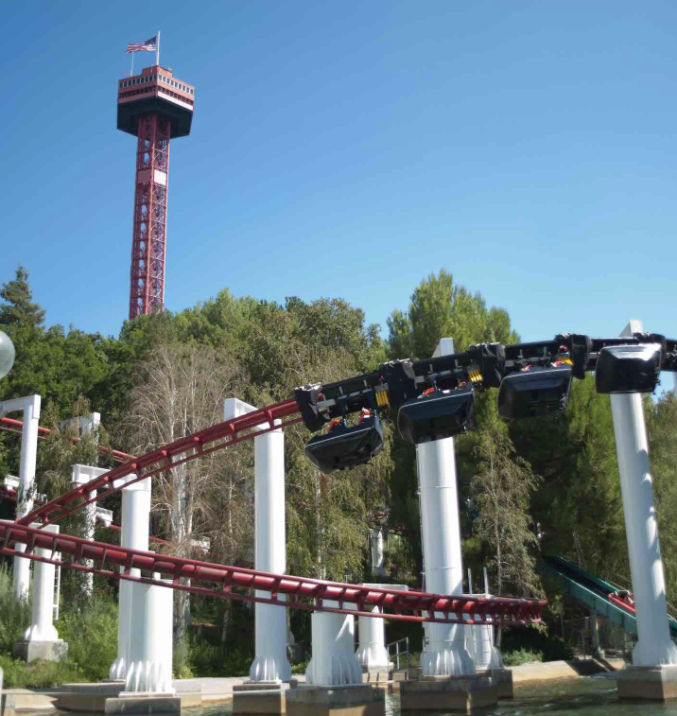
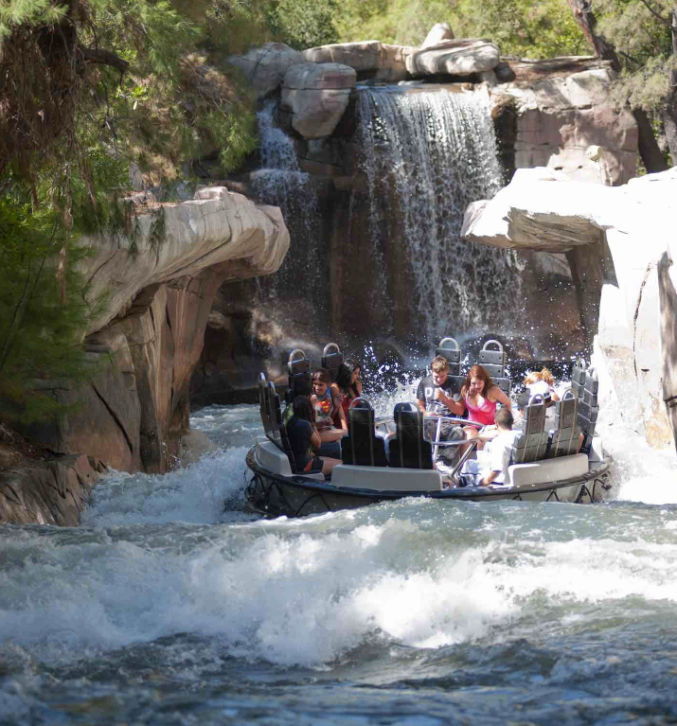
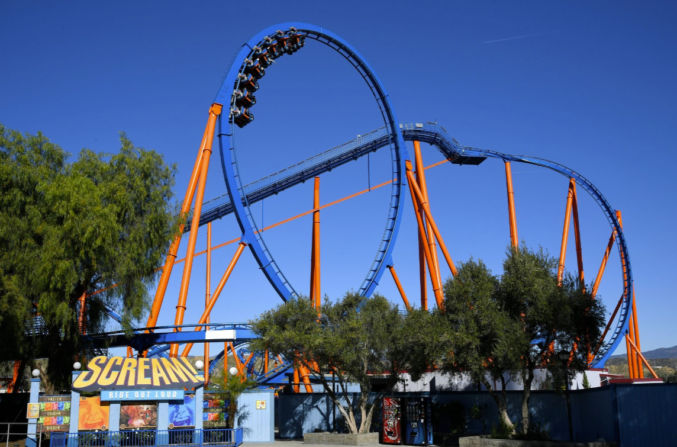
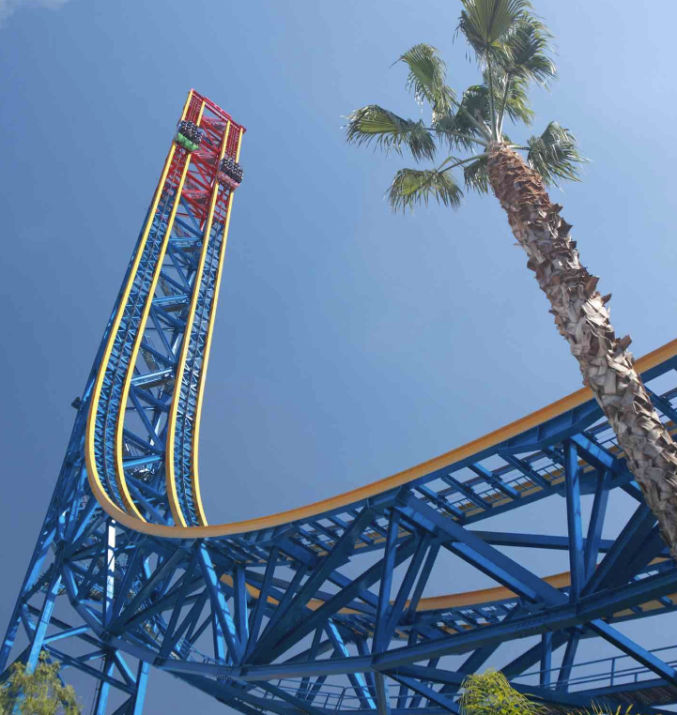
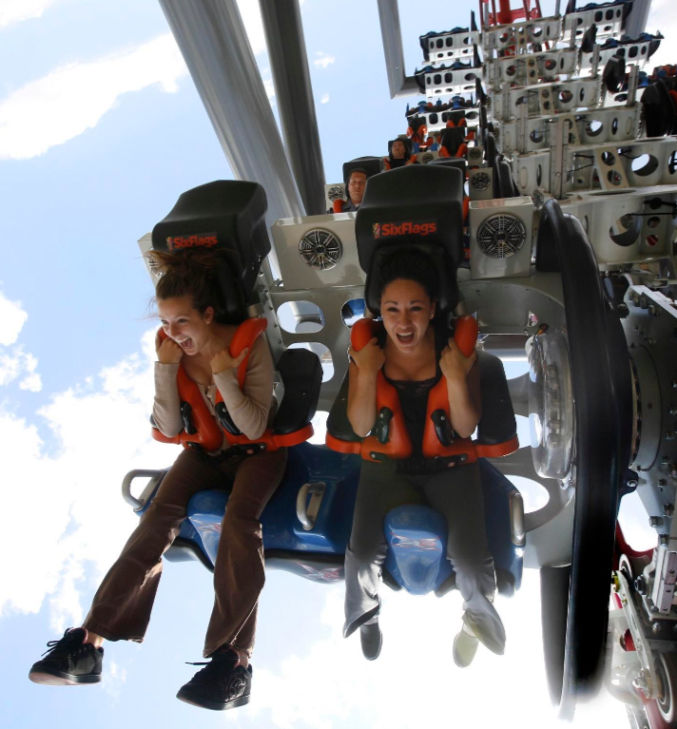
Sunday: Catalina Island – the Amalfi Coast of Orange County Monday: Six Flags Hurricane Harbor (Water Park) Tuesday: Six Flags Magic Mountain (Amusement Park) Wednesday: Six Flags Magic Mountain (Amusement Park)
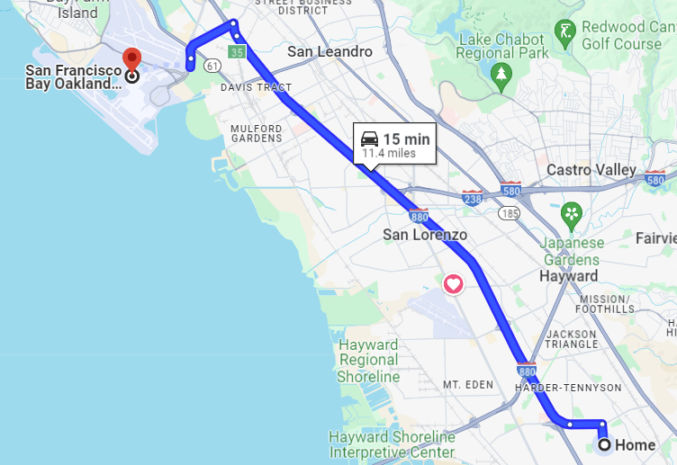
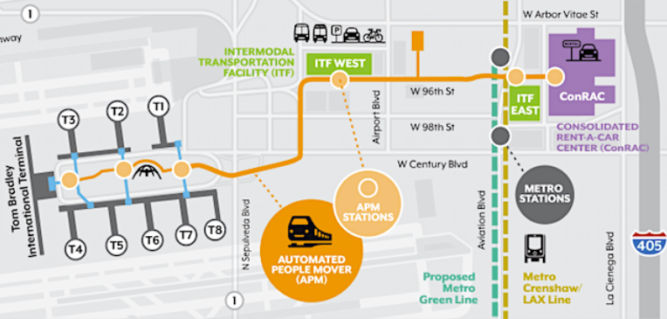
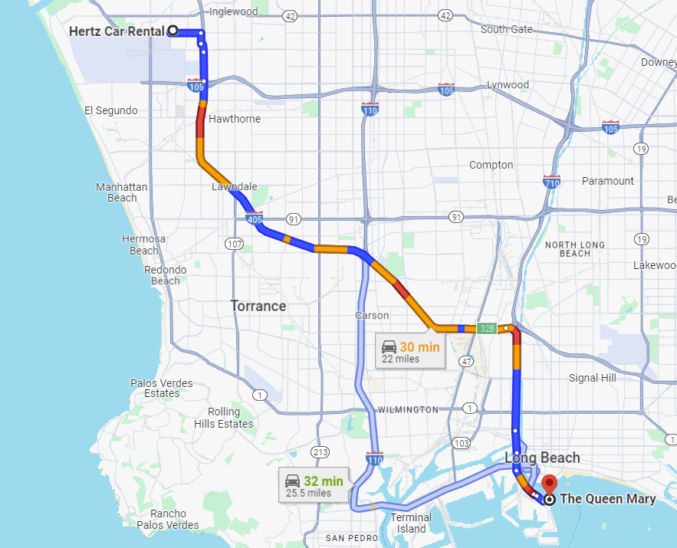
When exiting the airport, follow the signs to “ground transportation”
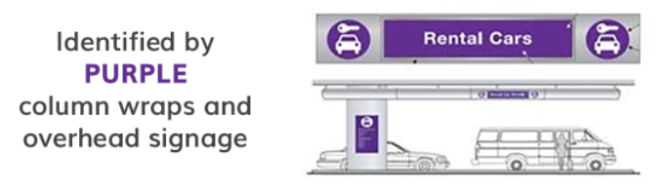
Stand under the purple sign marked “car rental companies” to await shuttle pick-up
Board the Dollar shuttle bus
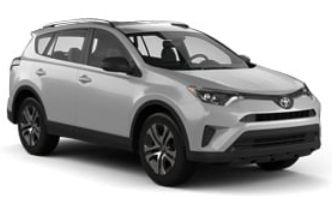
Dollar Rent a Car Booking.com # 789858762 Toyota RAV4 or similar $316.94 for 5 days
3:00 PM
Drive to Hotel
30 minutes
3:45 PM
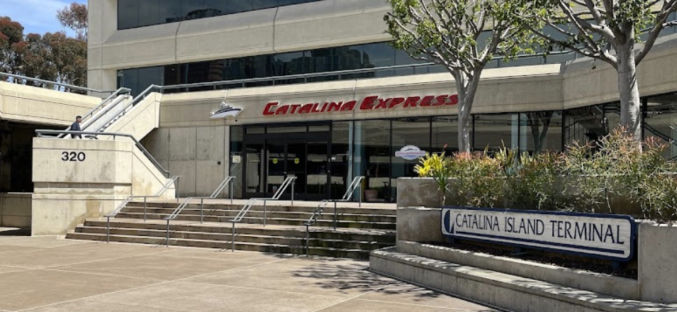
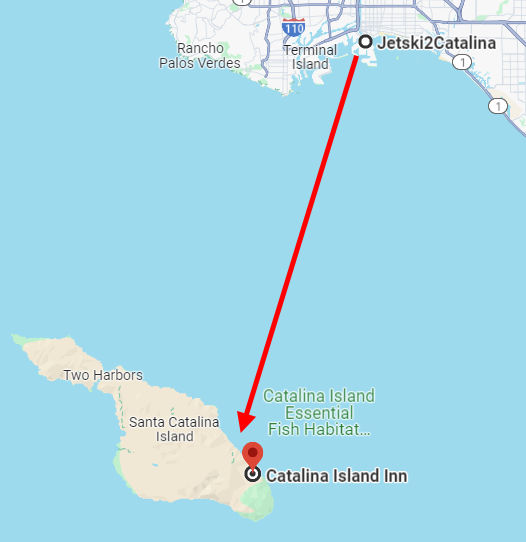
Stop by Catalina Express
320 Golden Shore, Long Beach, CA 90802
3:45 PM
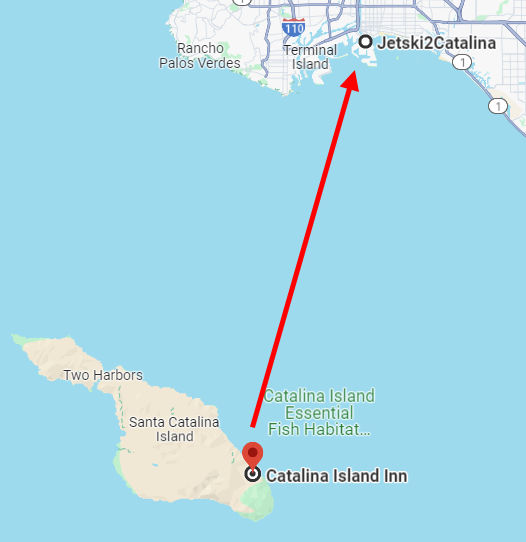
Stop by Jetski2Catalina nearby
Check out the jet skis.
Drive to Hotel Maya 700 Queensway Dr Long Beach, CA 90802
4:00 PM
Check in to Hotel
Queen Mary – a cruise ship turned into a hotel 1126 Queens Highway, Long Beach, California 90802, United States $265 / night Check-in is at 4:00 PM and Checkout is at 11:00 AM Hotel guest self-parking is $30/night Built in 1930 Map of the Queen Mary
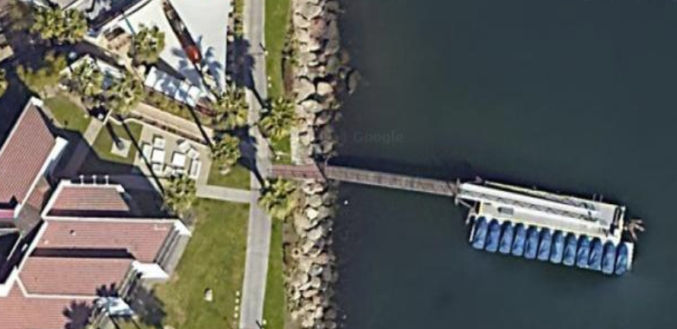
Park at Hotel Maya by building 3 or 4. Normal parking is $31. We will stamp your parking ticket and the Jetski2Catalina rate is $14.
7:40 AM
Walk to JetSki2Catalina
After parking at the Maya Hotel parking lot by building 3 or 4, walk through the buildings, and you will see the marina on the water. Turn right at the sidewalk and go past the Pool. We are on the water in the marina.
8:00 AM
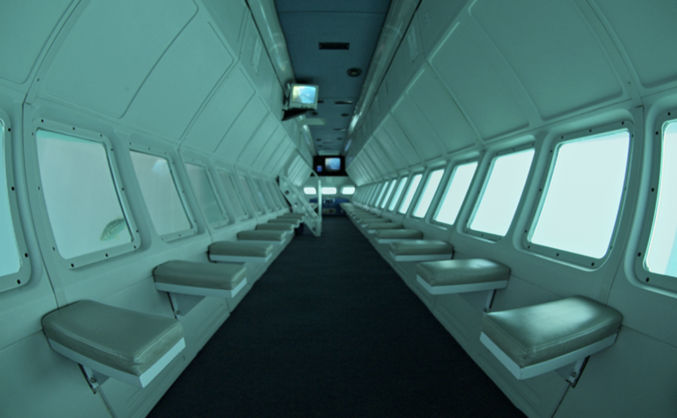
Check in for Jet Ski Ride from Long Beach to Catalina
2 hours
8:15 AM
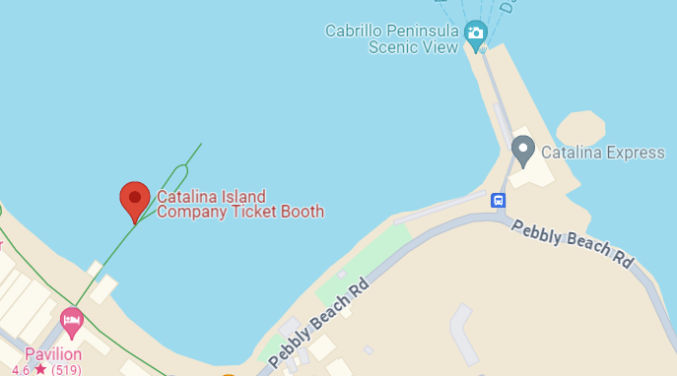
Catalina Express ferry arrives at Avalon, Catalina Island
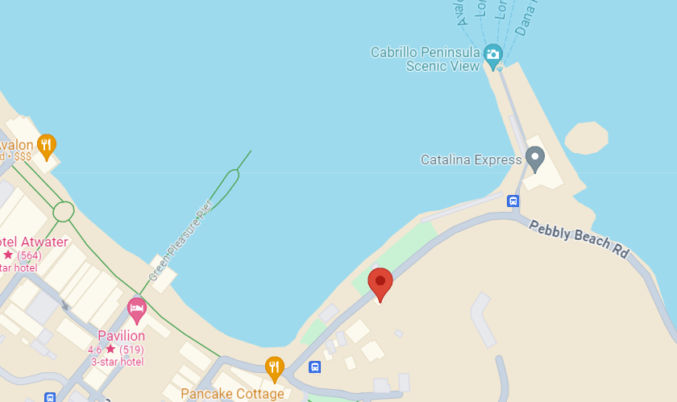
The Catalina Express ferry drops off at the Cabrillo Mole in Avalon, Catalina Island.
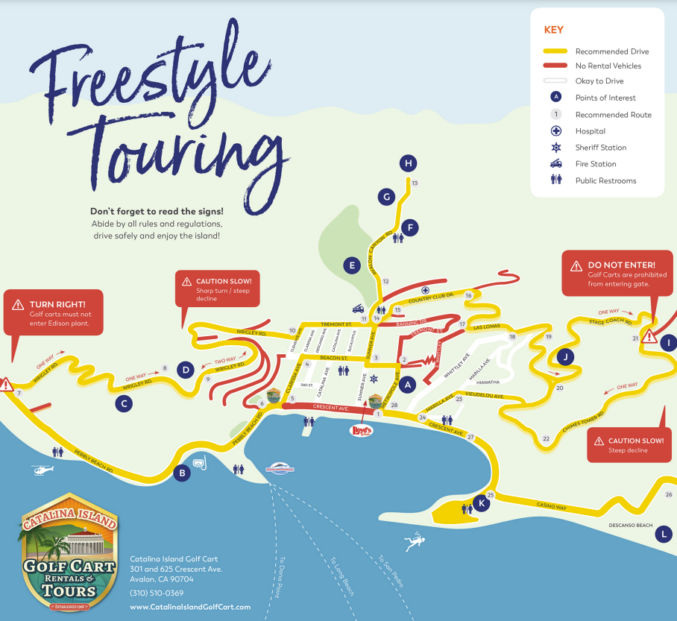
Explore Catalina by golf cart for 1 hour. Scenic tour. Island Rentals 125 Pebbly Beach Road, Avalon, CA 90704, Phone 310.510.1456 NO RESERVATIONS. First come, first serve. $60 / cart / hour We have a one-hour scenic route through the beautiful hills around Avalon and if you want to go longer we will pro-rate the second hour (the time you use is the time you pay for). We have a pre-planned 12-mile scenic route that may be completed in 1 hour without stops.
Adjustable-color LED Light Bulbs (This is for the sconces. I set the color to pink.)
Uplights (This one on Amazon lets you change the color of the light) In the picture above, I just have one behind the sofa with a soft white (yellow) light.
LED Light Strip (I got mine from Costco. You can adjust the color.) In the picture above, this is the blue light behind the TV.
1.5 RPM Speed Disco Ball Motor(I chose a speed of 1.5 RPM. Faster speeds make the lights move too quickly, which is distracting and headache-inducing)
Spot Light (This is for the mirror ball. I bought this one because it allows me to adjust the aperture size / spot diameter.) In the picture above, I put it on the ottoman facing up to light up the mirror ball.
Northern Galaxy Light Aurora Projector (In the video above, I set the color to red (R) and blue (B) and disabled the green “star” lights. It’s on the ottoman and illuminates the ceiling).