


Here are some detailed steps for rigging an MP3 player and connecting it to your lights that are powered by a light switch so that whenever you turn the lights on or off, music will play or stop.
Features:
- Ability to play music (mp3 files) from a USB stick or SD card
- Ability to play music from where it last played (This particular system will play from the beginning of the last song played. If you turn off the lights in the middle of a song and then turn the lights back on, the mp3 player will play from the beginning of that song. Fortunately, it will not start over and play from the beginning of the first mp3 file on the USB stick or SD card.)
- No need to push a play or stop button to control music. As soon as there is power to the mp3 player, the device will scan for mp3 files and start playing from the beginning of the last song played.
- Ability for set volume and remember the volume setting
- Wired power. No need to replace batteries.
Parts:
- NiZHi TT-028 MP3 Mini Digital Portable Music Player Micro SD USB FM Radio ($11)
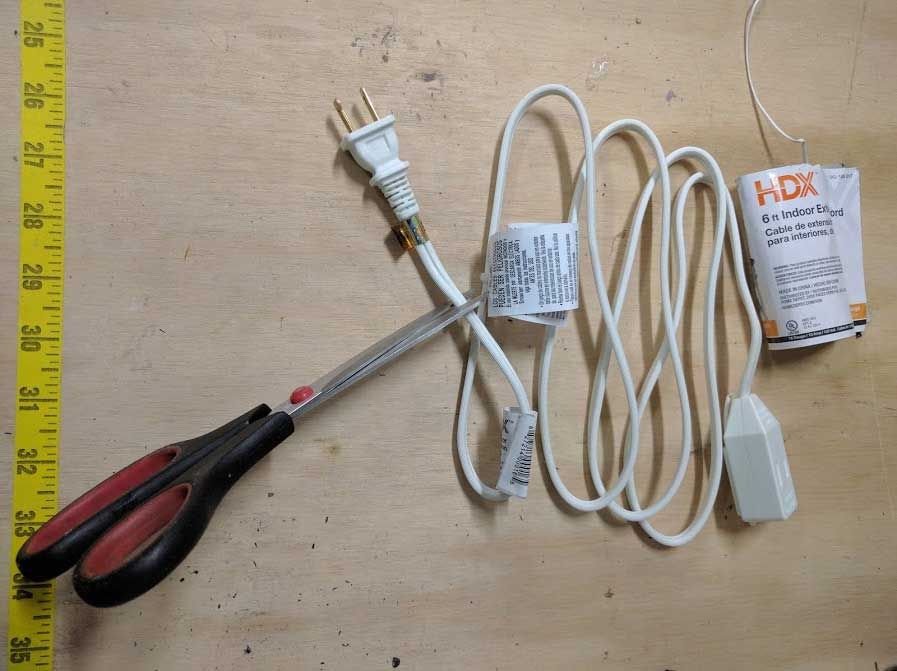
- Extension cord ($2)
- 5V, 1A USB Power Adapter (you probably have some from old cell phones or USB devices laying around the house)
Tools:
- Wire stripper
- Scissors
- Utility knife
- Small screwdriver
Instructions:
Read all instructions at least once before proceeding.
The instructions below show how I installed this in a bathroom.
-
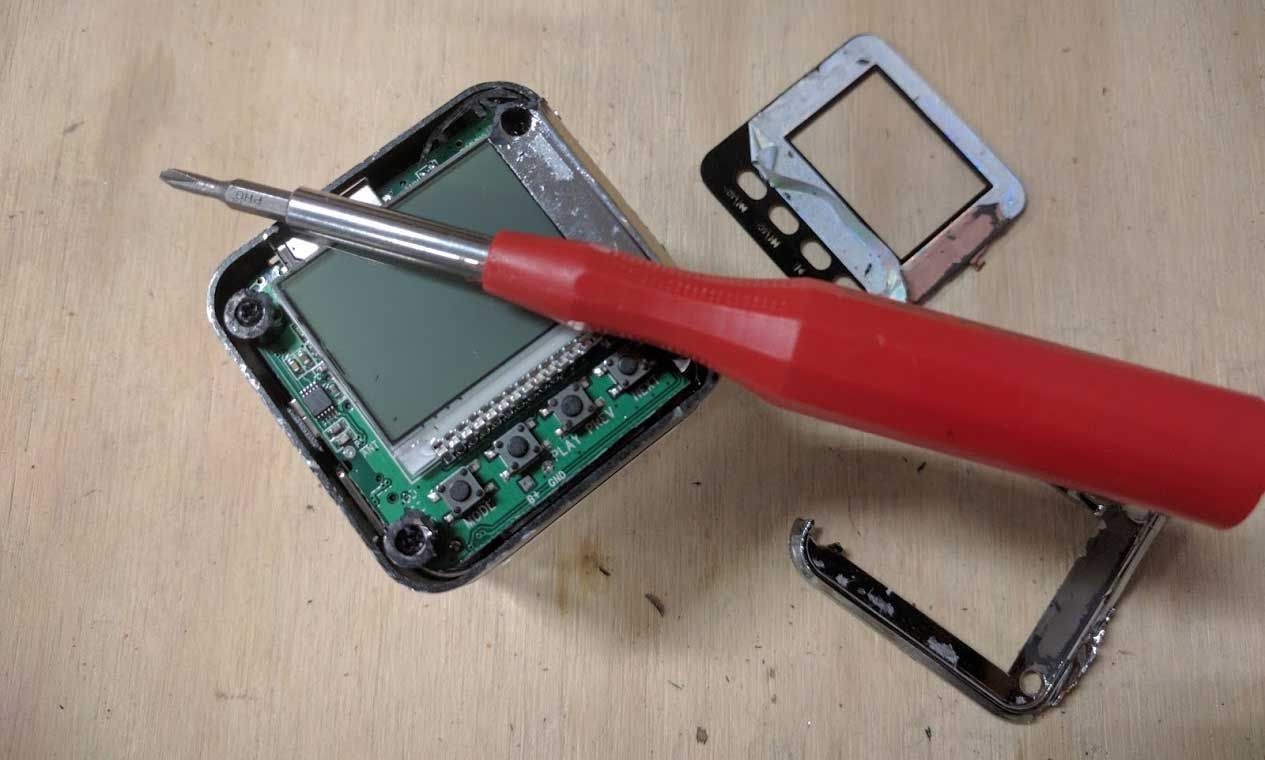
Using a utility knife, pry open the face of the player.
UPDATE: Apparently you can just use a utility knife and peel off the plastic LCD cover as it’s just glued on. This is easier and doesn’t cause damage to the device.

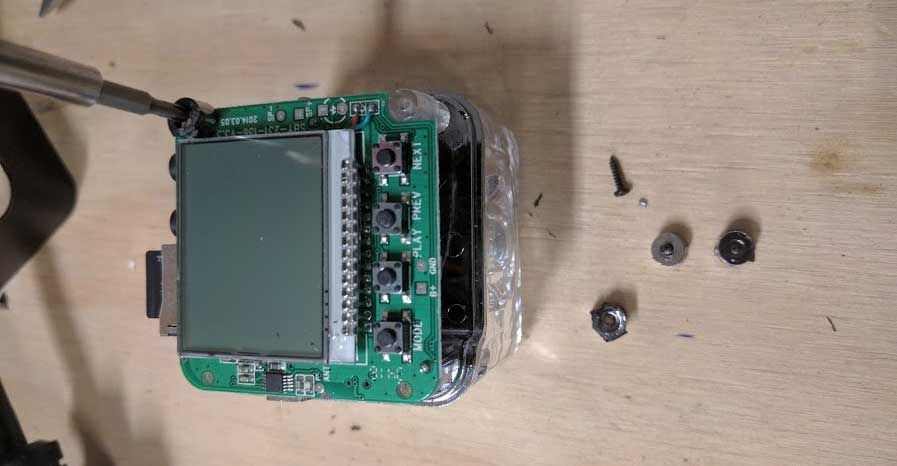
3. Unscrew the 4 screws
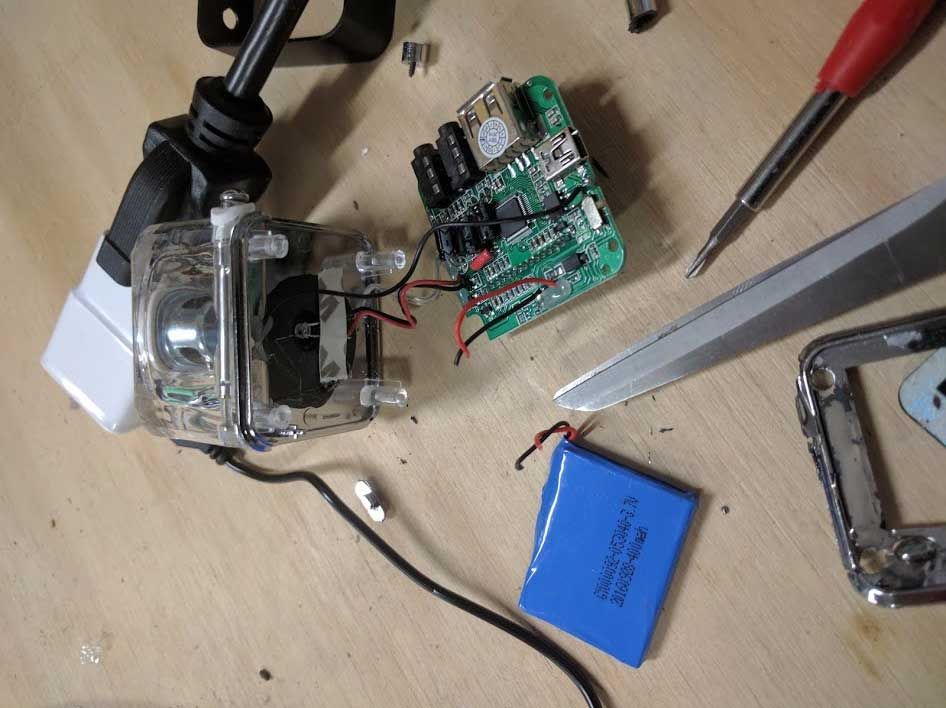
4. Carefully pull out the circuit board

5. Cut the battery wires
The blue thing is the battery (like I said, these are “detailed” instructions).
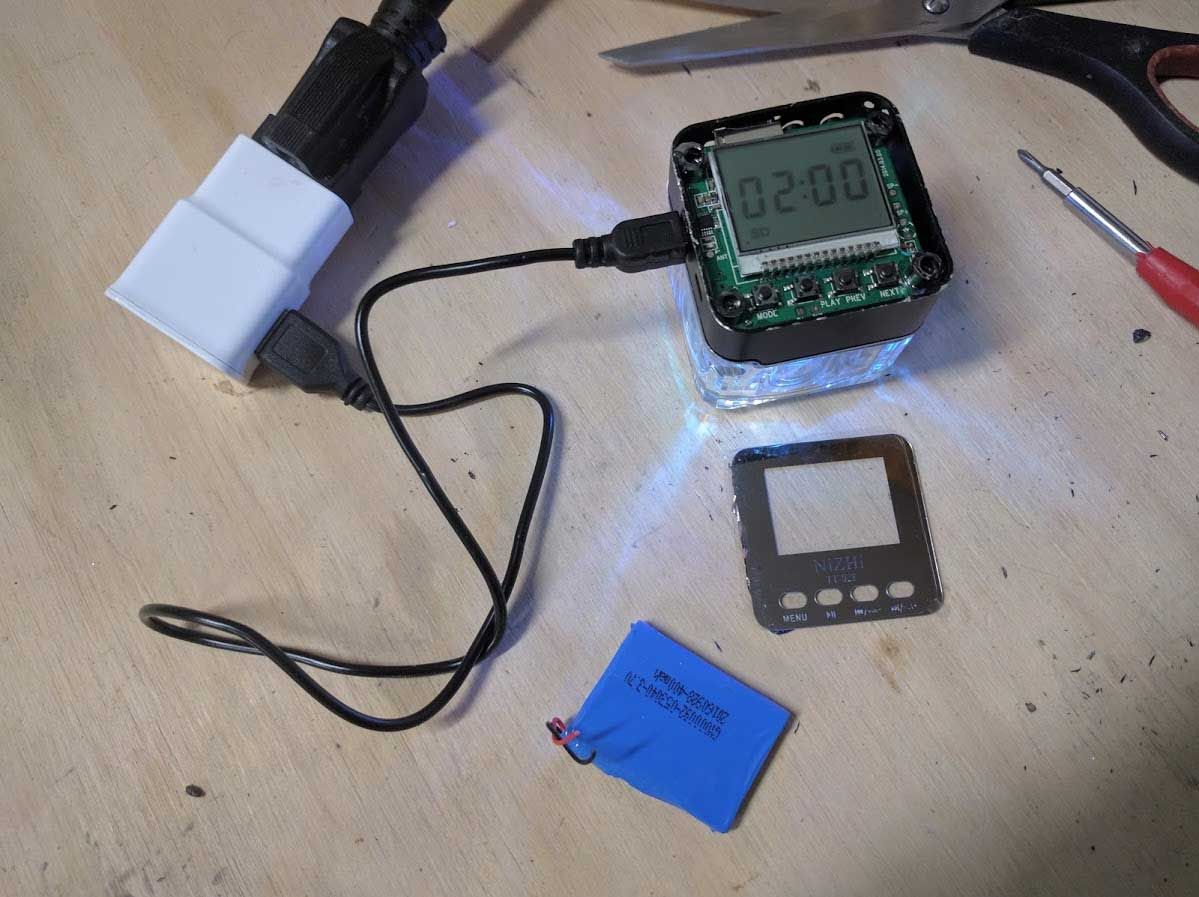
6. Test by plugging in the USB cable into the USB power adapter and into a power outlet.
7. Screw the circuit board back in
8. Push and slide the black casing back on
9. Test in bathroom
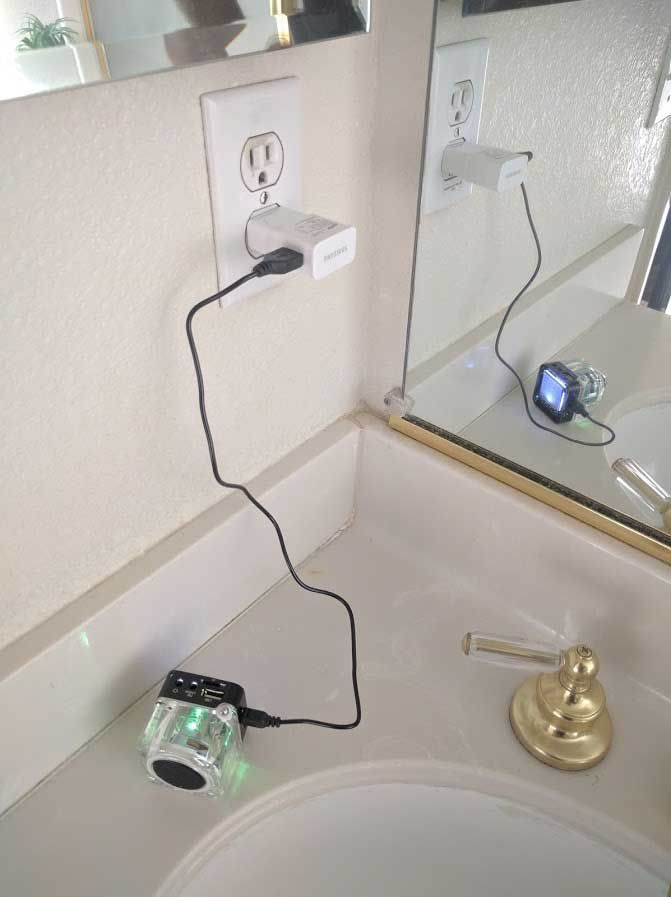
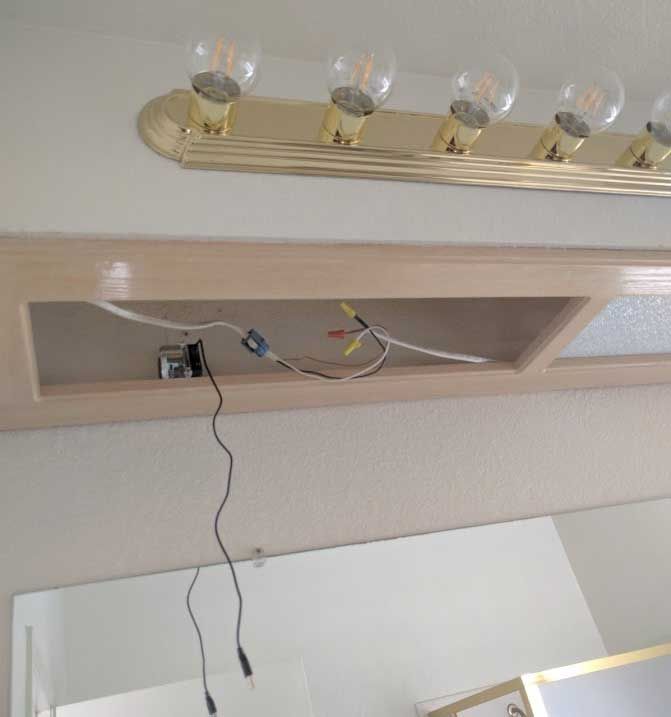
10. Get access to lighting wires
In my case, I could just remove the light diffuser panels (there used to be flourescent lights in the light box / soffit but I didn’t like that so I put vanity lights outside the light box)
11. Cut the plug end off of the extension cord
12. Using scissors, cut and separate the two insulated wires
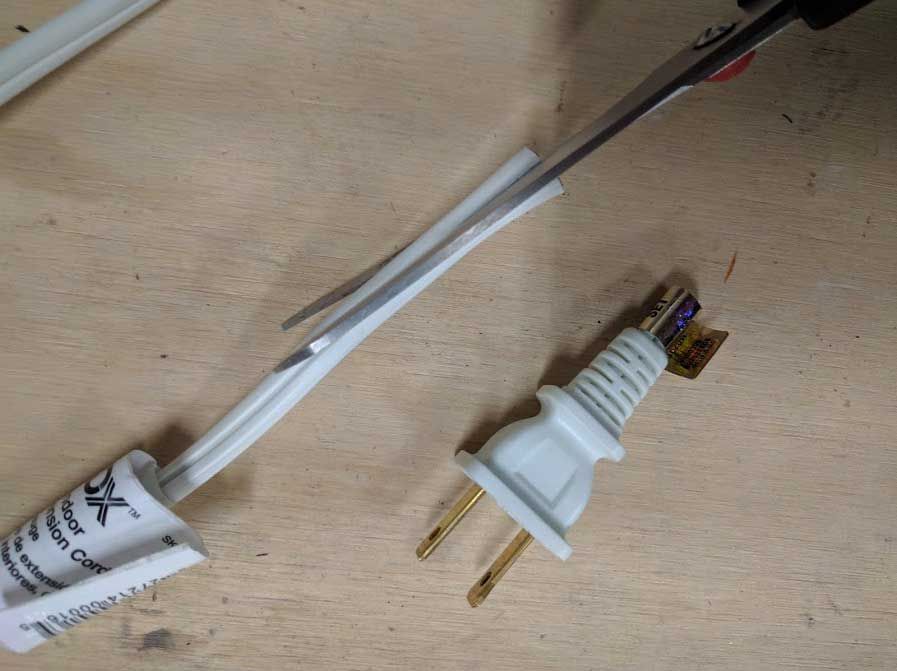
13. Using wire strippers, strip about 1 inch of insulation from the end of the two wires

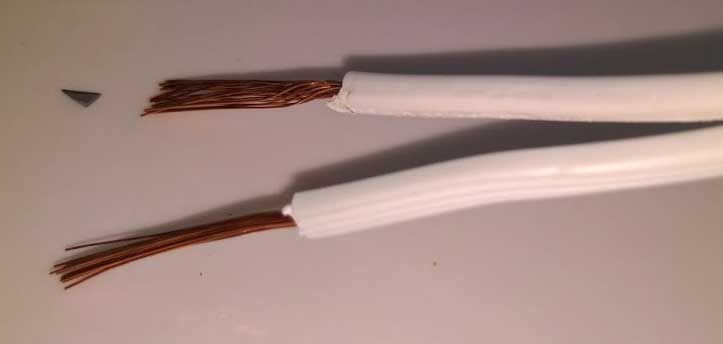
14. Identify “hot” and “neutral” wires
The hot wire is the one with the smooth insulation and the neutral wire is the one with the ribbed insulation. In the picture below, the top wire is hot and the bottom one is neutral.
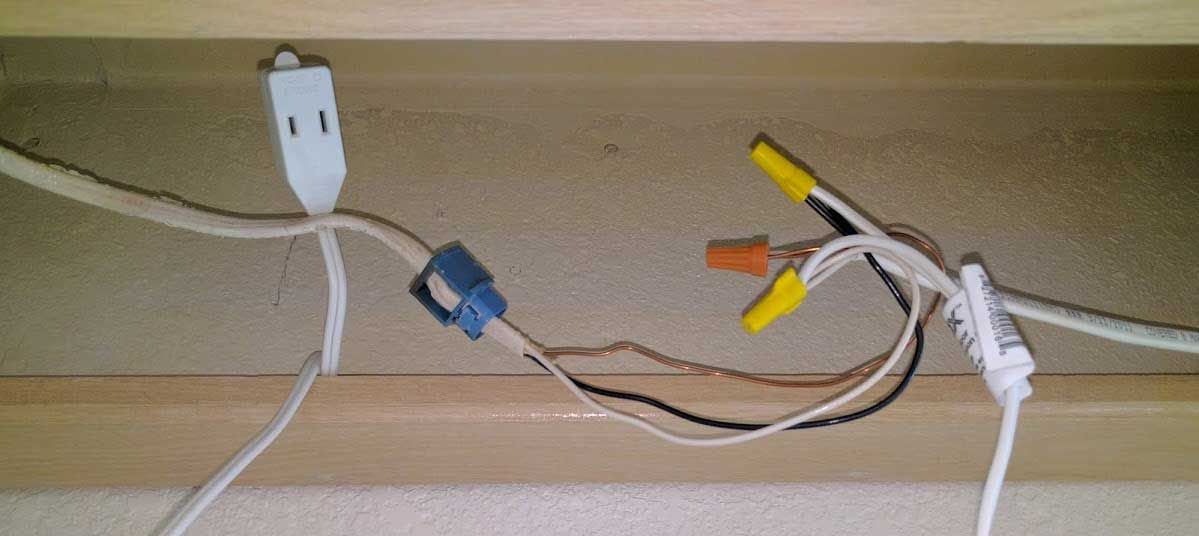
15. Connect the wires to the existing lighting wires
In this example, the black wire is “hot” so add the “hot” wire from the extension cord into the wire nut for the black wire. The uninsulated wire going into the orange wire nut is ground and it not used by the ungrounded extension cord. The other yellow wire nut connects the neutral wires so add to it the neutral wire from the extension cord.
16. Plug in the MP3 player and test
17. Cover up the wires and MP3 player and test again. You’re done.
Notes:
- I set the volume to the lowest setting (1) because I only want subtle background music playing in the bathroom.
- I play instrumental music because I don’t get bored of it as quickly as I do with music with vocals. My bathroom music playlist comes from