


This tutorial uses Corel VideoStudio Pro.
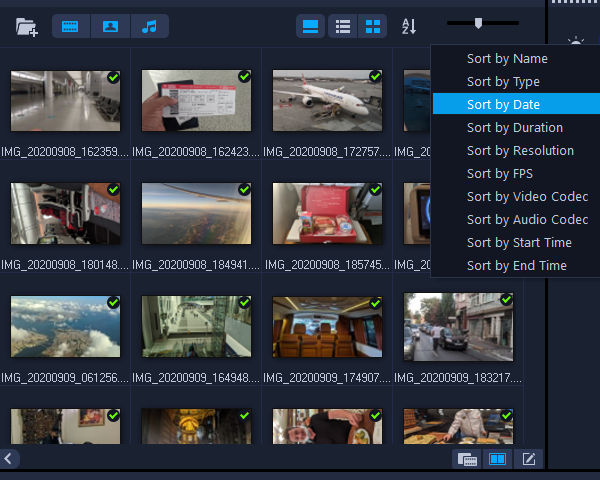
1. Add photos to project
Sort the photos as desired, usually by date, so they appear in chronological order.
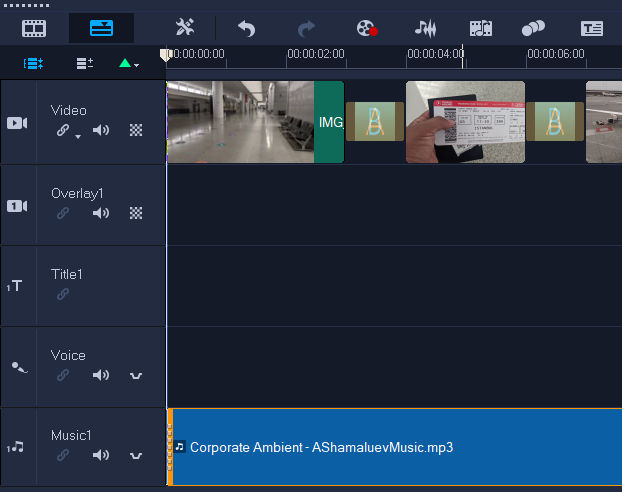
2. Select and drag photos to video track
All photos will be added to the video track

3. Change duration of each photo
If the duration of each photo is too short or long, select all photos, right click and click on “Change Photo Duration …”. This will change the duration for each and all photos.

4. Add a transition effect
Choose a transition (a simple “crossfade” is the best”), right click and click on “Apply current effect to video track”.
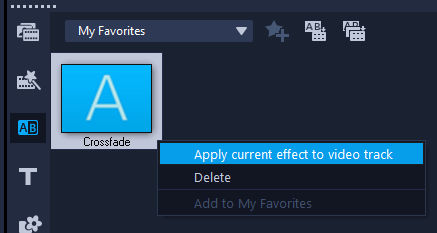
This will result in the transition being applied to all photos.

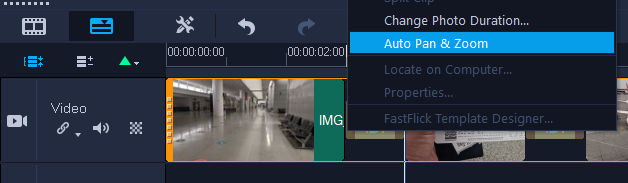
5. Add Pan and Zoom effect
Select all photos, right click and click on “Auto Pan & Zoom”.
6. Drag audio file to music track
You can find some background music from Sound Cloud.
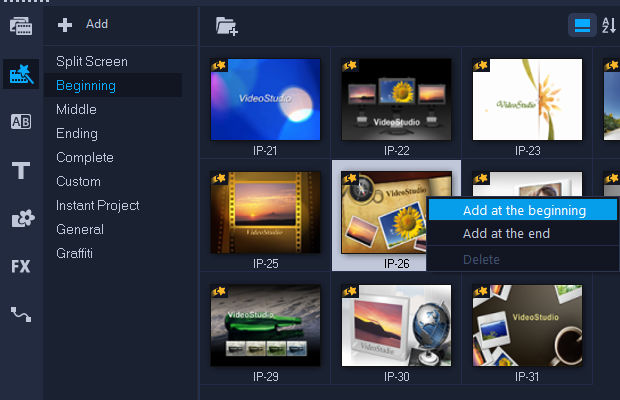
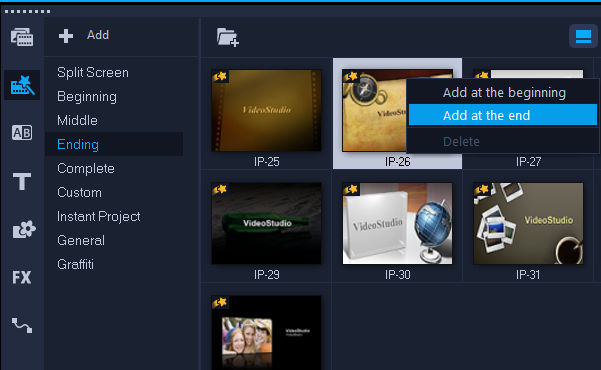
7. Add intro slide
Click “Instant Project” icon, click on “Beginning”, choose a template, right click and click on “Add at the beginning”.
8. Edit intro slide
Since the intro slide is a template, you will see placeholder content.
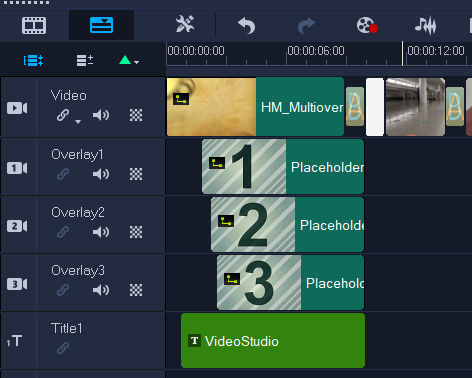
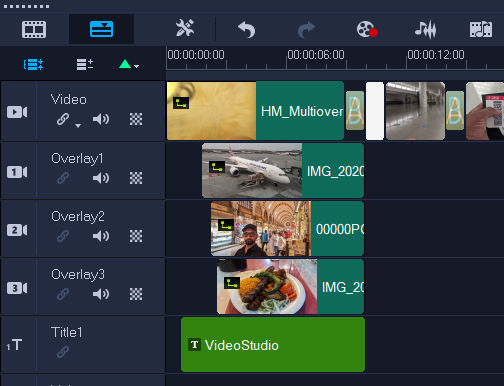
Drag a photo to the placeholder clip and hold “Ctrl” to replace the clip. This will cause the photo to be formatted to fit the template.
Double-click the text clip to edit the text of the intro template.

9. Add end slide
This process is the same as for adding the intro slide but click on “Add at the end” instead.
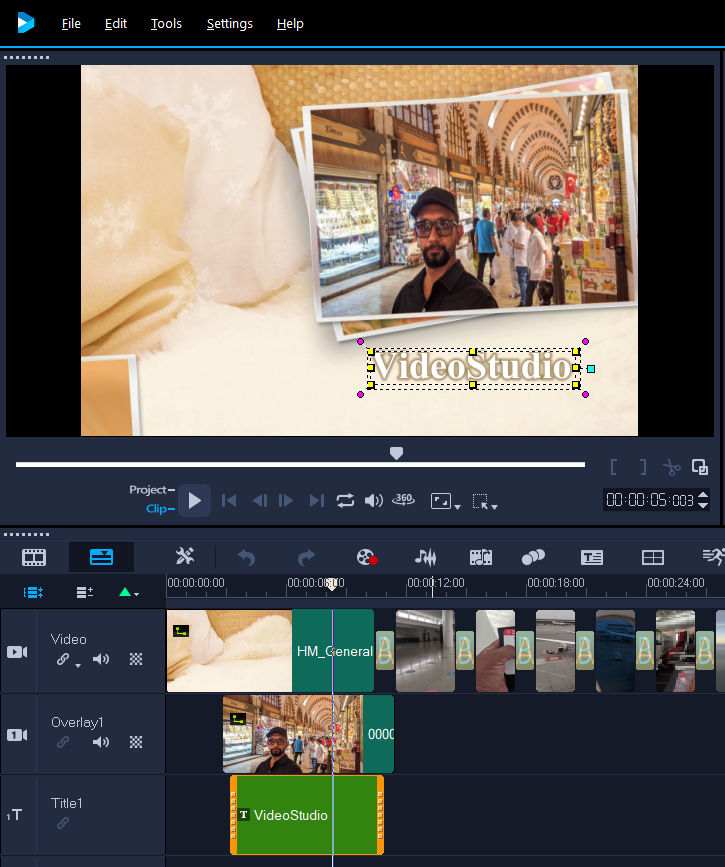
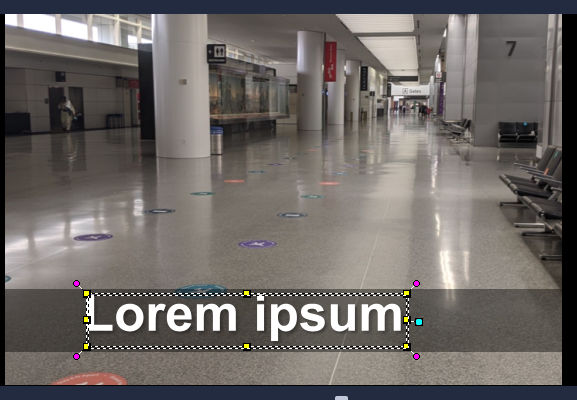
10. Add text to some photos
Click “Title” and then pick a title template. The one with a semi-transparent background is good. Drag it to the Title track where you want the text to appear.

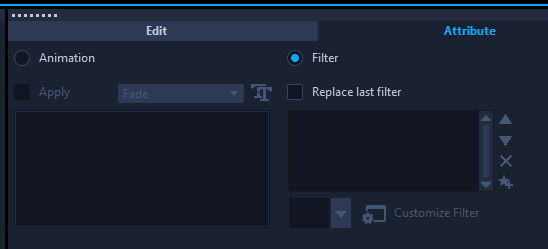
11. Change text and background color
This title template animates the text.

Convert it to a simple fade in and out by clicking on the “Attribute” tab in the Options Panel for the title, click on “Attribute” tab, click on “Animation”, and disable animation by unchecking the “Apply” checkbox.
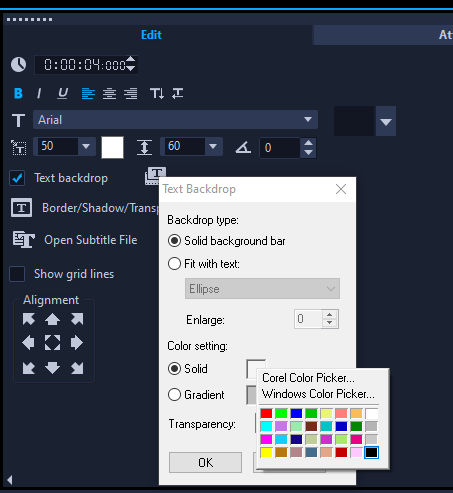
The background of the text is too light so let’s darken that semi-transparent bar. Double-click on the title clip and in the Options Panel, click the “Edit” tab, and click on the black color in the Text Backdrop context menu as shown in the screenshot below.
Double-click on the title clip again and edit the text.
12. Add more text
Copy and paste the text clip to other photo clips and edit the text.

13. Render video
Click the “Share” tab, choose a setting, and click “Start” button.
