


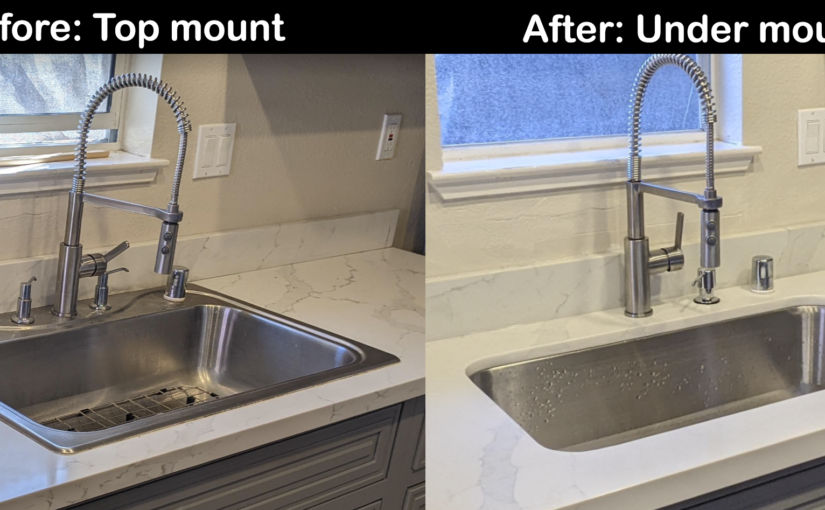

The old sink was the top-mount kind. Water kept leaking behind the sink into the base cabinet.

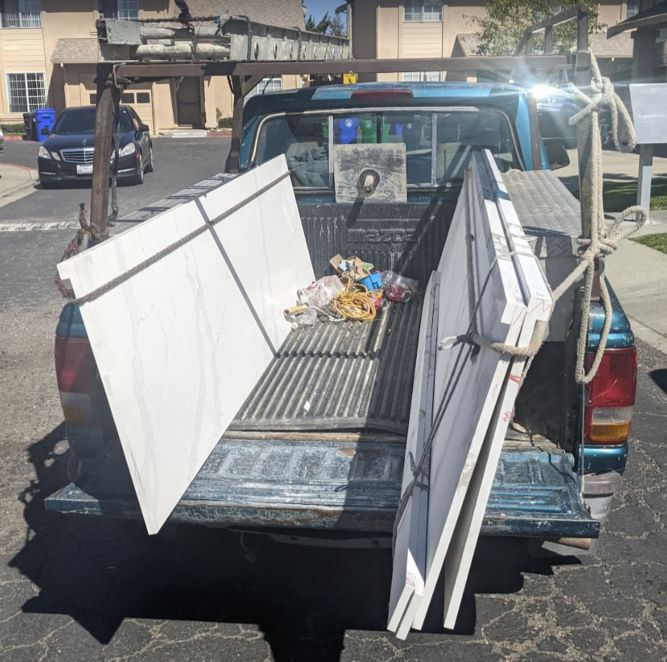
The same quartz countertop was on sale from $500 to $400 (8-foot-long slab).

Found a Mexican guy in the parking lot and got him to transport and install the countertop.

The slab was leaning against the side of the truck and secured using a rope.
To remove the old countertop, I placed a towel on top of it and hit it with a sledgehammer to break it up into small pieces without pieces flying everything.

It actually didn’t take long to remove the old countertop.

I then unscrewed the old plywood and threw it away.

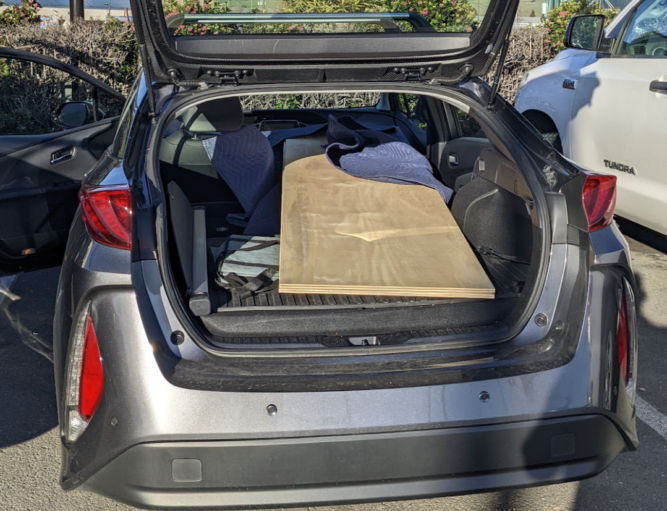
For an undermount sink, you need at least 19/32″ thick plywood. I had Home Depot cut a 4×8′ plywood sheet in have to make two 2×8′ sheets.

I was able to fit both 2×8′ sheets in my car 🙂
I screwed the plywood into the base drawers. There was moisture damage and a hole in the wall which I had to fix.

I patched up the hole and smoothened the wall surface.

That 19/32″ thick plywood should be strong enough for the undermount sink.

I found an 18-gauge undermount sink (30″ x 18″ x 9″ deep) at HD Supply for $175.

The installers cut a hole in the plywood for the sink. They should have used a jigsaw to make the hole.

They cut the countertop outside because it produces a lot of dust.

First, they cut the slab to length. Water was needed to keep the blade from getting too hot and keep dust from going everywhere.

Here, he’s cutting the hole for the sink using an angle grinder. I think he should have used a circular saw to make a straighter cut.

He then polished the edges while his assistant squirted water.

The sink didn’t come with a paper template for cutting a hole in the plywood and countertop. An easy way to mark an outline where to cut the whole is by turning the sink over, sticking your hand into the drain hole, and using a pencil, mark the perimeter.

I had them drill 3 holes: one for the faucet, one for a soap dispenser, and one for the dishwasher.
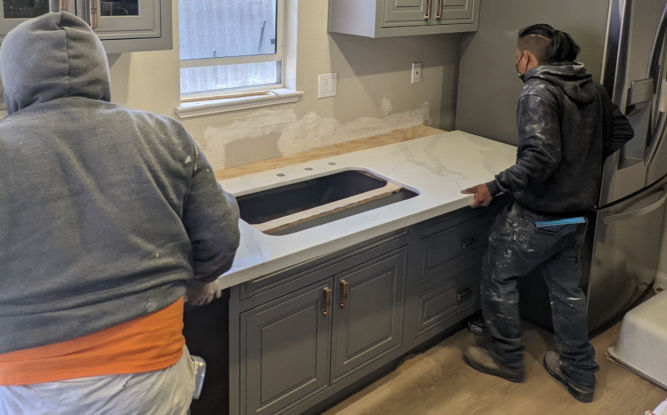
They put extra strong construction adhesive along the perimeter of the sink hole where the sink lip will sit. They also put it on the plywood in various places to secure the countertop to the plywood.

They then glued the backsplash to the wall and applied silicon to the joint.

When smoothening out silicone or caulk, you should always use a tool like the Husky 3-in-1 caulk tool. The triangular edge makes for a perfect finish.

When installing the p trap, I chose the flexible kind that you can cut to length. It’s much easier than fooling around with metal or PVC drain parts and it never leaks.

And this it how it came out. Not bad at all.
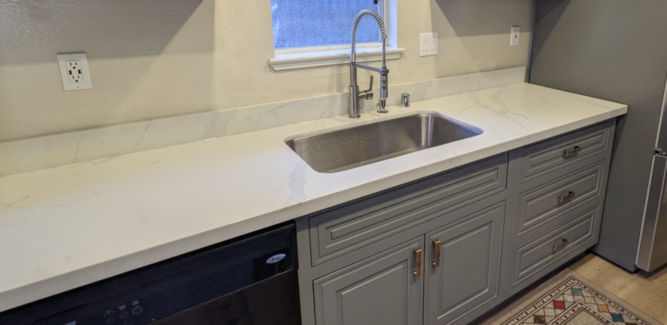
And here’s a close-up of the sink area.
