Let’s say you want to build a simple, static website with the following requirements.
- You want to keep track of changes to each file using version control.
- You don’t want to spend a lot of money.
- You want a simple setup, intuitive interface, and automatic publishing of changes.
- You want SSL encryption with a certificate that automatically renews.
- You want your own custom domain.
- You don’t want to manage servers and you want to focus on your content.
You can accomplish this in many ways. But, I think the easiest way is to use GitHub and Netlify.
GitHub
GitHub, Inc. is a provider of Internet hosting for software development and version control using Git. It offers the distributed version control and source code management functionality of Git, plus its own features.
Netlify
Netlify is a San Francisco-based cloud computing company that offers hosting and serverless backend services for web applications and static websites.
This post will show you how easy it is to set up a simple website using GitHub and Netlify.
UPDATE: An alternative to Netlify is Render. Unlike Netlify, which is limited to static sites, Render supports web apps (Node.js, PHP, etc) like Heroku. Render is like Netlify + Heroku.
1. Create a free GitHub and Netlify account
This step is self-explanatory. If you create a GitHub account first, you can then log in to Netlify using your GitHub account, which saves time.
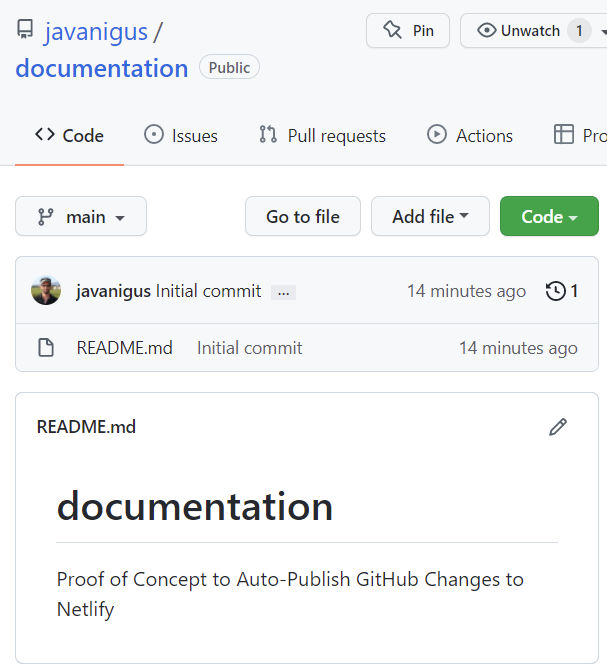
2. Create a repository in GitHub
I created a private repository (repo) called “documentation” to create a hypothetical website containing product documentation. When I created the repo, I opted to automatically create a README.md file to explain what the repo is about. At this point, there’s only one file in the repo.
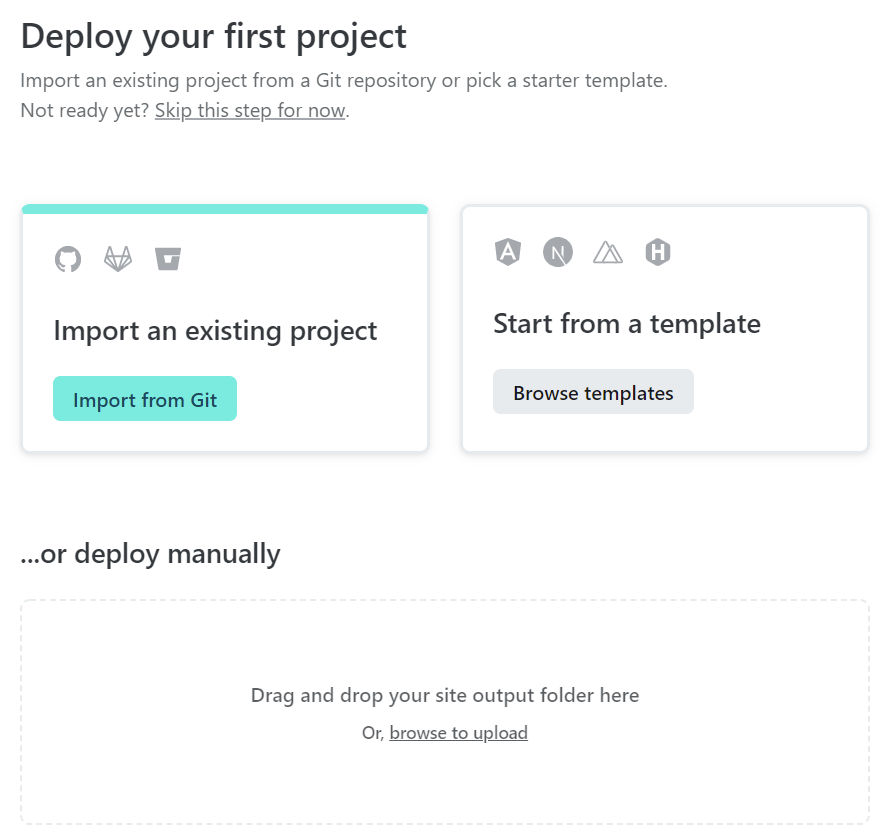
3. Create a new project in Netlify
When you create a new project, you have a few options. In this case, we’ll choose “Import from Git”,
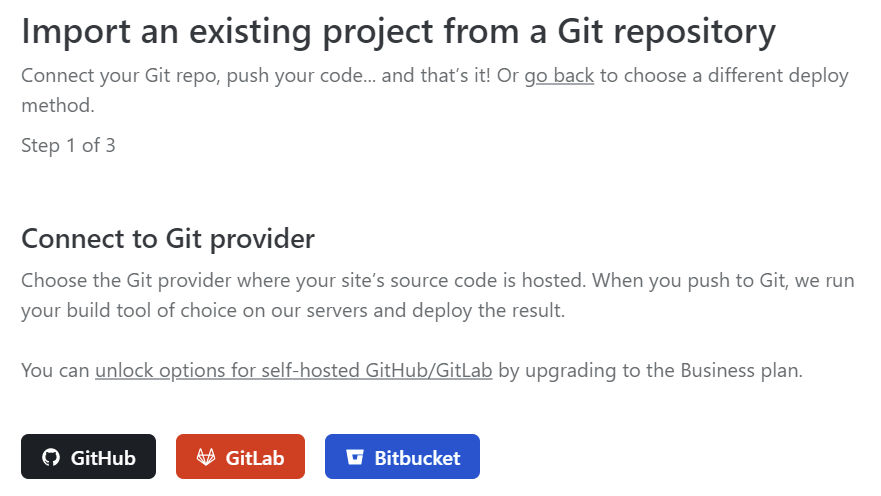
4. Choose Git provider
Since we’re using GitHub, choose GitHub.
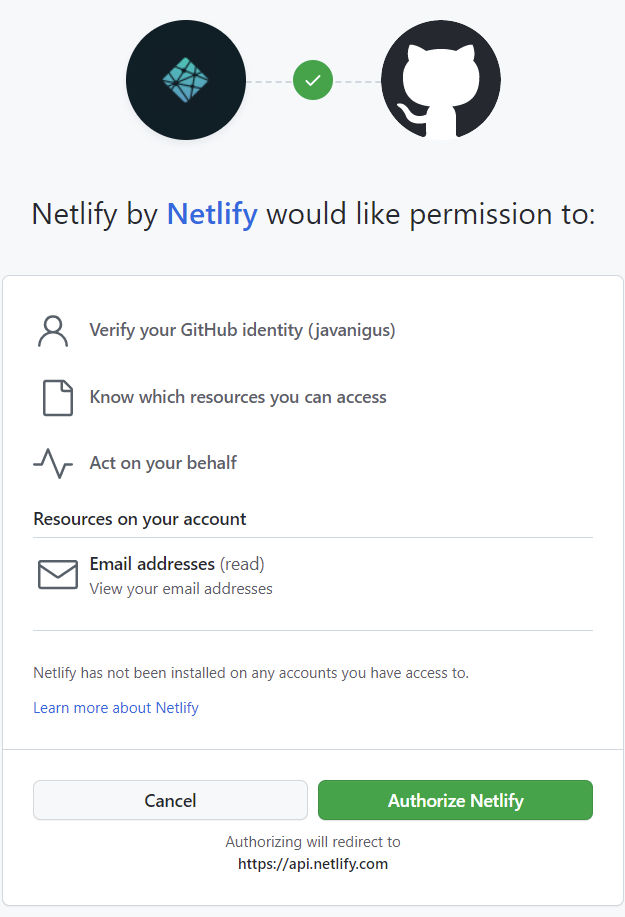
5. Connect Netlify to GitHub
In order to auto-publish from GitHub to Netlify, you need to connect the two.
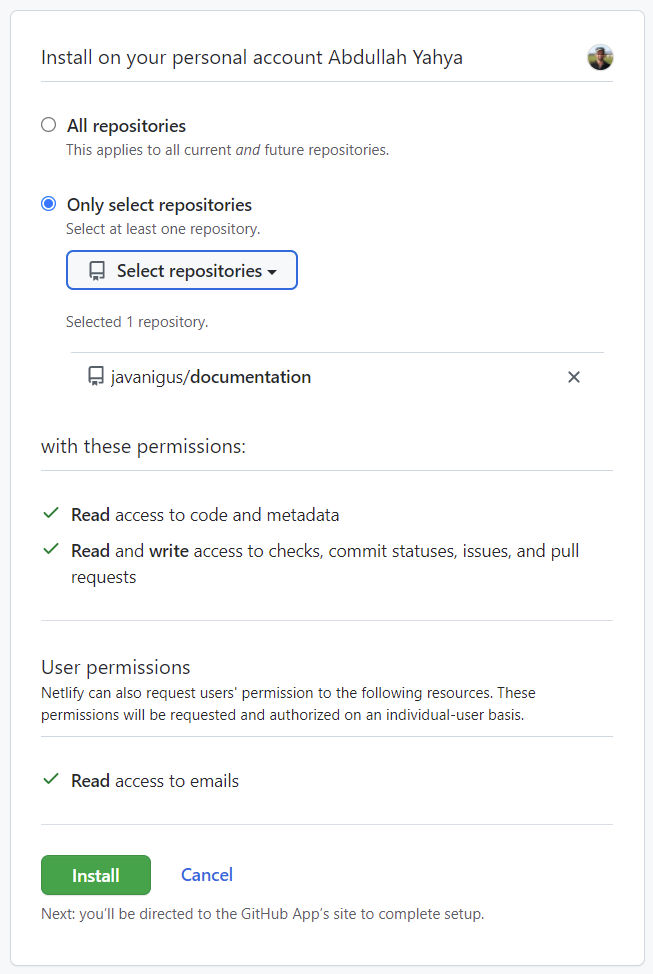
6. Choose repositories
You may choose to connect Netlify to all of your GitHub repositories or just some. In this example, I just want Netlify connected to the one “documentation” repo I just created.
7. Choose a branch to deploy
In this example, I only have one default branch called “main” in the “documentation” repo. Since I just need to transfer static files in GitHub to Netlify, there is nothing to build.
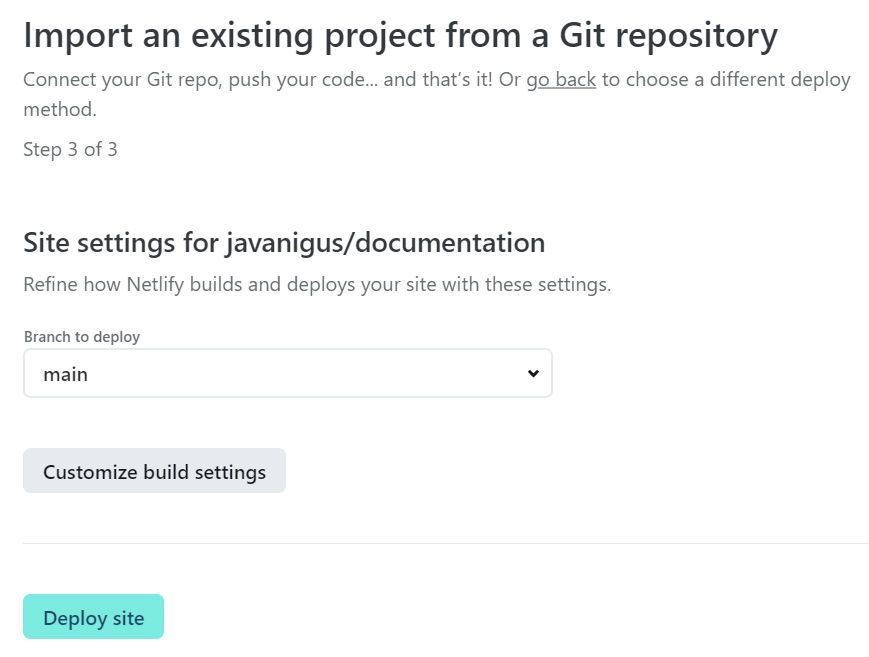
8. Deploy site
Once you click the “Deploy Site” button, Netlify will take all existing files in your GitHub repo and host them. You can see the status of the deployment in the “Site overview” tab along with the default URL. Notice that in steps 2 and 3 of the screenshot below, you can set up a custom domain and secure your site automatically with a Let’s Encrypt certificate.
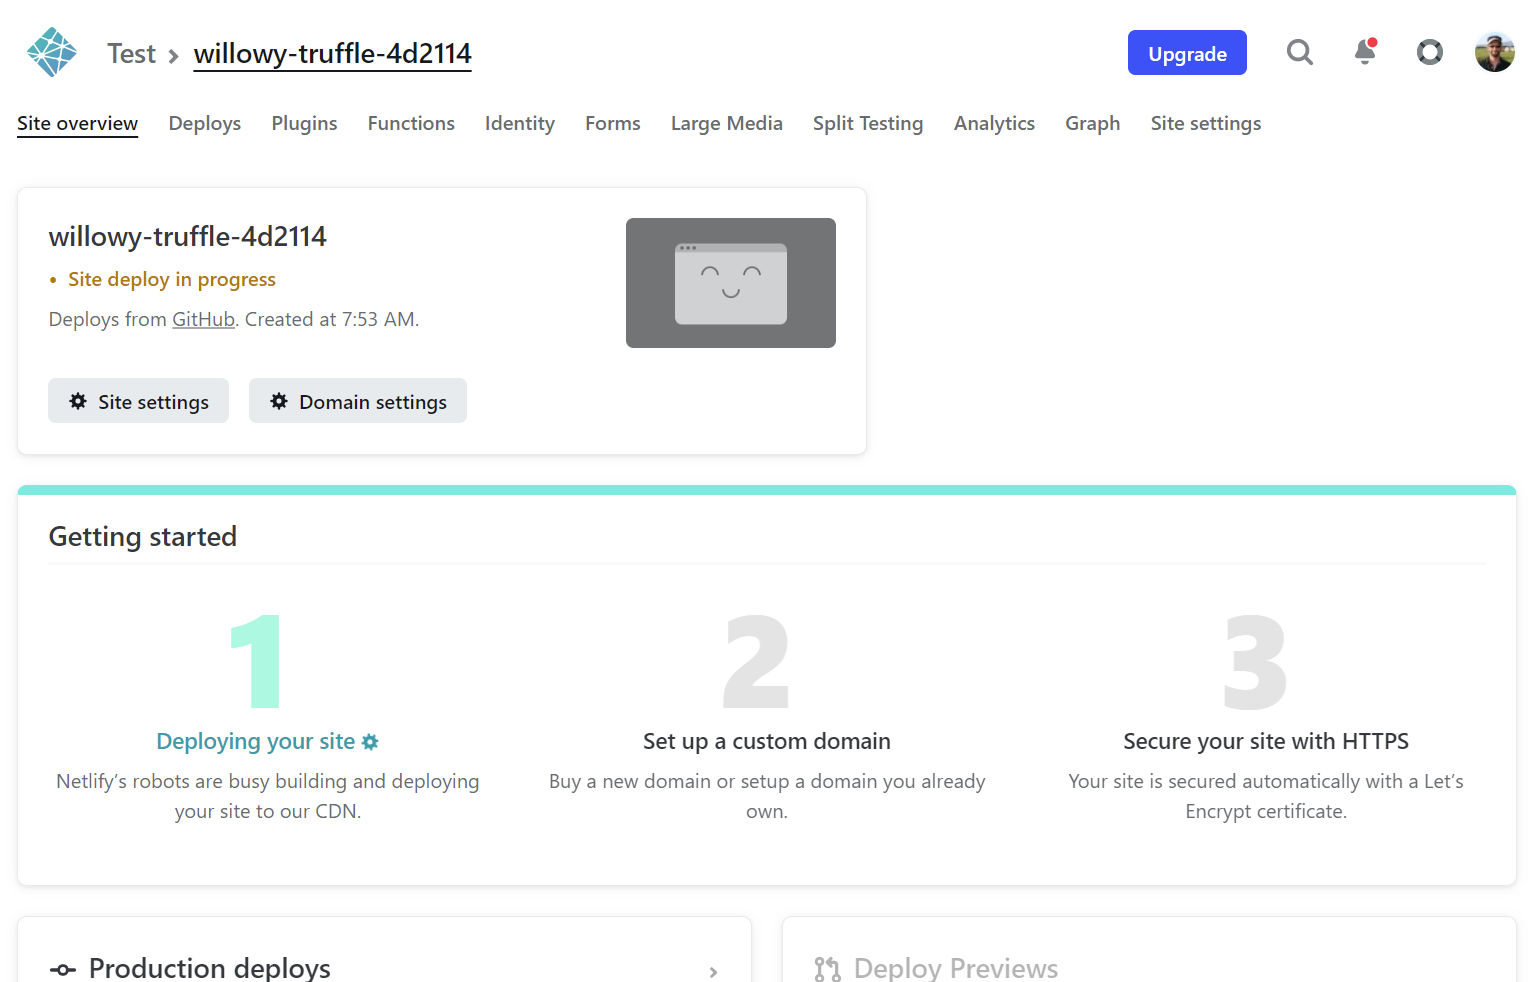
9. See the deployed site
If you go to the auto-generated URL, you’ll see a Page Not Found error. That’s because we only have a README.md file in the repo.

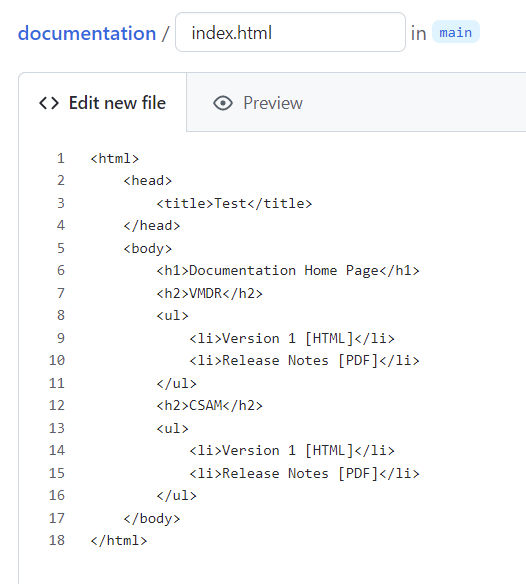
10. Create an index.html file
Let’s create a home page for our new website. In GitHub, create a new file with filename “index.html” and add some HTML to it.
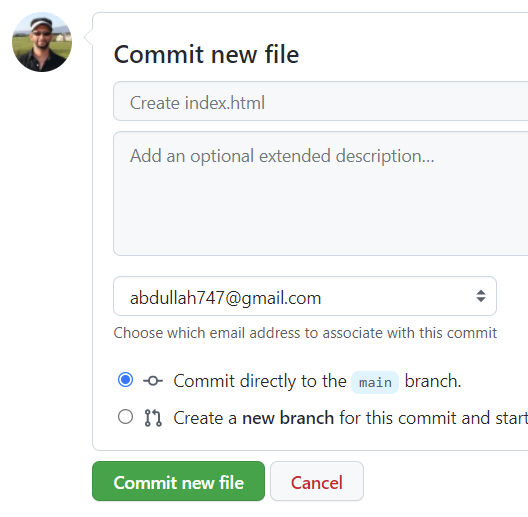
Commit the new file. For simplicity, I will leave the default values and click “Commit new file”.
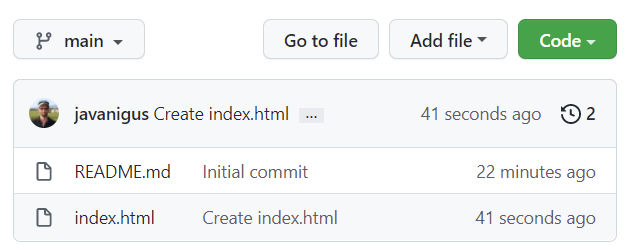
You will then see that you have two files in the repo.
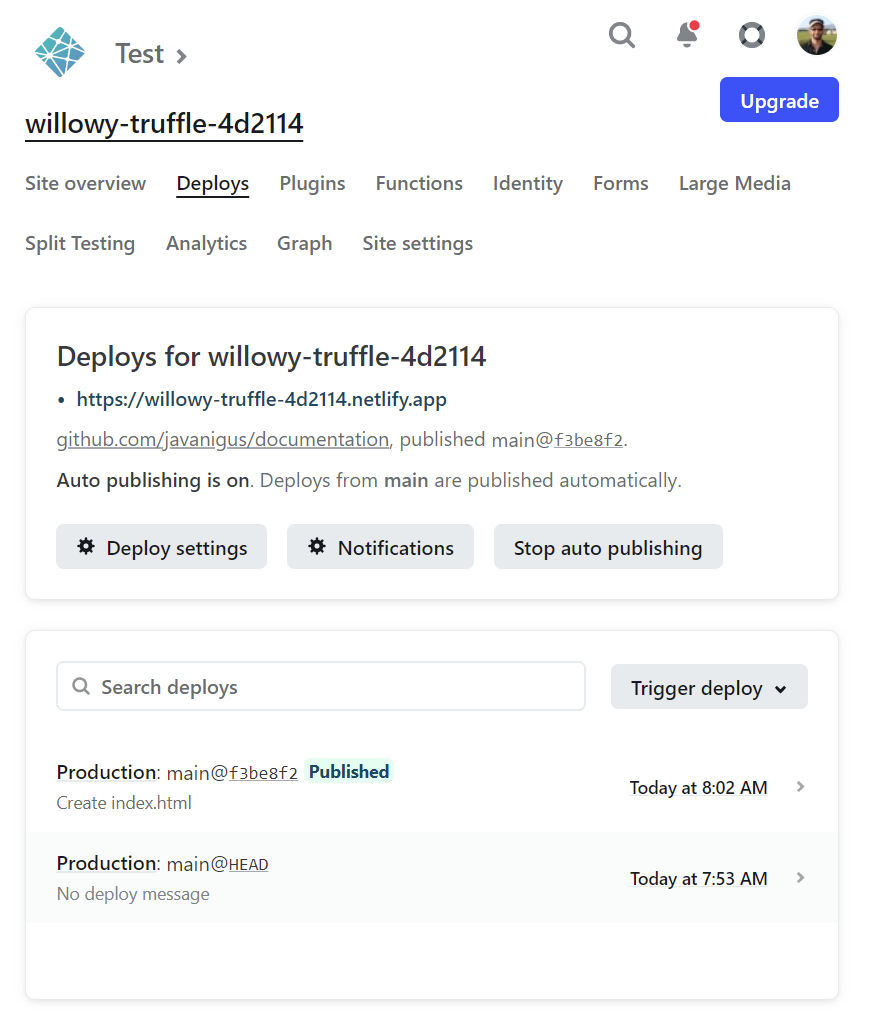
11. View deployment status
When you committed the file in GitHub, that automatically triggered a deployment to Netlify. In Netlify, click the “Deploys” tab to check the status of the deployment. In the screenshot below, we see that the status is “Published”.
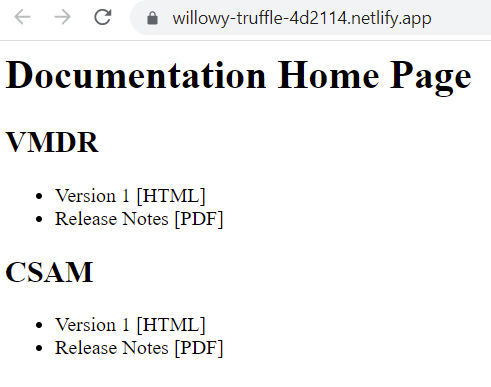
12. View the deployed change
Going to the auto-generated URL in Netlify, we see that our new home page has been published.
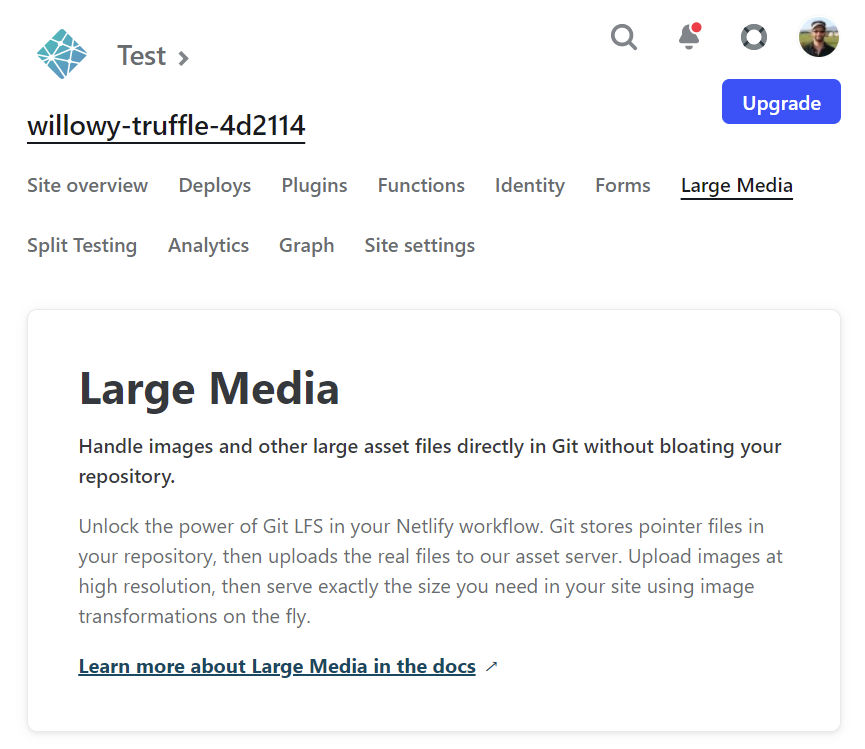
13. Handling Large Media (Images, PDFs, etc)
If you have large, non-text media such as images and PDFs, to avoid bloating your repo, you can use Git LFS. Clicking on the “Large Media” tab gives you more information about that. Personally, for images, I prefer to use ImageKit.io. Alternatives are Cloudinary and Uploadcare.
14. Analytics
You can install Google Analytics on your website and/or you can get analytics from Netlify for $9 per month. Clicking on the “Analytics” tab provides more information.

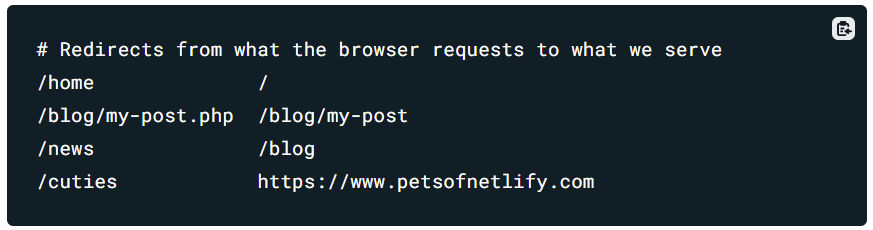
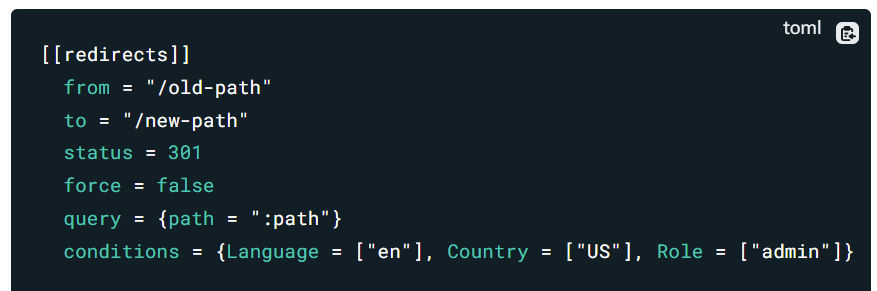
Redirects
If you need to create redirects, you can use a simple redirect file.
Or, you can create advanced redirects in the Netlify configuration file.
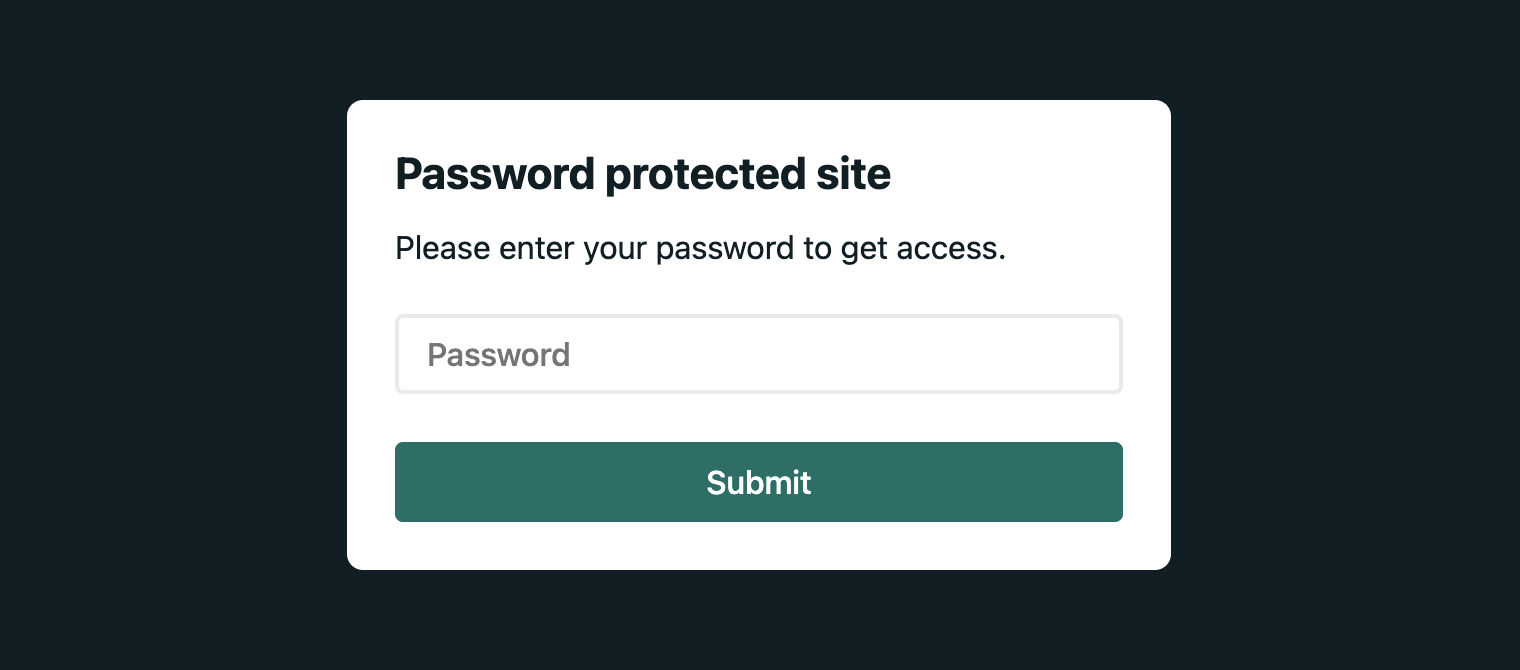
Access Control
If you want a staging environment where certain people can preview changes before you push them to production, one way to do this is by
- creating a “develop” branch in your GitHub repo
- connecting Netflify to that branch
- enabling site-wide password protection in Netlify (password protection is a paid feature) on the site sourced from that branch.
Though Netlify supports basic authentication, it is not the most secure method of protecting a site. Instead, you can use Netlify’s site-wide protection which uses JWT secret.