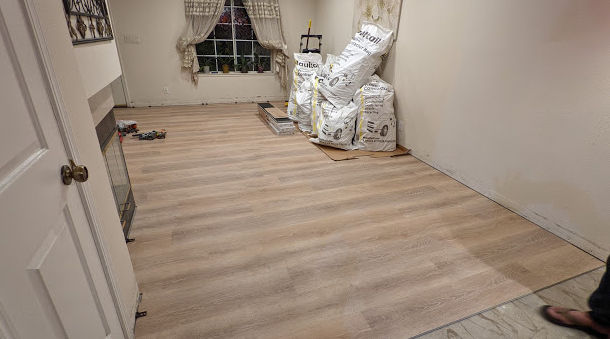
So, I was going to replace the old bamboo flooring in the living room and vinyl tiles on top of linoleum sheet flooring in the dining and kitchen areas of my rental with tile but since I hate dealing with mortar and cutting tile, I asked some contractors to do it. Apparently they all want thousands of dollars so I decided to instead install luxury vinyl planks which are easy enough to do myself (or with a helper). I decided to go with this particular brand and color:
Lifeproof Dusk Cherry 8.7 in. W x 47.6 in. L Luxury Vinyl Plank Flooring
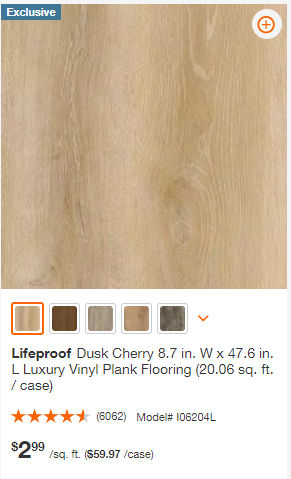

It’s exclusive to the Home Depot and it looks pretty nice. It costs $2.99 per square foot but it comes with the underlayment pre-attached which greatly simplifies installation.

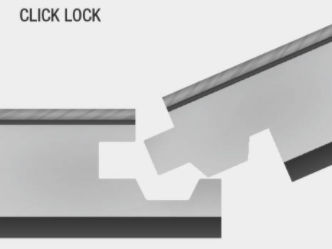
These planks are waterproof and float on the subfloor. No glue or mortar is necessary. The planks click and lock into each other.
Following are some tips I came up with after following the instructions and realizing the instructions could be better.
Subfloor preparation
Removing linoleum sheet / vinyl tile and adhesive
Don’t try to do this by hand. Spend a little bit of money ($85) and rent a power floor scraper. You’ll save a ton of time and energy.

Notice how the top part of the blade sits underneath the black curved deflector. This was problematic because vinyl tiles that were getting stuck where those two parts meet making it difficult to move forward.
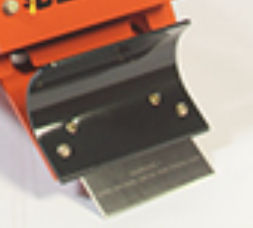
To fix this, I unscrewed the bolts and put the scraper blade above the deflector.
This tool is loud and heavy and can’t reach into tight spaces. For tight spaces, I bought a pneumatic floor scraper from Harbor Freight.
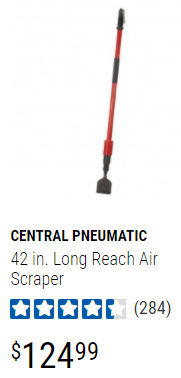
This tool requires a compressor that preferably has a large tank. I have a small 2.5 gallon compressor and this tool would work very well at high pressure for about 30 seconds before losing strength. I’d have to stop for another 20 seconds for the compressor tank to fill up before proceeding again with high pressure. To address this, you can buy or rent a large air compressor.
Removing tile flooring and mortar
If you have a lot of tile to remove, you can rent a demolition hammer with the following scraper / breaker attachments.

Installing click-lock vinyl plank flooring
Cutting planks
The instructions say to use a utility knife to score planks on both sides and snapping them into two pieces. Though that works without producing any vinyl dust, doing this a lot can get tiring very quickly and is error prone. Instead, just buy a flooring saw like the SKIL 4-3/8-in 7-Amp Sliding Corded Miter Saw.
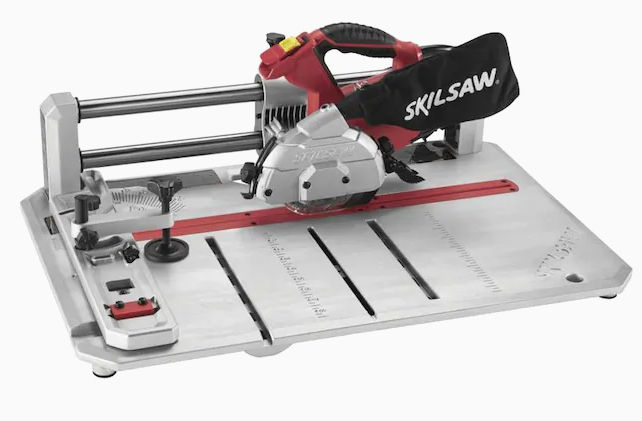
It’s lightweight and can do rip and cross cuts.
For clean cuts, place the plank face side down and underlayment side up.

If you need to cut irregular shapes or cuts that are difficult with a flooring saw, just use an angle grinder if the cuts don’t need to be perfect since they’ll be hidden underneath baseboard. I temporarily took off the blade guard so I could see where I was cutting.

Spacers
You’re supposed to leave a 1/4 inch gap between the wall and the planks. At first I used the spacers that came with a flooring kit from Harbor Freight.
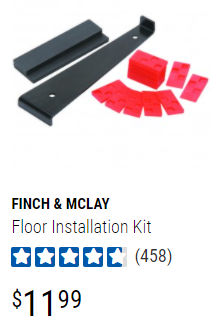
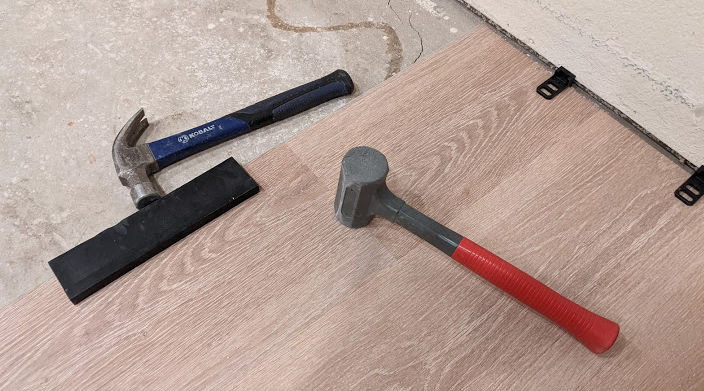
Though this kit is cheap, the spacers and the tapping block are no good. The red spacers keep falling out of place and the tapping block is made of rubber which helps protect the vinyl planks from damage but it makes it difficult to tap the planks together. Instead, by the following tapping block and spacers. Or, just buy the kit which comes with 2 other tools.
Pro Flooring Installation Kit for Vinyl, Laminate and Hardwood Flooring
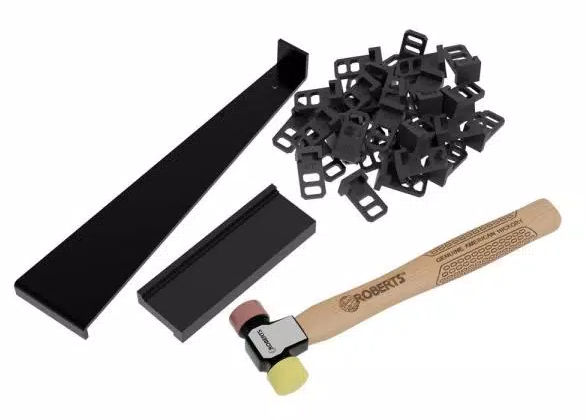
The hammer doubles has a hard side for hitting the tapping black and a soft (mallet) side for hitting vinyl plank seams. Since I did not have this kit, I used a separate hammer and mallet.

Installation Steps
- First Row
Starting at one end, place a spacer against the wall and lay planks down to lay the first row. Overlay the short end of the planks and tap them together using a mallet. - Second and Even Number Rows
Cut a plank in half or at least 8 inches from one end to stagger the placement of planks. Make sure that no plank pieces are less than 8 inches long, if possible. - Install plank by wall
Place a spacer by the wall, place a plank such that the long edge overlaps the long edge of the existing plank in the first row at a 45 degree angle.
Then, lay the plank down and tap down on the two long edges using a mallet.
- Install next planks
The subsequent planks will have two edges that need to be snapped into place – a long edge and a short edge. Again, position the plank at an angle to get the long edge into the groove of the neighboring plank’s long edge. Then, slide the plank towards the short edge of the neighboring plank’s short edge. Lay the plank down and hit the short edge using a mallet.

Then, using a hammer, hit the tapping block so there’s no gap between the long edges of the plank.

Keep doing this until you get to the last plank in that row.
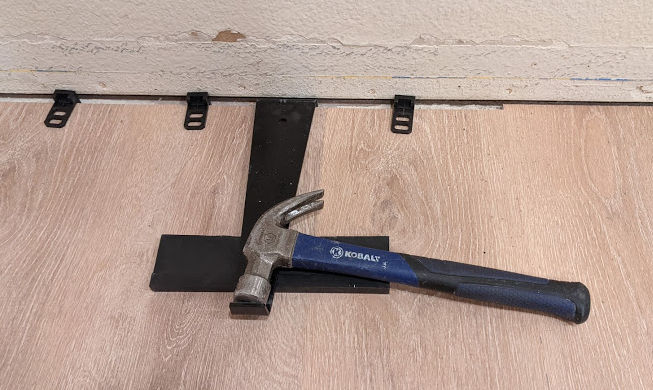
- Install last plank in row
For the last plank in the row, you’ll likely need to cut the plank. Then, install the plank. If you notice any short edges of the planks in that row have a gap, you can close the gap by using the following method. Notice I put the tapping block underneath the metal pull bar which worked better than if you don’t use the tapping block.
Repeat above steps for each row till you’re done.