


I recently worked on a project to replace my stair’s handrails. I bought the unfinished handrails at Home Depot and then stained them easily as follows.
Applying Wood Stain
- Using a brush, applied one coat of Minwax Pre-stain Conditioner
- Using a brush, applied one coat Minwax Stain (Gunstock color). While the stain was wet, I wiped it with a paper towel to prevent some areas to be thicker or darker than others. Though wiping with a towel lightens the stain, it is an important step. To achieve darker stains, just repeat the staining and wiping process.
Note: Applying anything wet, e.g. stain, to wood will cause the grain to rise resulting in bumps. If, after the first coat of stain, you notice bumpiness, then sand it down with 220 grit sandpaper until the bumps are gone and then restain the wood. This first coat following by the sanding process serves as a sort of “primer” to prepare the surface.
The tricky part was getting the protective finish coat on. I wanted a shiny, smooth, glossy handrail. After trying different products and processes, here’s my advice.
Lacquer vs Polyurethane
Lacquer is sticky and seemingly more toxic. My eyes felt weird even though none of it gone in them. A bit of lacquer got on my hands and cleaning my hands were a hassle and temporarily messed up my skin. The fumes were so strong I could smell some of it in other rooms of my house. Cleaning the brush used to apply the lacquer was impossible so it had to be thrown away.
Polyurethane is also toxic but the water based kind is easy to clean by simply rinsing with water and it doesn’t smell as much. I was able to easily rinse my brush so I could reuse it for additional coats.
Conclusion: Don’t even bother with lacquer. Just stick with polyurethane.
Regular Polyurethane vs Triple-Thick Polyurethane
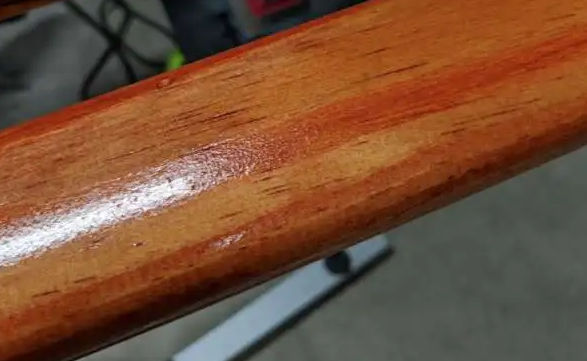
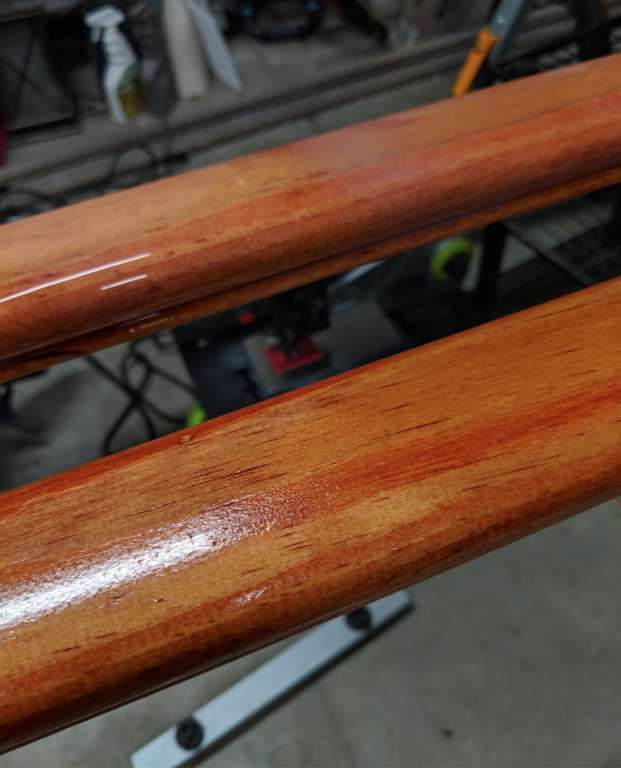
Since it is often recommended to apply 3 coats of regular polyurethane, manufacturers, e.g. Minwax and Varathane, have come up with triple-thick polyurethane so you can just apply 1 coat. However, it’s super thick and will easily run and produce dry drips on uneven surfaces, e.g. stair handrails. When applying triple-thick polyurethane, it will appear milky white. That’s okay as it will dry clear. In the picture below, the handrail on top shows a milky white coat as the polyurethane hadn’t dried yet. In the handrail on the bottom, you see a shiny but thin and bumpy surface after having applied a coat of smelly lacquer.
Conclusion: Use triple-thick brush-on polyurethane for flat surfaces and use regular spray-on polyurethane (outdoors, not indoors) for uneven surfaces, e.g. stair handrails.
How many coats?
From my experience, one coat of triple-thick polyurethane produced a shiny result but 2 coats of triple-thick polyurethane produced a much smoother, even slippery, result as if there was oil on the surface. I’d do at least 2 coats of the triple-thick polyurethane.
Sanding
When you apply polyurethane, it is almost inevitable that after it dries, you will feel bumps on it. This is due to dust and tiny particles. Therefore, in between each coat, if you run your hands over the surface and feel bumps, lightly sand the surface with a 220 grit foam block. Don’t apply pressure on the block so you don’t sand through the polyurethane coat and remove some of the underlying stain. After sanding, the workpiece should still mostly appear shiny. Before applying another coat of polyurethane, wipe off the dust with a wet paper towel followed by tack cloth which is tacky (sticky) to pick up small particles. When you’re happy with the thickness and appearance of the polyurethane coats, remove any remaining bumps with 1000 or 2000 grit sandpaper by lightly rubbing it over the workpiece. For the last sanding job with 2000 grit sandpaper, you can spray a thin layer of water before sanding.
Video on sanding and buffing a polyurethane surface
Buffing
Lastly, using a random orbital sander for flat surfaces or a drill for uneven surfaces, polish the surface with a buffing pad / drill attachment.
Video on sanding and buffing a polyurethane surface
Steps from Start to Finish
Here are complete steps for a flat surface.
- Using a brush, apply pre-stain wood conditioner
- Using a brush, apply wood stain
- While the stain is still well, wipe the stain using a paper towel
- If you notice bumps, sand the bumps off with 220 grit sandpaper
- Repeat steps 2 and 4 until desired color is achieved
- Using a tack cloth, remove bumps and dust
- Using a brush, apply one coat of triple-thick polyurethane
- Using 220 grit sandpaper foam block, lightly remove bumps
- Using a wet paper towel, remove dust
- Using a tack cloth, remove bumps and dust
- Repeat steps 6 – 9
- Using 1000 or 2000 grit sandpaper, lightly remove bumps
- Using a random orbital sander and a buffing pad, polish the surface